
I stood there in my pajamas, coffee in hand, staring at a ‘clean’ dinner plate that looked like it had been through a sandstorm. It wasn’t just the grit; it was that faint, funky odor—a mix of old broccoli and damp basement—wafting from the machine every time I cracked the door. I’d spent good money on a high-end model, yet here I was, basically hand-washing everything after it came out. My first instinct was to blame the detergent, but then I remembered that little mesh cylinder at the bottom I hadn’t touched in three years. I pulled it out and, honestly? It was a biological hazard. I had made the classic mistake of thinking these machines are self-cleaning miracles. They aren’t.
The Night I Realized My Dishwasher Was Just Recycling Grime
For the longest time, I assumed that the ‘self-cleaning’ feature on my appliance meant I was off the hook. I was wrong. I’d even noticed why my dishwasher wasn’t cleaning the top rack properly, but I just figured I was loading it wrong. It turns out, that filter is the literal heart of the machine. If it’s clogged with a film of old fats and calcified food bits, your dishwasher is basically just spraying ‘garbage soup’ over your heirlooms. I learned the hard way that ignoring this doesn’t just make your dishes look bad; it can actually lead to standing water in the bottom of the tub, which is a whole other headache I don’t want you to deal with.
Does this actually require a degree in engineering?
You might be looking at that plastic assembly at the bottom and thinking you need a toolkit and a prayer to get it out. I felt the same way. I was terrified I’d snap a plastic clip and be stuck with a $400 repair bill. But here’s the truth: most modern filters are designed to be removed with a simple quarter-turn. According to a report by Consumer Reports, nearly 80% of dishwashers sold in the last decade feature these manual-clean filters because they are quieter and more efficient than the old ‘grinder’ styles. The trade-off is that you are the grinder now. Have you ever pulled yours out only to find something absolutely unrecognizable living there? Tell me I’m not the only one who has neglected this chore for way too long.
Why a Quick Rinse is Better Than a Deep Scrub
Early on, I made a massive error. I took a stiff wire brush to my mesh filter, thinking I needed to exfoliate the plastic. Big mistake. I ended up poking tiny holes in the screen, which let even bigger chunks of food through to the pump. Now, I know better. You don’t need harsh chemicals or abrasive tools. In fact, if you’ve already noticed that weird smell in your dishwasher, the fix is much gentler than you’d think. We’re going to talk about the ‘soak and swish’ method that takes about five minutes of actual work but makes your machine run like it’s brand new. Before we dive into the steps, make sure you aren’t dealing with mold on the door gasket too, because a clean filter won’t save a rotten seal. Let’s get that water flowing clear again. [image_placeholder]
Access the Gunk Without Calling a Repairman
You don’t need a toolbox to get to the source of the smell. First, slide out the bottom rack of your machine and set it aside. You are looking for a circular assembly at the base, usually nestled right under the spray arm. Think of this filter as the ‘lint trap’ of your kitchen; it catches everything from rogue peppercorns to bits of plastic labels. Most modern units require a simple counter-clockwise twist to unlock. I remember the first time I did this; I was so convinced I’d break the plastic housing that I barely touched it. Then I realized it’s built to be handled. If you find yours is stuck, it’s likely just calcified food acting like glue. A gentle but firm tug usually does the trick. While you are down there, take a quick peek to see if your dishwasher still has standing water in the filter area, which might indicate a deeper blockage in the drain hose. 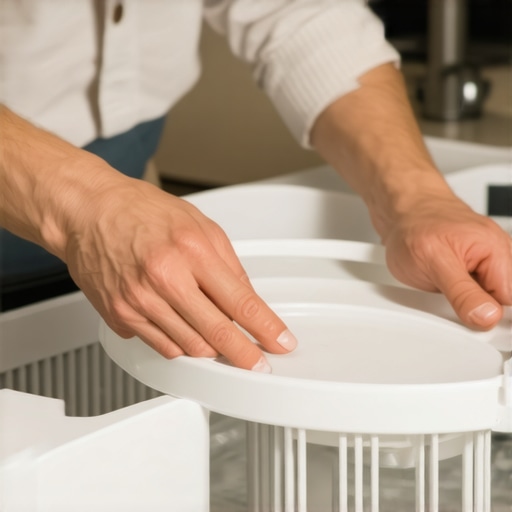
Ditch the Scrubber for a Simple Sink Soak
Once the filter is out, your instinct might be to grab the roughest sponge you own. Don’t. Those fine mesh screens are more delicate than they look. I once spent twenty minutes scrubbing a filter with a heavy-duty scouring pad, only to realize I was fraying the mesh, which eventually leads to the top rack not cleaning properly because debris bypasses the screen. Instead, fill your sink with warm water and a generous squeeze of degreasing dish soap. Let the filter sit for at least ten minutes. This softens the ‘biofilm’—that slippery, gross layer of bacteria and old grease—so it slides right off. If you have particularly stubborn calcium deposits from hard water, a quick splash of white vinegar in the soak works wonders. This is easily the best way to clean a smelly dishwasher without using bleach or harsh chemicals that can degrade the plastic over time.
Clear the Path for the Pump
While your filter is soaking, stick your hand (carefully!) into the hole where the filter usually sits. You’d be surprised what finds its way down there. I once pulled out a whole cherry pit and a shard of a broken wine glass that had been rattling around for weeks. This area leads directly to the drain pump, and even a small blockage here will result in standing water in the bottom of the tub at the end of the cycle. Use a soft toothbrush to gently clear any debris from the internal housing. This ensures that when you put your clean filter back in, the water can actually move through it at the speed it was designed for. In the world of choosing the best dishwasher, maintenance is the only thing that separates a high-end machine from a glorified drying rack.
Reassemble and Test the Flow
Rinse the filter under a steady stream of water until the mesh is clear and you can see through it. Slide it back into the base and give it that satisfying clockwise click to lock it. If it’s loose, the water will just flow around it, defeating the purpose of your hard work. After everything is back in place, it is the perfect time to optimize how you use the machine. Learning the best way to stack your dishwasher for a maximum clean will prevent large items from blocking the spray arms, which often causes food particles to settle back into the filter faster than they should. A quick test run on a short cycle will confirm that the water is draining perfectly and that the ‘garbage soup’ smell has officially left the building.
Your Eco-Setting Might Be Harboring Bacteria
Most people believe that using the ‘Eco’ or ‘Energy Saving’ mode on every single cycle is the gold standard for responsible homeownership. I used to think the same, until a technician pointed out a layer of grey sludge in my machine’s outer drum. Here is the contrarian truth: if you exclusively use low-temperature cycles to save energy, you aren’t actually cleaning your machine; you are incubating a bio-film. These efficient settings often don’t reach the temperatures necessary to fully dissolve fats and detergents. To keep things running smoothly, you need to break the cycle. I’ve found that running a high-heat ‘sanitize’ or ‘heavy’ load at least once every two weeks is essential. It acts as a purge for the internal pipes. When looking at the future of home appliances and trends to watch in 2025, it is clear that while machines are getting smarter, they still rely on basic thermodynamics to stay clean.
The Detergent Trap That Costs You a New Pump
The biggest ‘oops’ factor in modern appliance care is the ‘more is better’ mentality with soap. We’ve been conditioned by decades of old-school top-loaders to want a mountain of suds. However, in high-efficiency (HE) units, excess detergent is a death sentence for the sensors. If you see bubbles at the end of a cycle, you’ve used too much. This excess creates a sticky residue that traps lint and hair, eventually clogging the drain pump. I learned this the hard way when I realized why your washer doesn’t need a whole cup of detergent to get clothes clean. In fact, using too much soap is the primary reason for that ‘old gym sock’ smell that plagues front-loaders. If you are still using the same scoop size as your parents did, you are likely overworking your machine’s motor. 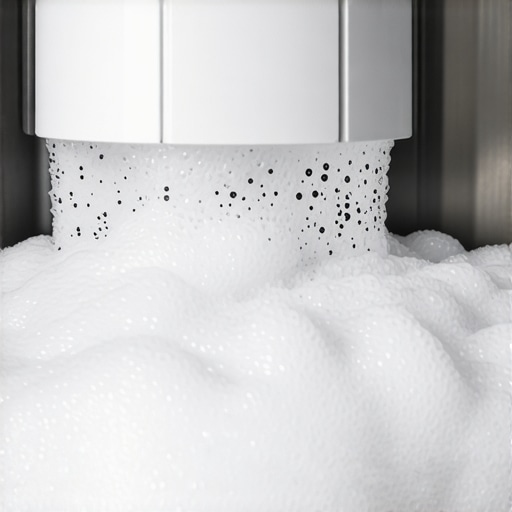
Why does a 2025-ready machine take three hours to wash a load?
It feels counter-intuitive that innovative dishwashers with AI technology or high-end washing machines take significantly longer than the clunky models from the 90s. You might think it’s a design flaw, but it’s actually a sophisticated engineering trade-off. According to reports from the American Council for an Energy-Efficient Economy (ACEEE), modern machines substitute time for water and heat. By letting the clothes or dishes ‘dwell’ in a smaller amount of water for a longer period, the enzymes in the detergent have more time to break down organic matter without requiring a massive, energy-draining heater. Understanding why your energy efficient washer takes so long to finish helps you plan your day better and stops you from constantly checking the timer in frustration.
Stop Ignoring the Small Filters
While we’ve mastered the dishwasher filter, many forget that refrigerators and washing machines have their own ‘hidden’ gatekeepers. For instance, the sediment filters in your water inlet valves can get grit from the city main, leading to a slow fill that you might mistake for a failing pump. Even the truth about high efficiency detergent in old washers won’t save you if the physical path for the water is blocked. Have you ever fallen into this trap of over-cleaning the exterior while the internal mechanics were gasping for air? Maintenance isn’t just about the parts you can see; it’s about the parts you have to go looking for. Let me know in the comments if you’ve ever discovered a ‘secret’ filter you didn’t know existed!
I used to think that buying a premium brand meant I was buying a decade of peace of mind. I quickly learned that even the most expensive machine is only as good as the person wielding the screwdriver. If you want to avoid the heartbreak of a mid-cycle breakdown, you need a basic ‘survival kit’ for your utility room. I’m not talking about a heavy-duty contractor’s belt, but I do swear by two specific items: a long-handled, flexible condenser coil brush and a basic digital multimeter. These two tools alone have saved me thousands in service calls. For instance, knowing how to test a heating element yourself can be the difference between a $20 DIY fix and a $400 replacement bill. It is the only way to ensure the secret to making your refrigerator last twice as long actually works for your specific model.
Your Fridge is Gasping for Air Behind That Grille
The number one killer of modern compressors isn’t a faulty chip; it’s simple household dust. Modern refrigerators, especially high-efficiency ones, have much tighter tolerances and smaller cooling fins. When pet hair and floor grit clog those coils, the compressor has to run twice as hard to shed heat. According to technical bulletins from the Association of Home Appliance Manufacturers (AHAM), dirty coils can increase energy consumption by up to 30% and significantly shorten the lifespan of the motor. I make it a habit every six months to pull the unit out and give it a thorough vacuuming. If you have a Golden Retriever like I do, learning how to keep your refrigerator coils clean in a pet-friendly home is a survival skill. 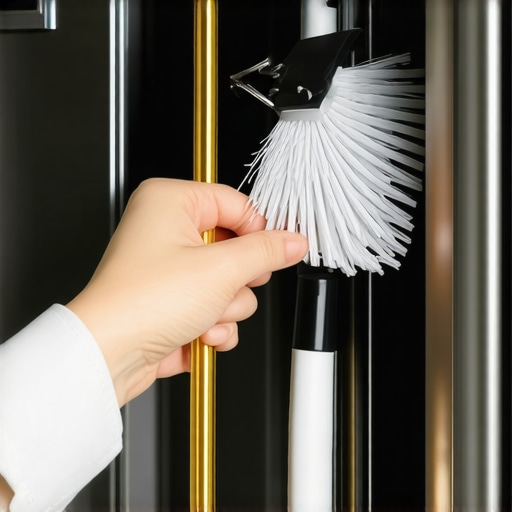
Washing Machines Need a Physical Reset Too
We’ve talked a lot about dishwasher filters, but your washing machine is hiding a similar secret. Most front-loaders have a small access hatch at the bottom front. Inside is a debris filter designed to catch coins, hair ties, and that weird grey sludge that builds up from liquid softeners. If you ignore this, the pump has to fight against a wall of grime, eventually leading to a burnt-out motor. I’ve found that even if you use the best cycles, you still need to manually how to clean the lint filter you didn’t know your washer had to keep the drainage system efficient. If your machine is starting to vibrate more than usual, it’s often because the water isn’t draining fast enough, leaving the drum unbalanced during the spin cycle.
How do I maintain these high-tech machines over time?
The key to longevity in the age of AI is a mix of physical cleaning and digital upkeep. Sensors can get ‘lazy’ or covered in mineral scale, which throws off the whole system. For example, if your smart fridge is freezing the milk, it might just need a sensor recalibration rather than a new thermostat. I always recommend people learn how to calibrate your smart fridge temperature sensors before calling a technician. Looking toward the future of home appliances and trends to watch in 2025, we are going to see even more self-diagnostic tools built into our apps, but they will still rely on us to do the dirty work of clearing the physical blockages. My challenge for you this weekend: find your refrigerator’s condenser coils and give them a five-minute vacuum. You’ll likely find enough dust to build a second cat, and your utility bill will thank you immediately.
The Expensive Myths I Had to Unlearn
After years of trial and error, I’ve realized that the ‘smart’ in smart appliances refers to the technology, not a replacement for human oversight. My biggest mistake was thinking a high price tag bought me a decade of silence and zero chores. In reality, the more sophisticated the machine, the more it relies on clear sensors and clean pathways. If I could go back, I’d tell myself that five minutes of maintenance every month saves five hundred dollars in parts every three years. It’s about being proactive rather than reactive. Prevention is always cheaper than a Saturday morning emergency repair.
- Don’t wait for the ‘error’ light: If your machine is louder than usual, something is already struggling.
- Embrace the heat: Running a sanitize cycle once a month isn’t a waste of energy; it’s a necessary purge of bacteria.
- Manuals are maps: Most troubleshooting answers are in the first five pages, yet we treat them like packing material.
My Go-To Toolkit for Taming High-Tech Appliances
You don’t need a degree in electrical engineering to keep your kitchen humming. I’ve narrowed my ‘survival kit’ down to a few essentials that make home appliances feel less like mysterious black boxes and more like manageable tools. First, I always keep an ultimate guide to smart home appliances for a modern living bookmarked on my phone. When a screen goes dark or a pump groans, having a reliable reference is your best defense against panic-buying a new unit.
Beyond that, a simple flexible coil brush and a basic digital multimeter are non-negotiable. I also highly recommend staying updated on the future of home appliances and trends to watch in 2025, as newer models often have hidden reset procedures that can save you a $150 service call. For specific issues, I regularly revisit tutorials on how to deep clean the gasket on your dishwasher because the small details are where the real longevity lies. These resources have turned me from a frustrated consumer into a confident homeowner.
Empower Your Modern Home One Filter at a Time
Maintaining your home appliances, refrigerators, and washing machines isn’t just about saving money; it’s about the peace of mind that comes with a home that actually works for you. When you take the time to clear a filter or vacuum a coil, you’re ensuring the secret to making your refrigerator last twice as long becomes your reality rather than just a headline. Don’t let the technology intimidate you. These machines are designed to help us, and a little bit of care goes a long way in making sure they do exactly that for years to come. Your home is an investment—protect it with a little bit of elbow grease and the right information. You’ve got this!
Have you ever found something truly bizarre or embarrassing in your dishwasher filter? Let me know in the comments below!