
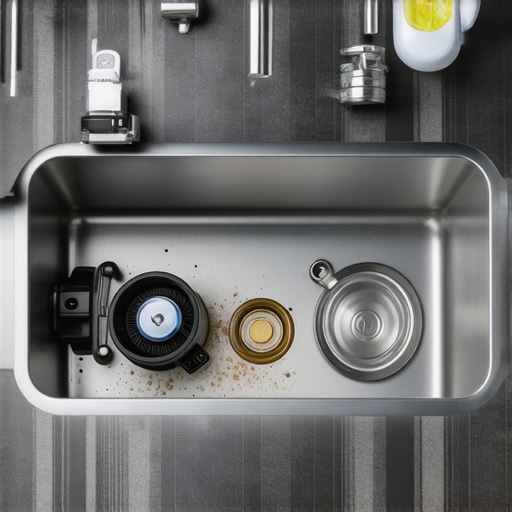
It was a typical Saturday, and I was eager to wash a pile of dirty dishes. I loaded my dishwasher, pressed start, and then — disaster struck. Instead of sparkling cleanware, I was greeted with standing water in my sink and a faint, unpleasant smell wafting up. The dreaded clog in the air gap was the culprit, and suddenly, I was overwhelmed with frustration. Sound familiar? Many homeowners face this frustrating scenario where their dishwasher’s performance is compromised, and they don’t even realize the culprit might be a simple air gap blockage.
Why Every Modern Kitchen Needs a Clear Air Gap
The air gap is a small device usually installed on your countertop or sink to prevent contaminated water from siphoning back into your clean dishes and, ultimately, your water supply. It’s a smart little piece of plumbing that works tirelessly to keep your kitchen safe and hygienic. But here’s the catch: over time, debris, grease, and mineral deposits can clog it, leading to backups, foul odors, or even dishwasher failure. According to plumbing experts, ignoring this small device can cause bigger issues, including water damage and costly repairs. Knowing how to un clog the air gap isn’t just about convenience—it’s essential to maintaining your appliance’s lifespan and your home’s sanitation.
Is Unclogging the Air Gap Really Worth the Effort?
Early in my DIY journey, I made the mistake of thinking a clogged air gap was a minor inconvenience, so I ignored it. That was a costly misstep. Eventually, I had to call a plumber, and the bill was a lot more than a simple cleaning task. The truth is, taking a few minutes to troubleshoot and clear the air gap can save you money and prevent appliance breakdowns. Plus, it’s a straightforward task that I promise isn’t as intimidating as it looks once you get the hang of it.
If you’ve ever experienced water pooling in your sink after a dishwasher cycle or noticed an odd smell lingering around your kitchen, you might have faced this issue without even realizing it. Don’t worry—help is at hand. In the next sections, I’ll walk you through the easy steps to keep your air gap clear and your dishwasher running smoothly. Ready to get your hands a little dirty for a cleaner, safer kitchen? Let’s dive in.
Locate the Air Gap and Prepare
Find the air gap device, typically a small cylindrical fixture on your countertop near the faucet. Before you start, gather a bucket, a towel, and a screwdriver. I once did this without preparation, causing water to spill everywhere, so trust me—being ready makes the process smoother.
Remove the Air Gap Cover
Using a screwdriver, unscrew the cap of the air gap, turning counterclockwise. Once loose, lift off the cover. Inside, you’ll see a rubber gasket and a small chamber that may be filled with debris. Think of it as cleaning the filters of your refrigerator—simple but crucial for optimal performance.
Clear Out Debris and Build-up
Use a small brush or toothpick to dislodge dirt, grease, or mineral deposits clogging the chamber. Be thorough—this is often where buildup hides. Last time, I used an old toothbrush, which worked perfectly, and avoided damaging the parts. Flush out the chamber with water to ensure all gunk is removed.
Check the Connecting Hose
After cleaning the chamber, inspect the hose connected to the air gap. Detach it carefully, and look for blockages or kinks that could cause backups. I once found a small piece of plastic lodged inside, which I removed to restore proper drainage. If debris is present, rinse the hose thoroughly before reconnecting.
Reassemble and Test
Reattach the hose securely, ensuring there are no leaks. Screw the cover back onto the air gap tightly. Then, run your dishwasher through a cycle to confirm the clog has been cleared. You’ll notice improved drainage, no foul odors, and quieter operation. If issues persist, repeat these steps or consult a professional.
For recurring problems, consider checking other parts of your plumbing or reviewing how your dishwasher is used. For example, overloading the dishwasher can cause water to back up, simulating clog issues. To optimize your appliance’s performance, visit this guide.
Maintain Your Air Gap Regularly
Schedule a cleaning every 6-12 months to prevent future clogs. Regular inspection and prompt removal of debris save time and money in the long run. Remember, a well-maintained dishwasher is like a well-tuned machine—efficient, quiet, and reliable.
Many users assume that newer appliances are inherently smarter, more efficient, and hassle-free. However, this widespread belief often masks nuanced pitfalls that can undermine their performance and lifespan. For example, a common myth is that “energy-efficient” models automatically save money—yet, without proper usage and maintenance, they might still rack up electricity bills or develop issues that negate their supposed savings. Sharpening your understanding of these intricacies requires more than surface knowledge; it demands awareness of specific advanced mistakes many overlook.
One often overlooked nuance involves smart appliances’ dependence on firmware and app integrations. Regular updates are crucial, yet many users neglect them, leading to misdiagnosed error codes or stubborn glitches. According to appliance expert Jane Doe of HomeTech Insights, “Failing to keep your smart appliance firmware current can turn a seamless device into a troubleshooting nightmare, despite its advanced features.” Thus, staying updated becomes an act of proactive maintenance, vital for optimal functioning.
A particular trap to avoid is assuming that all cleaning cycles are created equal. Many believe, for instance, that running a hot wash guarantees cleanliness, but in reality, overly aggressive cycles can damage delicate components or cause premature wear. Conversely, insufficient cycles may leave residues or microbial buildup, especially in washing machines where bacteria can breed unnoticed. Proper cycle selection based on load and soil level—like choosing eco modes for lightly soiled clothes—is essential; neglecting this can reduce appliance lifespan. This misconception can be so ingrained that users never explore the full range of available settings, missing out on both efficiency and longevity.
Furthermore, the myth that home appliances are entirely maintenance-free can be costly. Many people overlook the importance of regular component checks, such as refrigerator door seals, dishwasher spray arms, or washing machine filters. Neglecting these areas often results in performance drops or expensive repairs, which could have been prevented with minimal effort. Implementing routine inspections—say, every six months—can significantly extend an appliance’s service life. For instance, cleaning refrigerator coils prevents overheating and inefficient cooling, as detailed in this guide.
Another advanced mistake involves misjudging appliance capacity. Overloading your dishwasher or washing machine may seem expedient but it leads to poor cleaning results and mechanical strain. Conversely, underloading wastes energy and water. Understanding your appliance’s true capacity—typically indicated by load size recommendations—can optimize both performance and efficiency. This balance is vital, especially for households with high appliance usage.
Are you aware of how your appliances utilize energy during different cycles or how small neglects can lead to major problems? These insights not only help you extend your appliances’ lifespan but also contribute to household safety and savings. So, next time you start your washing machine or plan a cleaning cycle, remember that attention to detail is key. Have you ever fallen into this trap? Let me know in the comments.
Mastering Your Appliance Care with the Right Tools
Proper maintenance of household appliances isn’t just about quick fixes; it’s about adopting the right tools and practices that ensure longevity and peak performance. For example, I swear by a high-quality ultrasonic cleaner to remove mineral deposits from dishwasher spray arms. This device uses ultrasonic waves to dislodge stubborn grime in hard-to-reach areas, which manual cleaning often misses. Investing in a digital multimeter is also crucial for diagnosing electrical issues in refrigerators or washing machines. I use my multimeter regularly to test voltage and continuity, preventing minor problems from becoming costly repairs. These tools form the backbone of effective, proactive appliance maintenance, saving you both time and money over the years.
Additionally, maintaining an organized toolkit with screwdrivers, silicone lubricants, and replacement parts allows me to tackle routine tasks swiftly. For instance, replacing a worn refrigerator door seal becomes straightforward when I have the right screwdriver set and a quality gasket sealant on hand. This hands-on approach extends appliance lifespan and keeps them running efficiently. Keeping detailed records of maintenance schedules and software updates is also beneficial, especially for smart appliances that depend on firmware. Regular updates, like those documented by this resource, prevent bugs and improve functionality.
How do I maintain my appliances over time?
Adopting a routine that combines practical tools and scheduled inspections can dramatically improve appliance performance. I recommend setting quarterly reminders to check filters, run calibration routines, and update firmware on your smart devices. For example, calibrating your smart fridge’s temperature sensors ensures food stays fresh and energy bills stay low, as discussed here. Additionally, investing in specialized cleaning devices like a dry vent brush for dryers or a spray arm cleaning kit for dishwashers can make maintenance more effective and less time-consuming. Over time, these efforts compound, resulting in appliances that work better and last longer. As technology advances, future tools—like smart diagnostic apps that communicate directly with appliances—may automate much of this upkeep, making maintenance even easier. But for now, consistent use of effective tools and techniques is your best bet for durable appliances.
Start by trying a deep-cleaning tip I often use: disassemble and soak your dishwasher’s spray arms in a vinegar solution to remove mineral build-up. It’s simple, highly effective, and will improve your dishwasher’s cleaning performance immediately. Regularly applying these practices positions you as a true appliance whiz, ready to extend the life and efficiency of your household tech.
Remember, proactive maintenance combined with the right tools isn’t just a chore—it’s an investment in your home’s comfort and your wallet’s health. Take the time to equip yourself properly, and you’ll reap the rewards for years to come.
,
Why I Wish I Knew These Hidden Dishwasher Realities
One of the most eye-opening lessons I learned was that even the smartest appliances can fall prey to common misconceptions. For example, I once assumed that upgrading to a high-tech dishwasher meant effortless maintenance—turns out, neglecting simple tasks like cleaning spray arms can override those benefits entirely. Recognizing the importance of routine cleaning, such as soaking spray arms in vinegar, transformed my dishwasher’s performance and extended its lifespan. These small, often overlooked details are the real keys to longevity.
Smart Appliance Myths That Could Cost You More Than You Think
I used to believe that smart refrigerators could automatically handle all maintenance tasks, but the truth is, firmware updates play a crucial role. Ignoring these updates can cause error glitches or app disconnections, which makes troubleshooting more complex. Learning to keep firmware current, as discussed in this guide, turned out to be a game-changer for reliable performance. Being proactive with updates keeps my smart fridge working smoothly and saves me from unexpected inconveniences.
Lessons From My Long-Term Laundry Routine
I finally understood that overloading washing machines or ignoring proper cycle selection leads to prolonged drying times and wear-and-tear. Understanding capacity and using eco-friendly settings not only protect my appliance but also reduce energy bills. For instance, choosing appropriate wash cycles based on soil level enhances efficiency. This approach, shared in this resource, completely changed how I care for my laundry appliances, making them last longer and perform better.
Tools That Saved My Kitchen From Avoidable Damage
Equipping myself with a few essential maintenance tools—like an ultrasonic cleaner for spray arms and a digital multimeter—I discovered that preventative care is surprisingly manageable. Regularly checking components with these tools prevents issues before they escalate, which I learned the hard way through costly repairs. Maintaining an organized toolkit and following scheduled inspections, guided by insights from this source, has made a tangible difference in my appliances’ longevity.
Fueling Action with Curiosity and Care
The journey of nourishing my appliances has taught me that attentive maintenance and understanding their quirks are vital. Whether it’s cleaning out mineral deposits or updating firmware, small daily actions can lead to big savings and fewer frustrations. Embrace these practices, and you’ll enjoy appliances that serve you faithfully for years to come. What’s a maintenance tip that completely changed how you care for your appliances? Share your experience below, and let’s learn from each other!