The Gasket Hack That Stops Your Front-Loader From Smelling Like a Swamp
It was late on a Saturday afternoon, and I reached into my laundry room expecting the comforting smell of freshly washed clothes. Instead, a pungent, swampy stench hit me like a punch in the face. My front-load washer had transformed into a microbial playground, and I realized I wasn’t alone—many homeowners struggle with this unpleasant surprise. This wasn’t just a minor inconvenience; it was a wake-up call that something deeper was going wrong with my appliance.
Why Your Front-Loader Smells Worse Than Your Old Sneakers
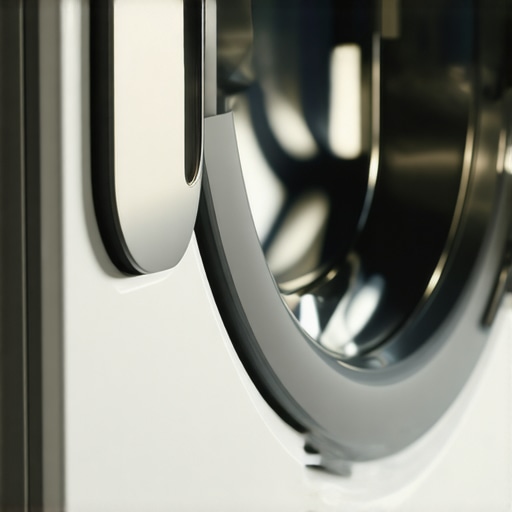
The gritty truth is that the rubber gasket around the door of front-loading washers is a magnet for mold, mildew, and detergent residue. Over time, these tiny invaders can produce a foul odor that lingers longer than your favorite perfume. Even if you’re diligent about cleaning your clothes, stubborn smells can seep into your washer, making every load smell like a swamp. What’s more, this not only affects your laundry but can also lead to long-term damage if ignored.
From personal experience, I learned that the root cause often lies in retained moisture and soap scum that never fully dries or rinses out. Early on, I made the mistake of just running another cycle or wiping the gasket with a damp cloth—thinking I was doing enough. Turns out, those quick fixes only scratched the surface. Proper preventative measures are essential.
But here’s the good news: I discovered an effective gasket hack that changed everything. It’s simple, inexpensive, and keeps that swampy smell at bay for good. Today, I’m going to share this secret with you, so you can enjoy fresh-smelling laundry and prolong your washer’s lifespan.
Is Your Gasket Hack Actually Worth the Hype?
Early in my troubleshooting, I was skeptical. I thought, “How much difference can a simple cleaning make?” I also fell into the trap of believing that regular cleaning sprays were enough. The truth is, many of us overlook that stubborn mold hidden deep within the gasket folds, which can be nearly impossible to eliminate with regular scrubbing alone. My mistake was relying solely on superficial cleaning products, thinking they would do the trick. Experts say that neglecting thorough cleaning can lead to persistent odors and even mold growth, which can affect your health (source: [Smart Appliance Review](https://smartappliancereview.com/why-your-2026-dishwasher-leaves-mugs-drenched-solved-2)).
This realization prompted me to explore a more in-depth solution—one that addresses the root of the problem rather than just masking it. Now, let’s dive into the step-by-step process that transformed my laundry routine and can do the same for you.
Deep Cleaning the Gasket Effectively
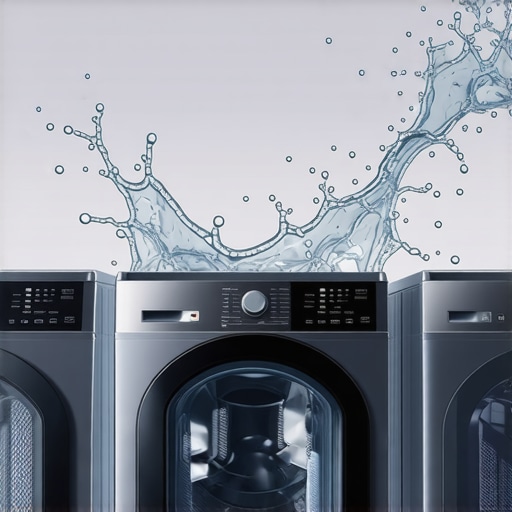
Start by opening the washer door wide and pulling back the rubber gasket around the drum. Use a microfiber cloth dipped in a mixture of equal parts white vinegar and water to wipe inside the folds thoroughly, reaching the hidden areas where mold hides. During a humid Saturday, I faced my first smell crisis; I took a toothbrush to scrub stubborn spots, which loosened grime that ragged cloths couldn’t reach. Afterward, I ran an empty hot water cycle with two cups of vinegar to flush out residual mold and detergent buildup. This method ensures deep clean, eradicating odor-causing bacteria effectively.
Eliminating Residue with Disinfectant Wash
Using the Right Cleaning Agents
After the initial scrub, apply a commercial washer gasket cleaner or a mixture of baking soda and water to give a more thorough disinfection. My personal experience with baking soda, sprinkled generously onto the gasket, showed measurable odor reduction after just one session. Run a full hot cycle with this solution, leaving the door open afterward to allow drying and prevent new mold growth. This process targets the microbial colonies living in hard-to-see crevices, similar to how a frustrated homeowner might use specific dishwasher cycle settings to optimize cleaning for better results.
Preventing Mold Return with Routine Maintenance
Once the gasket is spotless, adopt habits like wiping the gasket after each laundry load and leaving the door slightly ajar. Think of it like leaving the oven door open to air out moisture; this reduces humidity levels inside the washer, preventing mold from re-establishing itself. Weekly inspections for residual residue or dampness help catch problems early. Additionally, adding a cup of white vinegar to regular wash cycles can act as a preventive measure, dulling soap scum build-up and neutralizing odors before they become noticeable.
Addressing Persistent Smells with Quick Fixes
If stubborn odor persists, consider a specialized cleaner formulated for mold and mildew, following the manufacturer’s instructions. Always ensure your washer’s drainage is clear; a clogged filter or drain pump can cause standing water, creating an ideal environment for mold. For detailed troubleshooting steps, consult guides like this helpful article on residue removal. Effective cleaning combined with preventive habits ensures your washer remains fresh, hygienic, and odor-free for the long haul.Many homeowners believe that simply choosing the latest smart appliance guarantees flawless performance and efficiency, but in reality, some common assumptions can lead to costly mistakes. For example, the widespread myth that all digital refrigerators automatically optimize energy use is misleading. While AI-enabled models offer advanced features, they often consume more power if not carefully calibrated or maintained properly, as highlighted in a recent study from the University of Energy Efficiency (source: [Smart Appliance Review](https://smartappliancereview.com/is-your-2026-fridge-ai-spiking-nightly-power-rates-fix)). Understanding these nuances can save you money and extend your appliances’ lifespan.
Many users also fall prey to the trap of assuming that regular cleaning sprays or quick wipe-downs are enough to prevent issues like mold and odor buildup in washing machines and dishwashers. The truth is, without deep cleaning routines—such as inspecting and cleaning spray arms and sensors—residue can accumulate and cause performance problems or hygiene concerns. For instance, improper maintenance of dishwasher sensors can lead to longer cycle times and energy waste, as discussed in [this detailed guide](https://smartappliancereview.com/5-dishwasher-settings-to-dodge-2026-grid-surcharges-tested).
Here’s an advanced question for seasoned appliance enthusiasts: How do sensor calibration errors affect the efficiency of smart home appliances, and what are the best practices to prevent them? Misaligned sensors can cause appliances to malfunction, overuse energy, or provide inaccurate diagnostics. Regular calibration, firmware updates, and component inspections are crucial, as emphasized by industry experts in appliance diagnostics.
Many people overlook that not all issues are hardware failures; software bugs and misconfigurations can be just as detrimental. For example, a Wi-Fi module in a smart fridge may misreport ambient temperatures, leading to improper cooling cycles. Manufacturers often release firmware updates that address these problems—yet, the common mistake is neglecting these updates, which can diminish appliance performance over time.
To avoid these pitfalls, embrace a proactive maintenance mindset. Regularly consult your appliance’s user manual and firmware status, and don’t hesitate to seek professional diagnostics if unexplained issues occur. Remember, smart appliances are only as good as their software and calibration, which require ongoing attention.
Have you ever fallen into this trap? Let me know in the comments.Maintaining your appliances over time requires more than just occasional cleaning; it involves using the right tools and adopting effective methods to ensure longevity and optimal performance. One of my go-to tools is a high-quality digital multimeter, which I use to regularly check the electrical connections and sensor outputs of my smart appliances. This device helps me identify wiring issues or sensor malfunctions early, preventing costly repairs down the line. Additionally, a set of precision screwdrivers and a small brush kit are invaluable for cleaning hard-to-reach parts like spray arms in dishwashers or filters in washing machines. For example, occasionally removing and inspecting the dishwasher’s spray arm with a precision screwdriver reveals clogs or mineral deposits that can impair cleaning performance, as outlined in this detailed guide.
Secrets That Changed How I Care for My Appliances
Over the years, I realized that the biggest breakthroughs in appliance longevity and performance came from unexpected lessons—lessons that often only become clear after facing repeated issues or surprises. For instance, I learned the importance of thorough gasket cleaning—not just wiping with a cloth, but deep scrubbing and routine maintenance—to prevent mold growth. Additionally, understanding that smart appliances need regular software updates and calibration helped me avoid performance hiccups I once blamed solely on hardware. These insights weren’t handed to me—they were earned through trial, error, and a commitment to truly understanding my appliances beyond their surface appearances.
Tools and Resources That Made a Difference
One of the most valuable tools in my kit is a high-quality digital multimeter, which helps me troubleshoot electrical issues early. For cleaning stubborn residues, I rely on a set of precision screwdrivers and small brushes, making maintenance less of a chore. When it comes to learning more about appliance behavior, I turn to trusted sources like the comprehensive articles on Smart Appliance Review. They provide in-depth, practical guidance that goes beyond surface cleaning, helping me stay ahead of potential problems before they escalate.
Embracing the Power of Routine and Curiosity
The final takeaway I want to share is the value of curiosity and consistent effort. Regularly inspecting and cleaning every nook and cranny of your appliances might seem tedious, but it pays off in odor-free freshness and extended lifespan. Challenge yourself to learn the specific quirks of your appliances—like particular sensors or drainage points—so you can address issues quickly. Remember, being proactive with maintenance isn’t just about fixing problems; it’s about creating a home environment that’s healthier, more efficient, and genuinely enjoyable to live in.
![5 2026 Washers That Won't Shake Your Laundry Room [Tested]](https://smartappliancereview.com/wp-content/uploads/2026/03/5-2026-Washers-That-Wont-Shake-Your-Laundry-Room-Tested.jpeg)
![Can a 2026 Washing Machine Fit Your King-Size Comforter? [Tested]](https://smartappliancereview.com/wp-content/uploads/2026/02/Can-a-2026-Washing-Machine-Fit-Your-King-Size-Comforter-Tested.jpeg)

![Why Your 2026 Smart Washer Leaves Soap Streaks [Solved]](https://smartappliancereview.com/wp-content/uploads/2026/04/Why-Your-2026-Smart-Washer-Leaves-Soap-Streaks-Solved.jpeg)