Ever opened your dishwasher after a cycle and found a big, disgusting mess around the filter? I’ve been there. That sinking feeling when you realize cleaning the dishwasher filter has turned into an epic splash zone—water and grime everywhere—makes me want to call it quits altogether. But then I had a lightbulb moment: there’s a way to get that filter sparkling clean without turning my kitchen into a crime scene.
Today, I promise to share exactly how I learned to clean my dishwasher filter mess-free—and how you can too. Gone are the days of sloshing dirty water all over your hands, only to find the mess a hundred times worse than the problem.
Why Cleaning Your Dishwasher Filter Than You Might Think
Most of us ignore the dishwasher filter until the appliance starts acting up—poor cleaning results, foul odors, or strange noises. But the truth is, neglecting this small part can severely reduce your dishwasher’s efficiency over time. In fact, a clogged filter can cause your dishwasher to use more water and energy, costing you extra money and stressing your appliance.
I used to think that removing and cleaning the filter was just a quick, straightforward task. But my early attempts turned into messy disasters—water splashing onto the floor, bits of grime flying everywhere. I didn’t realize there was a better way until I stumbled upon some expert advice from industry leaders like smart appliance experts. They emphasize that proper technique is key to avoiding the mess.
Early on, I made the mistake of trying to pry out the filter with my bare hands or using tools that were too rough. That just pushed dirt deeper or caused leaks. Trust me, I learned the hard way that patience, the right approach, and a few simple supplies can transform a disgusting chore into a quick, clean process. If you’ve ever faced a stubborn, mucky dishwasher filter, you’re not alone. Many homeowners overlook this maintenance—yet it’s so simple when you do it right.
Stay tuned because next, I’ll walk you through the exact steps to clean your dishwasher filter without making a mess. Trust me; once you master this, your dishwasher will thank you with fresh satisfaction at every cycle.
Prepare Your Workspace and Gather Supplies
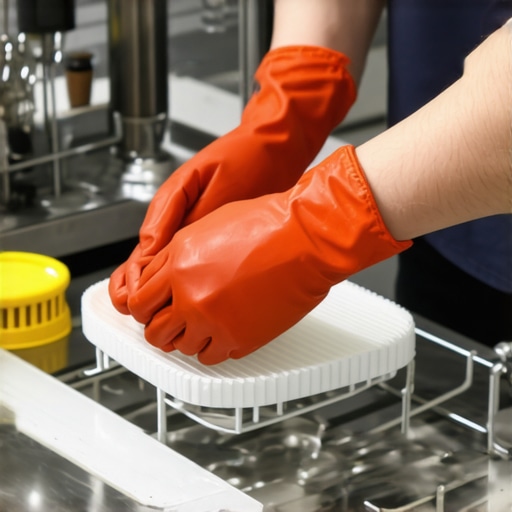
Start by unplugging your dishwasher to ensure safety. Gather essential supplies: a soft-bristled brush, a small bowl of warm water mixed with a few drops of dish soap, a toothpick or small brush for stubborn grime, and a microfiber cloth. Remember, a clean workspace prevents cross-contamination and makes the process smoother.
Locate and Remove the Filter
Open the dishwasher door and locate the filter—usually at the bottom center. Consult your dishwasher’s manual if you’re unsure. Carefully unscrew or lift out the filter assembly, being gentle to avoid damaging any clips or seals. During my first attempt, I hurried and accidentally dropped the filter, creating a small splash. Taking my time prevented such messes.
Disassemble the Filter Components
Most filters come apart into a few pieces. Rinse each part under warm water to loosen debris. Use a toothpick or small brush to dislodge trapped grime from tight corners. I once ignored this step, which left stubborn residue and led to poor cleaning results later. Disassembling ensures every nook gets cleaned thoroughly.
Clean the Filter Thoroughly
Submerge the parts in the prepared warm soapy water. Gently scrub with the soft brush, focusing on areas with visible grime or buildup. Be cautious not to use abrasive tools that could scratch the plastic or metal parts. For persistent gunk, apply a vinegar solution for extra cleaning power. I found that soaking for about 10 minutes made stubborn deposits easier to remove, drastically reducing scrubbing effort.
Address Stubborn Buildup
If some areas resist cleaning, use a toothpick to carefully scrape away hardened debris. Do not force or gouge the plastic—this can cause damage and leaks. I discovered that patience here prevents costly repairs down the line. After cleaning, rinse thoroughly to remove any loosened dirt or soap residue.
Reassemble and Reinstall the Filter
Ensure all parts are dry, then reassemble the filter correctly, aligning clasps or screw threads as per your manual. Reinstall the filter back into its housing, making sure it clicks or screws in securely. I once overlooked this, causing the filter to come loose mid-cycle, which I only realized after water leaked onto my floor. Double-checking the fit prevents leaks and ensures optimal performance.
Final Checks and Tips
Before closing the dishwasher, run it on a short cycle with no dishes to verify everything is functioning properly. Regular maintenance, say once every three months, prevents buildup and prolongs your dishwasher’s lifespan. Remember, a clean filter leads to better cleaning results, lower energy costs, and a fresher-smelling kitchen.
While many believe that simply owning smart appliances guarantees an efficient home, the reality is far more nuanced. A widespread myth is that all smart devices automatically optimize energy consumption without user input. In truth, features like eco-mode can sometimes lead to unintended results, such as insufficient cooling or washing cycles, if not configured correctly. Experts emphasize that understanding the detailed settings and potential pitfalls is crucial, as highlighted in studies from the future trends report. For example, some users assume that newer models always outperform older ones in energy savings, but in practice, improper setup or neglecting manual adjustments can negate those benefits. Moreover, many overlook the importance of regular maintenance—like cleaning filters or inspecting seals—that is vital for optimal performance. An advanced mistake is relying solely on smart features such as remote diagnostics without periodically performing basic upkeep, which can obscure underlying issues until they cause major malfunctions. Be cautious not to fall into the trap of over-trusting automation, as it may cause complacency, leading to overlooked wear and tear. This oversight can result in higher utility bills or costly repairs down the line. To avoid these pitfalls, always read the user manual thoroughly and stay informed about best practices through resources like ultimate guides. Remember, true efficiency arises from informed use, not just the latest gadgetry.
How can seasoned homeowners optimize smart appliances without falling into advanced pitfalls?
The key lies in combining technology with consistent manual checks and a good understanding of your specific device models. Staying proactive, rather than reactive, ensures your investment in smart home tech pays off in both convenience and savings. Have you ever fallen into this trap? Let me know in the comments.
Invest in the Right Tools to Maintain Efficiency
Having the proper equipment makes all the difference when it comes to maintaining smart appliances. I personally rely on a high-quality digital multimeter like the AstroAI Digital Multimeter, which allows me to test voltage, current, and resistance within my devices, helping me identify potential issues before they become serious problems. For cleaning, a soft-bristled brush such as the OXO Good Grips All-Purpose Scrub Brush ensures gentle yet effective removal of grime from filters and vents without damaging sensitive components.
In addition to physical tools, I use specialized software like the SmartLife app to monitor my appliances’ performance metrics in real time. This app provides detailed reports on energy consumption and alerts me to anomalies, enabling proactive maintenance. Combining hardware and software tools creates a comprehensive approach that keeps everything running at peak efficiency over the long term.
Establish a Routine Maintenance Schedule
Consistency is key. I set calendar reminders to inspect and clean filters, seals, and vents every three months. Regular checks prevent dirt buildup that can cause malfunctions or reduce energy efficiency. For example, cleaning refrigerator door seals with a mixture of vinegar and water removes mold and sticky residues, extending seal life and preventing cold air leaks. Follow the detailed procedures in the ultimate guide to ensure you’re following best practices.
Use Diagnostic Tools for Troubleshooting
Beyond basic maintenance, diagnostic tools like the ANCEL AD310 Scanner can be invaluable for identifying electrical or mechanical faults early. Many smart devices also come with built-in self-diagnostic features accessible through their companion apps. Regular use of these diagnostics helps catch issues like failing sensors or overheating components before they cause system failures.
For instance, when my smart washing machine started producing unusual vibrations, running its diagnostic mode pinpointed a worn-out shock absorber. Replacing it promptly prevented a costly repair. These tools not only save money but also extend the lifespan of your appliances by preventing small issues from escalating.
Predict Future Trends and Prepare Accordingly
The landscape of smart appliances is rapidly evolving, with manufacturers integrating AI-driven predictive maintenance features. According to industry forecasts, early adopters who utilize diagnostic and monitoring tools will benefit from reduced downtime and increased efficiency. Investing in smart monitoring software now prepares you for a more seamless, autonomous maintenance experience in the near future.
How do I maintain my appliances over time to avoid costly repairs?
Adopting a systematic approach that combines the right tools, routine inspections, and diagnostics is essential. Don’t forget to document the maintenance schedule and keep spare parts like replacement seals or filters handy. This proactive attitude ensures your smart appliances serve you well for years to come. I encourage you to try integrating a diagnostic app like Home Connect or similar, which can anticipate issues before they become inconvenient. For more expert insights, visit our contact page or check out detailed guides on advanced appliance upkeep.
Now that you’ve learned the finer points of cleaning your dishwasher filter without making a mess, it’s clear that the true power lies in consistent maintenance and informed choices. One of the most underrated lessons I’ve discovered is that even the smartest appliances require manual care—relying solely on automation can lead you astray. Regularly inspecting and cleaning your appliances, combined with using the right tools, transforms a once-dreaded task into a quick, satisfying routine. Remember, understanding your dishwasher’s specific needs and employing expert-recommended methods ensures longevity and peak performance. For more insights, check out our comprehensive guide.