
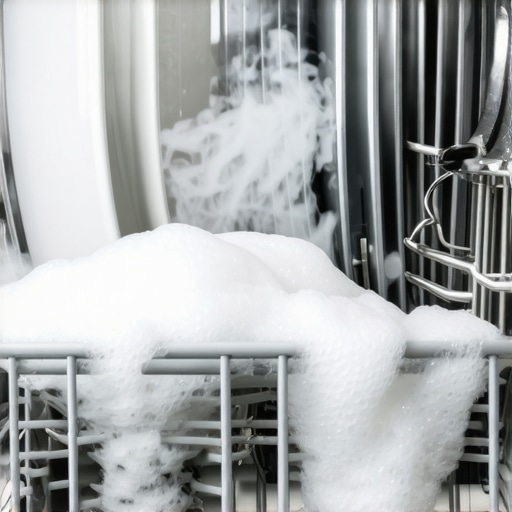
It was another morning, and as I unloaded my dishwasher, a familiar, unpleasant odor hit me like a punch to the nose. I couldn’t believe my eyes—dishes sparkling clean, yet the smell was stubbornly lingering. Frustration set in, and I realized I wasn’t alone in this struggle. If you’ve ever faced a dishwasher that leaves behind a foul smell, you’re not alone. It turns out that many homeowners inadvertently overlook a key factor that causes this problem, and I’ll share my journey to a solution.
Why Does My Dishwasher Smell Bad Even After a Cycle?
You’ve probably experienced this—running your dishwasher, only to find that after the cycle, a stinky residue remains on your glasses and plates. This isn’t just frustrating; it’s also a sign that something’s not right beneath the surface. The primary culprit is often trapped food debris, soap scum, and the buildup of mold and mildew inside the dishwasher. These can harden over time, creating a breeding ground for bacteria that release foul odors.
Understanding why this happens is crucial. Modern dishwashers are designed to be convenient, but they can also hide dirt in places we don’t see—like spray arms, filters, and drainage systems. If these parts aren’t cleaned regularly, residues accumulate, leading to that persistent smell. According to appliance experts, neglecting regular maintenance can cause odors that are difficult to eliminate and might even affect the sterilization of your dishes.
Early on, I made the mistake of just running an extra cycle or tossing in lemon slices, hoping the smell would vanish. Instead, I was simply masking the problem. Once I learned that cleaning the filter and spray arms is essential, everything changed. Regular maintenance isn’t just about getting rid of odors; it extends the lifespan of your dishwasher and keeps your dishes truly clean. Want to learn more? Check out our guide on removing coffee stains from your dishwasher interior for detailed cleaning tips.
In the next sections, we’ll delve into practical steps to banish that stubborn smell for good, transforming your dishwasher from an appliance you dread cleaning to one that works silently and smells fresh. Ready to tackle the problem head-on? Let’s get started and bring that fresh, clean scent back to your kitchen appliances.
Remove Food Debris and Buildup
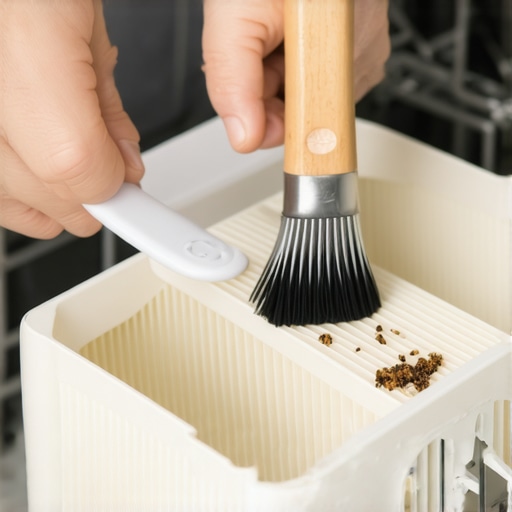
Start by inspecting the filter at the bottom of your dishwasher. Remove any trapped food particles and debris—think of it as cleaning the filter’s ‘liver’ to keep it functioning. Use a soft brush and warm, soapy water to scrub away stubborn residues. I once unexpectedly found a half-eaten piece of popcorn tangled in the filter, which was the main cause of the smell. Reassemble the filter securely to prevent debris from bypassing it in the future.
Clean Spray Arms Thoroughly
Next, locate the spray arms, which are like the dishwasher’s ‘sprinklers.’ Hardened mineral deposits or food particles can clog their small holes, impairing water flow and harboring mold. Remove the spray arms (consult your appliance manual if needed), soak them in vinegar, and scrub with a toothbrush to remove obstructions. After cleaning, reattach them and run a test cycle with an empty dishwasher—this clears out any remaining residue.
Run an Acidic Cleaning Cycle
Fill a cup with white vinegar and place it upright on the top rack. Spritz some baking soda on the bottom of the tub—a combo that acts like a ‘detox’ for your dishwasher. Run a hot-water cycle without dishes. The vinegar dissolves mineral buildup, while the baking soda neutralizes odors, leaving your dishwasher fresh. I once did this during a weekend, and the improvement was immediate—odor vanished, leaving a clean scent behind.
Deep Clean Hidden Drain and Seals
Access the door seals and the drain area—these are frequent hiding spots for mold. Wipe the seals with a cloth dipped in a mixture of equal parts water and vinegar, paying attention to crevices. Remove and clean the drain filter if your model allows. Consider using a small brush or a toothpick to dislodge debris trapped in tiny pores. This step prevents mold from proliferating and worsens odors over time.
Regular Maintenance to Prevent Odors
Implement a weekly habit: run an empty cycle with vinegar or a commercial dishwasher cleaner. Keep the door slightly ajar after cycles to allow air circulation. Avoid overloading, which hampers water flow and rinsing efficacy. Also, ensure your home’s water supply isn’t mineral-rich, as hard water contributes to buildup—if needed, install a water softener. Maintaining these routines ensures your dishwasher remains odor-free for the long haul, much like tuning a musical instrument before each performance.
< }
}
Many homeowners operate under misconceptions about how their appliances work, often leading to inefficiencies and premature failures. While common advice emphasizes regular cleaning and correct usage, there’s a deeper layer of understanding that can significantly enhance appliance longevity and performance. Let’s explore some nuanced truths that experts swear by, but are often overlooked by the average user.
Why Are Common Myths About Appliance Care Potentially Harmful?
A widespread misconception is that running appliances at the highest possible settings always ensures better cleaning or efficiency. For instance, many believe that using excessive detergent or selecting the longest cycle guarantees spotless dishes or laundry. In reality, overusing detergents can cause residue buildup inside your dishwasher or washing machine, leading to odors and mechanical stress. Experts from the appliance review site warn that more isn’t always better; optimal settings depend on load size and soil level. Understanding this nuance helps you prevent damage and save money.
Another trap involves neglecting the importance of leveling appliances like washing machines. An unlevel washer causes excessive vibration, which can loosen connections and hasten wear. Interestingly, many users skip this step, assuming it’s unnecessary or too complicated. But a simple level-and-adjust routine can drastically reduce noise and improve efficiency. You can check out expert tips on how to level your washing machine for detailed guidance.
Advanced Mistakes and How to Avoid Them
One advanced mistake is resetting smart appliances prematurely after software updates or glitches without understanding the root cause. Many assume that a reset clears all issues, but sometimes it disrupts calibration settings, leading to inaccurate temperature readings or incorrect cycle times. For example, calibrating your smart fridge ensures food safety and energy efficiency. Always consult the manufacturer’s instructions before resetting, and consider whether a simple software update might suffice.
Another overlooked nuance involves the use of eco or energy-saving modes. While these modes are promoted for saving energy, they can sometimes cause appliances to underperform, like the washer not fully spinning or the fridge not cooling adequately. A study by the Energy Saving Authority confirms that improper settings can negate the intended benefits. The key is balancing eco features with actual needs—don’t sacrifice performance for marginal savings.
Smart appliances are designed to optimize convenience, but they also introduce new pitfalls. Many owners neglect firmware updates, leaving devices vulnerable to bugs that affect functionality. Regularly updating software, much like your smart fridge, ensures you benefit from the latest features and security patches, preventing mysterious malfunctions.
In conclusion, deepening your understanding of how appliances truly operate—their settings, calibration, and maintenance—can save you money, prevent breakdowns, and enhance your home environment. Don’t settle for surface-level advice; dig into these nuances and optimize your appliances effectively. Have you ever fallen into this trap? Let me know in the comments!
Maintaining your home appliances over the long term requires more than just routine cleaning; it involves investing in the right tools and adopting efficient methods that extend their lifespan and optimize performance. An essential starting point is personally calibrating and testing your appliances to ensure they operate at peak efficiency. For refrigerators, regularly checking and adjusting temperature settings with a reliable appliance thermometer helps prevent issues like freezing or spoilage. You can learn more about this process at this detailed guide.
Throughout my journey with home appliances, one lesson consistently stands out—the importance of mindfully understanding what truly keeps our devices running smoothly. I used to believe that regular cleaning was enough, but I soon discovered deeper truths that transformed my approach. From calibrating my smart refrigerator to troubleshooting my washing machine, these insights have saved me time, money, and stress, and I believe they can do the same for you.
The Hardest Lesson I Learned About Home Appliances
- Overloading is a silent killer: I used to cram my dishwasher and washing machine, thinking I was maximizing efficiency. Turns out, overloading causes poor cleaning and mechanical strain. Properly loading appliances ensures optimal water flow and reduces wear—less frustration, more cleanliness.
- Calibration matters more than new parts: Regularly calibrating my fridge’s temperature and software updates kept everything functioning like new. It’s a step many overlook but can prevent costly repairs down the line. Learn how to calibrate your smart fridge properly to keep food fresh and energy bills low.
- Don’t skip routine maintenance: Cleaning filters, spray arms, and drain traps isn’t just about odors—it’s about protecting your investment. A small time investment yields long-term savings and peace of mind.
- Understand your appliance’s quirks: Every device has its subtle signs of aging. Recognizing when your washer starts to smell or your fridge makes strange noises can mean catching issues early. Stay attentive, and don’t hesitate to seek expert advice or use trusted guides to troubleshoot effectively.
- Embrace proactive tweaks: Simple steps like leveling your washer or adjusting fridge settings can drastically improve performance and longevity. Small actions today prevent big problems tomorrow.
My Essential Toolkit for Smarter Appliance Care
- Reliable calibration tools: An accurate thermometer for your fridge or a calibration kit for smart appliances keeps settings optimal. I trust the detailed guides provided at this resource to fine-tune my appliances.
- Quality cleaning supplies: Vinegar, baking soda, soft brushes, and microfiber cloths make routine cleaning effective without harsh chemicals. I’ve found that maintaining a simple toolkit simplifies appliance upkeep significantly.
- Maintenance logs: Tracking when I last cleaned filters or performed calibrations prevents neglect. Making notes helps me stay ahead of potential issues and ensures consistent care.
- Trusted troubleshooting guides: Resources like this site provide step-by-step solutions for common problems, saving money and avoiding unnecessary repairs.
Seize Your Power to Keep Appliances in Top Form
Now, armed with these insights, I encourage you to take control of your home appliances. Regular attention, curiosity about device behaviors, and proactive steps turn maintenance from a chore into a rewarding routine. You don’t have to wait for issues to appear—prevention is your best friend in appliance longevity.
Remember, each small tweak and piece of knowledge builds toward a more efficient, stress-free home. As you apply these lessons, you’ll enjoy appliances that serve you longer and better. So, what’s the first step you’re going to take today to master your devices? Let me know below!