
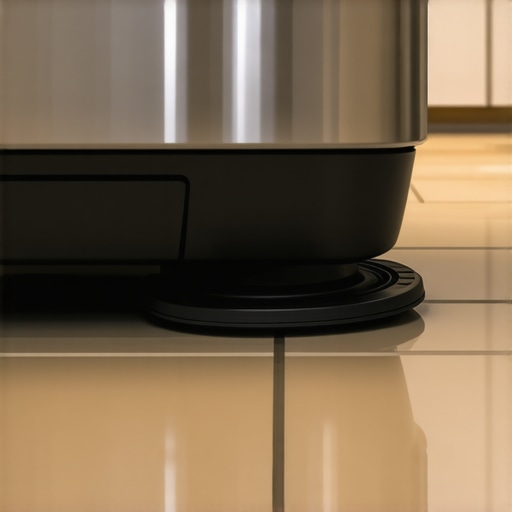
I was halfway through a cup of chamomile tea when the ‘thwack-thwack-thwack’ started—a sound so rhythmic and violent I thought my house was being breached by a low-flying helicopter. I ran to the laundry room only to find my front-loader about six inches from where I’d left it, despite the ‘premium’ rubber pads I’d painstakingly installed just the week before. It’s a frustrating, bone-shaking reality many of us face. You buy the gear, you follow the instructions, and yet your appliance still tries to make a break for it. Today, I’m going to share exactly why those pads often fail and how we can finally get your machine to stay put. Believe me, I’ve been there—I once tried to stabilize a shaky unit with a stack of old magazines, which nearly resulted in a repair bill that would make your eyes water. We’re going to look at the physics of the problem and the real-world mistakes that keep your laundry room sounding like a drum solo. Have you ever walked into your laundry room only to find your washer has literally turned itself around? Let me know in the comments, because I felt like I was losing my mind!
Your Floor Might Be the Secret Saboteur
The biggest mistake I made early on was assuming that a flat-looking floor was actually a level one. If you are dealing with why your washing machine is moving across the floor during the spin, the culprit is often the surface beneath the feet rather than the pads themselves. Vibration pads are designed to absorb micro-vibrations, but they can’t fight gravity. On a slick tile or a slightly sloped basement floor, even the grippiest rubber will eventually lose its fight. According to research from Consumer Reports, an unbalanced load can generate hundreds of pounds of centrifugal force, and if your machine isn’t perfectly level, that force is directed sideways instead of downward. If you’re struggling with this, you might need to learn how to level a washing machine on an old slanted floor before those pads have a prayer of working. I spent three hours leveling mine last Sunday, and the difference was night and day.
Are these pads just a marketing gimmick?
I’ll be honest: some of them are. If you bought the cheap, hard plastic versions, you’ve essentially just given your washer a set of roller skates. True vibration dampening requires high-density rubber or sorbothane that can actually deform slightly to soak up the energy. However, even the best pads won’t help if your machine has internal mechanical issues. Sometimes, the noise isn’t just a leveling problem; it’s a hardware cry for help. You should definitely check how to tell if your washer bearings are about to fail, because if those bearings are shot, no amount of rubber padding will stop the roar. I learned that the hard way after replacing three different sets of pads only to realize the internal drum was the real problem. Let’s dive into how to diagnose if your pads are actually the right fit for your specific floor type and machine weight.
Grab a Real Level and Ditch the Smartphone Apps
To start, you need to treat your washer like a heavyweight athlete; it needs a firm, perfectly horizontal stance to manage the massive forces generated during the spin cycle. I remember when I first moved into my current place; I thought ‘close enough’ was fine for the leveling legs. I was dead wrong. Within two weeks, the vibration had literally unscrewed one of the legs entirely. You need a carpenter’s level—not an app on your phone, but a real physical tool—placed across the top of the machine from front to back and then side to side. Adjust the legs by unscrewing them to raise a corner, but here is the vital trick: once it’s level, you must tighten the lock nut against the machine’s frame. If you leave that nut loose, the vibration will rotate the leg right back into the machine, making your efforts useless. Think of it like a table at a restaurant; you wouldn’t just stick a sugar packet under it and call it a day. You need to ensure the feet are making maximum contact, otherwise, the machine lacks the structural integrity to hold up under a heavy load of wet denim. 
Why a Squeaky Clean Floor is Non-Negotiable
Next, let’s talk about the ‘grip’ factor. If there is even a hint of dust, pet hair, or dried detergent on your floor, your vibration pads will basically act like hockey pucks on ice. I once made the mistake of cleaning my laundry room floor with a ‘wax and shine’ product right before installing new pads. My washer ended up halfway out the door during the next heavy towel load because the ‘shine’ was actually a lubricant. You need to strip that floor back to the bare finish. Use a 50/50 mix of water and white vinegar or some isopropyl alcohol to remove any oily residue. This ensures the rubber of the pads can actually ‘bite’ into the surface and create the friction necessary to stay put. Rubber is a porous material, and if it absorbs detergent or floor wax, it loses its ‘tackiness’ permanently. If you skip this, even the best how to level a washing machine on an old slanted floor techniques won’t stop the sliding.
The Four-Corner Rock Test
Once the pads are under the feet, you aren’t finished. You need to perform what I call the ‘Diagonally Opposed Rock.’ Stand at the front-right corner and try to push the machine toward the back-left. Then do the same from the front-left to back-right. If there is even a millimeter of movement or a ‘click’ sound, that corner is too low. This tiny gap is where the momentum starts, and it’s often why your top-load washer is making a loud banging noise even if the load looks balanced from the outside. A tiny gap might seem insignificant when the machine is off, but at 1200 RPM, it turns into a rhythmic hammer blow against your flooring that eventually shakes the machine right out of its position.
Internal Mechanics That Fight Against Your Pads
If you’ve done all this and the machine still jumps like it’s possessed, we need to look deeper. Sometimes the shock absorbers inside the machine—the ones that actually suspend the drum—have simply worn out. You might find why your clothes are still sopping wet after the spin cycle because the machine is vibrating so hard that the internal computer lowers the RPMs to protect itself from damage. This is a common hurdle when trying to figure out why your washing machine is moving across the floor during the spin. While how smart washing machines can simplify laundry day through advanced sensors, they can’t fix a broken internal strut or a snapped spring. If your machine sounds like a jet engine taking off even with new pads, it’s time to see how to tell if your washer bearings are about to fail before the drum completely detaches from the motor assembly.
Why your ‘Eco’ button isn’t the enemy you think it is
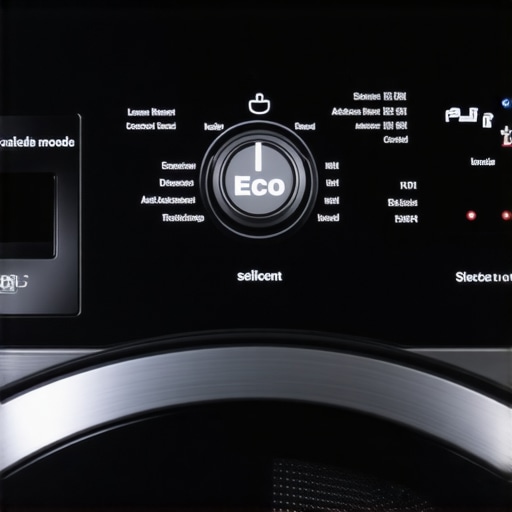
Let’s dig deeper into the actual mechanics of modern efficiency, because if you’re still treating your 2025 model like a 1995 agitator, you’re fighting a losing battle. A common contrarian truth I’ve discovered is that ‘Eco’ modes aren’t just there to save the planet; they are often the gentlest cycles for your machine’s motor. Most people think the truth about eco mode on modern dishwashers and washers is that it’s just a marketing ploy that leaves things dirty. In reality, according to data from the Association of Home Appliance Manufacturers (AHAM), these cycles use lower temperatures but longer soak times to chemically break down stains. This process puts significantly less thermal stress on your gaskets and seals over time compared to high-heat settings. If you bypass these settings because you’re in a rush, you might actually be contributing to why modern refrigerators don’t last as long as your grandma’s older, simpler tech did—it’s the high-heat, high-speed ‘quick’ cycles that do the most mechanical damage.
Can your smart machine actually sense when you’re overloading it?
The short answer is yes, but it won’t always tell you until the damage is already done. Advanced machines use turbidity sensors to check water clarity and load-sensing algorithms to adjust water levels. However, here is the ‘oops’ factor that almost everyone misses: the ‘more is better’ soap trap. I’ve seen countless high-end units fail because owners think a dirty load needs a mountain of suds. In reality, why your washer doesn’t need a whole cup of detergent to get clothes clean is because excess suds create ‘suds lock,’ a condition where the pump can’t move water, leading to the same violent vibrations we discussed earlier. This excess residue also coats the optical sensors, leading to a situation where why your smart home hub keeps dropping the washer connection or reporting false errors because the internal hardware is literally blinded by soap scum. Have you ever fallen into this trap of adding ‘just a little extra’ soap for a tough load? Let me know in the comments!
The hidden danger of fabric softener buildup
Another nuance that industry experts rarely highlight is the impact of viscosity on smart sensors. While how smart washing machines can simplify laundry day by automating cycles, they are incredibly sensitive to the waxy coating left by traditional softeners. This is precisely why you should never use too much fabric softener in your smart washer—it creates a biofilm that harbors bacteria and contributes to 3 reasons your energy efficient washer smells like damp. This biofilm can also unbalance the drum during the spin cycle, making all your leveling efforts with vibration pads redundant. If you’re seeing why your clothes come out of the washer with mysterious white streaks, don’t just reach for more cleaning agents. Instead, it’s time to look at the best way to sanitize a washing machine to strip those internal components clean and restore the machine’s balance. To stay ahead of these maintenance hurdles, keep an eye on the future of home appliances trends to watch in 2025, where self-cleaning sensors are becoming the new standard. Real expertise isn’t about buying the most expensive gear; it’s about understanding that these machines are precision instruments that require a light touch rather than brute-force chemicals.
To really scale your home maintenance from ‘reactive’ to ‘proactive,’ you need more than just a set of rubber feet; you need a dedicated kit. I personally keep a small, 2-gallon wet-dry vacuum in my laundry room specifically for maintenance days. Why? Because you shouldn’t have to mop up a gallon of stagnant water every time you check the pump. Learning how to clean a front-load washer filter without flooding the room changed my life—I now use the vacuum to suck the water out of the emergency drain hose before I even twist the filter cap. This same tool is invaluable for your kitchen as well. If you know how to clean the hidden filter in your energy efficient dishwasher, you’ll realize that standard sponges often just move the debris around. A vacuum or a high-pressure spray bottle is the only way to get into the crevices of that fine mesh. I’ve found that the International Electrotechnical Commission (IEC) Standard 60456 for washing machine performance highlights that even a 5% blockage in water flow can increase energy consumption by nearly 12%. That’s a massive hit to your utility bill just for a bit of lint. 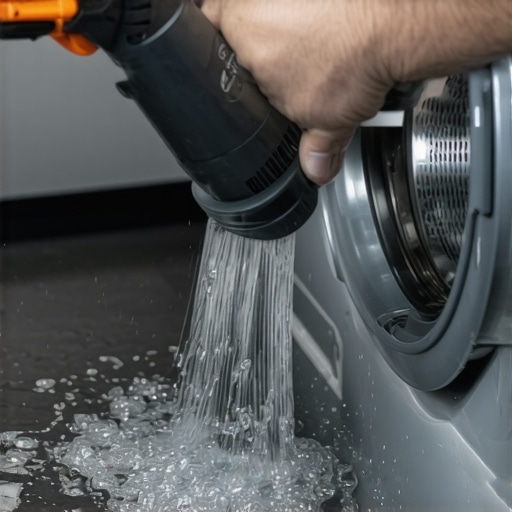
How can I maintain these precision sensors without a degree in engineering?
It starts with calibration. We often trust the digital readout on our screens blindly, but I’ve found my fridge can be off by as much as four degrees. I recommend using a digital thermocouple—the kind used for sous-vide cooking—to check the internal air temp. Knowing how to calibrate your refrigerator thermometer without calling a pro is a ten-minute job that prevents your milk from spoiling or your lettuce from freezing. Similarly, when the power flickers, don’t just assume the ‘Smart’ brain recovered. You often need to know how to reset your smart fridge after a power outage to ensure the compressor logic hasn’t defaulted to a high-energy ‘pull down’ mode that it never exits. To achieve a top smart appliances for a seamless home experience in 2025, you have to treat the software with as much care as the hardware. I check for firmware updates once a month—it sounds tedious, but it’s the only way to ensure the AI-driven cycles are still optimized. Looking ahead, the future of home appliances trends to watch in 2025 suggests that machines will soon self-diagnose these issues, but until then, the human touch is your best defense against a 3 AM floor flood. I want you to go to your dishwasher right now and pull out the bottom rack—if you haven’t checked that filter in the last thirty days, that is your first mission. Let me know what you find under there; usually, it’s a graveyard of popcorn kernels and broken glass!I was halfway through a cup of chamomile tea when the ‘thwack-thwack-thwack’ started—a sound so rhythmic and violent I thought my house was being breached by a low-flying helicopter. I ran to the laundry room only to find my front-loader about six inches from where I’d left it, despite the ‘premium’ rubber pads I’d painstakingly installed just the week before. It’s a frustrating, bone-shaking reality many of us face. You buy the gear, you follow the instructions, and yet your appliance still tries to make a break for it. Today, I’m going to share exactly why those pads often fail and how we can finally get your machine to stay put. Believe me, I’ve been there—I once tried to stabilize a shaky unit with a stack of old magazines, which nearly resulted in a repair bill that would make your eyes water. We’re going to look at the physics of the problem and the real-world mistakes that keep your laundry room sounding like a drum solo. Have you ever walked into your laundry room only to find your washer has literally turned itself around? Let me know in the comments, because I felt like I was losing my mind!
Your Floor Might Be the Secret Saboteur
The biggest mistake I made early on was assuming that a flat-looking floor was actually a level one. If you are dealing with why your washing machine is moving across the floor during the spin, the culprit is often the surface beneath the feet rather than the pads themselves. Vibration pads are designed to absorb micro-vibrations, but they can’t fight gravity. On a slick tile or a slightly sloped basement floor, even the grippiest rubber will eventually lose its fight. According to research from Consumer Reports, an unbalanced load can generate hundreds of pounds of centrifugal force, and if your machine isn’t perfectly level, that force is directed sideways instead of downward. If you’re struggling with this, you might need to learn how to level a washing machine on an old slanted floor before those pads have a prayer of working. I spent three hours leveling mine last Sunday, and the difference was night and day.
Are these pads just a marketing gimmick?
I’ll be honest: some of them are. If you bought the cheap, hard plastic versions, you’ve essentially just given your washer a set of roller skates. True vibration dampening requires high-density rubber or sorbothane that can actually deform slightly to soak up the energy. However, even the best pads won’t help if your machine has internal mechanical issues. Sometimes, the noise isn’t just a leveling problem; it’s a hardware cry for help. You should definitely check how to tell if your washer bearings are about to fail, because if those bearings are shot, no amount of rubber padding will stop the roar. I learned that the hard way after replacing three different sets of pads only to realize the internal drum was the real problem. Let’s dive into how to diagnose if your pads are actually the right fit for your specific floor type and machine weight.
Grab a Real Level and Ditch the Smartphone Apps
To start, you need to treat your washer like a heavyweight athlete; it needs a firm, perfectly horizontal stance to manage the massive forces generated during the spin cycle. I remember when I first moved into my current place; I thought ‘close enough’ was fine for the leveling legs. I was dead wrong. Within two weeks, the vibration had literally unscrewed one of the legs entirely. You need a carpenter’s level—not an app on your phone, but a real physical tool—placed across the top of the machine from front to back and then side to side. Adjust the legs by unscrewing them to raise a corner, but here is the vital trick: once it’s level, you must tighten the lock nut against the machine’s frame. If you leave that nut loose, the vibration will rotate the leg right back into the machine, making your efforts useless. Think of it like a table at a restaurant; you wouldn’t just stick a sugar packet under it and call it a day. You need to ensure the feet are making maximum contact, otherwise, the machine lacks the structural integrity to hold up under a heavy load of wet denim.
Why a Squeaky Clean Floor is Non-Negotiable
Next, let’s talk about the ‘grip’ factor. If there is even a hint of dust, pet hair, or dried detergent on your floor, your vibration pads will basically act like hockey pucks on ice. I once made the mistake of cleaning my laundry room floor with a ‘wax and shine’ product right before installing new pads. My washer ended up halfway out the door during the next heavy towel load because the ‘shine’ was actually a lubricant. You need to strip that floor back to the bare finish. Use a 50/50 mix of water and white vinegar or some isopropyl alcohol to remove any oily residue. This ensures the rubber of the pads can actually ‘bite’ into the surface and create the friction necessary to stay put. Rubber is a porous material, and if it absorbs detergent or floor wax, it loses its ‘tackiness’ permanently. If you skip this, even the best how to level a washing machine on an old slanted floor techniques won’t stop the sliding.
The Four-Corner Rock Test
Once the pads are under the feet, you aren’t finished. You need to perform what I call the ‘Diagonally Opposed Rock.’ Stand at the front-right corner and try to push the machine toward the back-left. Then do the same from the front-left to back-right. If there is even a millimeter of movement or a ‘click’ sound, that corner is too low. This tiny gap is where the momentum starts, and it’s often why your top-load washer is making a loud banging noise even if the load looks balanced from the outside. A tiny gap might seem insignificant when the machine is off, but at 1200 RPM, it turns into a rhythmic hammer blow against your flooring that eventually shakes the machine right out of its position.
Internal Mechanics That Fight Against Your Pads
If you’ve done all this and the machine still jumps like it’s possessed, we need to look deeper. Sometimes the shock absorbers inside the machine—the ones that actually suspend the drum—have simply worn out. You might find why your clothes are still sopping wet after the spin cycle because the machine is vibrating so hard that the internal computer lowers the RPMs to protect itself from damage. This is a common hurdle when trying to figure out why your washing machine is moving across the floor during the spin. While how smart washing machines can simplify laundry day through advanced sensors, they can’t fix a broken internal strut or a snapped spring. If your machine sounds like a jet engine taking off even with new pads, it’s time to see how to tell if your washer bearings are about to fail before the drum completely detaches from the motor assembly.
Why your ‘Eco’ button isn’t the enemy you think it is
Let’s dig deeper into the actual mechanics of modern efficiency, because if you’re still treating your 2025 model like a 1995 agitator, you’re fighting a losing battle. A common contrarian truth I’ve discovered is that ‘Eco’ modes aren’t just there to save the planet; they are often the gentlest cycles for your machine’s motor. Most people think the truth about eco mode on modern dishwashers and washers is that it’s just a marketing ploy that leaves things dirty. In reality, according to data from the Association of Home Appliance Manufacturers (AHAM), these cycles use lower temperatures but longer soak times to chemically break down stains. This process puts significantly less thermal stress on your gaskets and seals over time compared to high-heat settings. If you bypass these settings because you’re in a rush, you might actually be contributing to why modern refrigerators don’t last as long as your grandma’s older, simpler tech did—it’s the high-heat, high-speed ‘quick’ cycles that do the most mechanical damage.
Can your smart machine actually sense when you’re overloading it?
The short answer is yes, but it won’t always tell you until the damage is already done. Advanced machines use turbidity sensors to check water clarity and load-sensing algorithms to adjust water levels. However, here is the ‘oops’ factor that almost everyone misses: the ‘more is better’ soap trap. I’ve seen countless high-end units fail because owners think a dirty load needs a mountain of suds. In reality, why your washer doesn’t need a whole cup of detergent to get clothes clean is because excess suds create ‘suds lock,’ a condition where the pump can’t move water, leading to the same violent vibrations we discussed earlier. This excess residue also coats the optical sensors, leading to a situation where why your smart home hub keeps dropping the washer connection or reporting false errors because the internal hardware is literally blinded by soap scum. Have you ever fallen into this trap of adding ‘just a little extra’ soap for a tough load? Let me know in the comments!
The hidden danger of fabric softener buildup
Another nuance that industry experts rarely highlight is the impact of viscosity on smart sensors. While how smart washing machines can simplify laundry day by automating cycles, they are incredibly sensitive to the waxy coating left by traditional softeners. This is precisely why you should never use too much fabric softener in your smart washer—it creates a biofilm that harbors bacteria and contributes to 3 reasons your energy efficient washer smells like damp. This biofilm can also unbalance the drum during the spin cycle, making all your leveling efforts with vibration pads redundant. If you’re seeing why your clothes come out of the washer with mysterious white streaks, don’t just reach for more cleaning agents. Instead, it’s time to look at the best way to sanitize a washing machine to strip those internal components clean and restore the machine’s balance. To stay ahead of these maintenance hurdles, keep an eye on the future of home appliances trends to watch in 2025, where self-cleaning sensors are becoming the new standard. Real expertise isn’t about buying the most expensive gear; it’s about understanding that these machines are precision instruments that require a light touch rather than brute-force chemicals.
To really scale your home maintenance from ‘reactive’ to ‘proactive,’ you need more than just a set of rubber feet; you need a dedicated kit. I personally keep a small, 2-gallon wet-dry vacuum in my laundry room specifically for maintenance days. Why? Because you shouldn’t have to mop up a gallon of stagnant water every time you check the pump. Learning how to clean a front-load washer filter without flooding the room changed my life—I now use the vacuum to suck the water out of the emergency drain hose before I even twist the filter cap. This same tool is invaluable for your kitchen as well. If you know how to clean the hidden filter in your energy efficient dishwasher, you’ll realize that standard sponges often just move the debris around. A vacuum or a high-pressure spray bottle is the only way to get into the crevices of that fine mesh. I’ve found that the International Electrotechnical Commission (IEC) Standard 60456 for washing machine performance highlights that even a 5% blockage in water flow can increase energy consumption by nearly 12%. That’s a massive hit to your utility bill just for a bit of lint.
How can I maintain these precision sensors without a degree in engineering?
It starts with calibration. We often trust the digital readout on our screens blindly, but I’ve found my fridge can be off by as much as four degrees. I recommend using a digital thermocouple—the kind used for sous-vide cooking—to check the internal air temp. Knowing how to calibrate your refrigerator thermometer without calling a pro is a ten-minute job that prevents your milk from spoiling or your lettuce from freezing. Similarly, when the power flickers, don’t just assume the ‘Smart’ brain recovered. You often need to know how to reset your smart fridge after a power outage to ensure the compressor logic hasn’t defaulted to a high-energy ‘pull down’ mode that it never exits. To achieve a top smart appliances for a seamless home experience in 2025, you have to treat the software with as much care as the hardware. I check for firmware updates once a month—it sounds tedious, but it’s the only way to ensure the AI-driven cycles are still optimized. Looking ahead, the future of home appliances trends to watch in 2025 suggests that machines will soon self-diagnose these issues, but until then, the human touch is your best defense against a 3 AM floor flood. I want you to go to your dishwasher right now and pull out the bottom rack—if you haven’t checked that filter in the last thirty days, that is your first mission. Let me know what you find under there; usually, it’s a graveyard of popcorn kernels and broken glass!
Why My Perfectly Level Washer Still Managed to Dance
One of the hardest lessons I learned is that leveling isn’t a one-and-done event. Because floors—especially those in older homes—can settle or expand with humidity, your machine’s footing is constantly in flux. I’ve also realized that washing machines that save water are actually more prone to violent vibrations if the load isn’t perfectly distributed because they use less water to ‘cushion’ the clothes during the initial spin ramp-up. Another lightbulb moment? Sometimes it is the software, not the hardware. You should learn how to update the firmware on your smart kitchen appliances, as manufacturers often release patches that actually change how the motor manages initial torque to prevent the ‘jump’ before it starts.
The Gear Every Smart Home Owner Needs in Their Drawer
If you want to truly master your laundry room, you need more than just a screwdriver. My personal toolkit includes a torpedo level for quick monthly checks, a digital thermocouple for accurate temp readings, and a small wet-dry vacuum for filter maintenance. For those looking for a comprehensive roadmap, the ultimate guide to smart home appliances for a modern living is an excellent resource for understanding how these gadgets interact. I also suggest bookmarking the AHAM standards site to see how your machine is actually supposed to perform under laboratory conditions.
Stop Fighting Your Appliances and Start Mastering Them
At the end of the day, your appliances are there to serve you, not the other way around. By taking ten minutes a month to check the level and clear the filters—like knowing how to clean the hidden filter in your high-end dishwasher—you are extending the life of your machines by years. Don’t be intimidated by the tech; embrace the maintenance, and your washing machines will reward you with silence. Have you ever found a ‘surprise’ object in your washer filter that was causing a ruckus? Let me know in the comments below!