
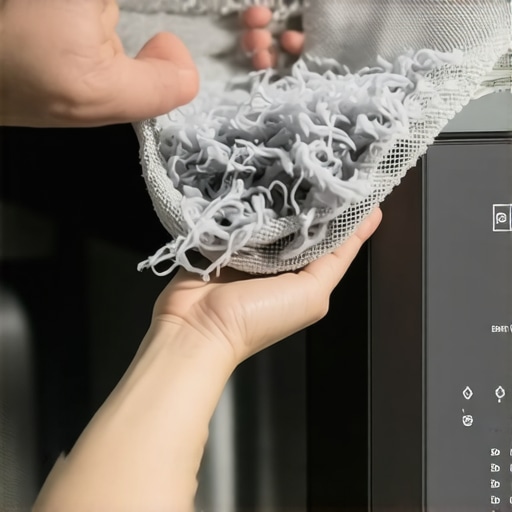
I remember sitting on my couch, feet up, when my phone buzzed with an annoying little chirp. It was my dryer. “Airflow restricted,” the notification read. I groaned and rolled my eyes. I had just “cleaned” the lint trap five minutes ago. Or so I thought. When I finally trudged downstairs and pulled that mesh screen out, I realized my version of cleaning was a total joke. A thick, grey felt-like layer was plastered to the screen, and behind it? A mountain of fluff was choking the life out of my expensive machine. This isn’t just about making sure your socks get dry; it’s about efficiency and, frankly, not burning your house down. If you’ve ever wondered why your clothes are still damp after a full cycle or why your smart app is screaming at you, you’re in the right place. We are going to fix this today. I’m going to show you how to go beyond the simple swipe and actually maintain the heart of your appliance.
Why a Quick Swipe Isn’t Saving Your Dryer
Most of us treat the lint trap like a suggestion rather than a strict requirement. We do a quick swipe, maybe a little flick of the wrist, and shove it back in. But here’s the thing: smart dryers are incredibly sensitive. They use advanced sensors to monitor air pressure and temperature in real-time. When those sensors get even a little bit of residue on them, they start throwing phantom errors. I learned this the hard way when I almost called a repairman for a “broken” sensor that was actually just covered in a waxy film from my favorite dryer sheets. If you want to keep your modern living setup running smoothly, you have to look past the surface. This is especially true if you are using compact dryers that do not require external venting, where internal airflow is the only thing standing between you and a laundry room flood of humidity.
Are These High-Tech Sensors Actually Worth the Hassle?
You might be skeptical. You just spent a small fortune on a top-of-the-line machine, and it should “just work,” right? Wrong. In fact, these machines need more love than the old clunkers from the 90s because they are tuned to such tight tolerances. According to the National Fire Protection Association (NFPA), nearly 16,000 home fires are caused by clothes dryers every year, and the leading cause is a failure to clean them. It’s a sobering thought that usually gets ignored until you smell something singed. Have you ever felt the back of your dryer and noticed it was scorching hot to the touch? That’s a cry for help. Just like how smart washing machines simplify laundry day by doing the heavy lifting, your dryer expects you to handle the basic maintenance to keep its AI brains happy. I used to think a deep clean was a once-a-year chore, but after seeing the gunk that accumulates in just a month, I’ve changed my tune. Have you ever ignored that “check lint” light only to regret it an hour later when your clothes came out steaming but soaked? Tell me I’m not the only one who has tried to outsmart the machine.
Deep Cleaning the Screen Beyond the Swipe
You think your lint screen is clean because it looks clear, but appearances are deceiving. Grab your screen and take it to the kitchen sink. Run some water over it. Does the water pool up instead of flowing through? That is a coating of wax and oils from dryer sheets and fabric softeners. It is exactly like the residue that causes problems when white streaks on dark clothes appear on your favorite shirts. To fix this, use a bit of dish soap and an old toothbrush. Scrub the mesh gently until the water flows through like a sieve. I remember the first time I did this; I was shocked at how much pressure I had to apply to break through that invisible barrier. Once I dried it and popped it back in, the restricted airflow warning on my phone vanished before the next load even finished.#IMAGE_PLACE_HOLDER_B#
Vacuum the Housing Before It Clogs
Cleaning the screen is only half the battle. If you look down into the slot where the screen sits, you will likely see a graveyard of lint that escaped the edges. This is where the real danger lies. Use a thin vacuum attachment or a flexible dryer lint brush to fish out the debris. I once pulled out a wad of lint the size of a small rodent from my machine. It is a messy job, but it prevents the internal sensors from overheating. Just like when you clean the debris filter on a washer, this task should be on your monthly rotation to avoid mechanical failure.
Locate and Polish the Moisture Sensors
Ever notice two small metal bars inside the dryer drum, usually near the front? Those are your moisture sensors. They tell the smart brain when your clothes are dry. If they are coated in the same waxy residue as your lint screen, they will report that the clothes are still wet, leading to over-drying and sky-high electric bills. Take a cotton ball dipped in rubbing alcohol and wipe those bars clean. It is a tiny maintenance trick that ensures your ultimate guide to smart home appliances setup stays efficient. If you are getting weird notifications, it is often a sensor issue, much like why your smart dishwasher app keeps giving you phantom errors caused by a dirty internal probe.
Clear the Path to the Outside World
If your lint trap and sensors are spotless but the machine still feels like a furnace, the problem is in the ductwork. Most people forget the silver slinky pipe behind the machine. Over time, lint bypasses the trap and builds up in the bends of the hose. If you are using compact dryers that do not require external venting, you have a condenser to clean instead, but for everyone else, that duct is a literal fuse. Detach the hose and use a leaf blower or a specialized duct cleaning kit to clear the line. When I finally cleared my 15-foot run to the exterior wall, I found a bird nest blocking the flap. My drying time dropped from 80 minutes to 35. This level of care is what keeps the future of home appliances running at peak performance without constant repairs.Now that the dryer is humming along, let’s talk about the biggest lie we’ve all been told: you need to rinse your dishes before you load them. In my experience, pre-rinsing is a mistake that actually makes your machine perform worse. Most innovative dishwashers with AI technology use turbidity sensors to measure how much soil is in the water. If you pre-rinse, the sensor essentially gets ‘tricked’ into thinking the load is clean and runs a shorter, cooler cycle. This often results in gritty white film on your plates because the detergent enzymes have nothing to latch onto. A study by the American Council for an Energy-Efficient Economy (ACEEE) confirms that modern units are designed to handle food particles, and pre-rinsing is a redundant habit that wastes thousands of gallons of water annually.
Is the Eco Mode on your dishwasher actually doing more harm than good?
You might think you are doing the planet a favor, but using the eco setting exclusively can be a trap. While it is one of the best energy-saving settings for daily use, it often operates at lower temperatures that fail to break down animal fats and grease. Over time, this causes ‘sludge’ to build up in your drainage system. The truth about the eco mode is that you should run a ‘heavy’ or ‘sanitize’ cycle at least once a month to blast out that residue. #IMAGE_PLACE_HOLDER_C# Then there is the ‘detergent trap’ in your laundry room. Many people assume more soap equals cleaner clothes, but the secret to using less detergent is understanding that high-efficiency machines use very little water. Excess suds create a ‘suds lock,’ causing why your washing machine takes much longer than the timer says as it struggles to pump out the foam. This can even lead to white streaks on dark clothes that many mistake for lint. If your front loader is vibrating so hard it shakes the house, check for suds buildup first—it can unbalance the drum just as easily as a heavy towel. Have you ever fallen into this trap? Let me know in the comments.It’s funny how we treat our refrigerators like pieces of furniture rather than the complex thermal machines they actually are. We buy them, shove them into a tight alcove with barely an inch of breathing room, and then wonder why the milk feels lukewarm two years later. I used to be the person who only looked at the fridge when I was hungry, but after a catastrophic compressor failure during a summer heatwave, I realized that maintenance is the only thing standing between a fresh salad and a $500 grocery loss. If you start hearing a specific refrigerator noise that means your fan motor is dying, you are already behind the curve.
Stop Ignoring the Hum in Your Kitchen
The biggest mistake I see—and I’ve made it myself—is neglecting the condenser coils. These are usually tucked away at the bottom or the back, acting as the heat exchange for the whole unit. When they get caked in pet hair and dust, the compressor has to work twice as hard. The U.S. Department of Energy (DOE) notes that dirty condenser coils can increase energy consumption by as much as 30%, which is essentially throwing money into a trash compactor. I now keep a long, flexible coil brush and a can of compressed air in my utility closet. It takes five minutes to brush them off, but it’s the single best way to ensure your choosing the right refrigerator tips from industry experts actually pay off in the long run.
How do I keep my smart fridge from dying early?
The key is to treat the hardware and the software as two different animals. For the hardware, perform the ‘dollar bill test’ on your gaskets. Close the door on a dollar bill; if it slides out easily, your seal is gone, and you’re leaking cold air. You should definitely learn how to check if your refrigerator door seal is actually airtight before you blame the thermostat. On the software side, keep your firmware updated. I’ve seen fridges struggle to maintain temperature simply because a bug was taxing the CPU. However, be careful with your network setup; I’ve had to learn how to keep your smart home hub from interfering with app-signals because my Zigbee lights were literally knocking my fridge offline. #IMAGE_PLACE_HOLDER_D#
The Tools That Saved My Food and My Sanity
If you want to get serious, stop trusting the digital readout on the door. Those sensors can drift over time. I use a cheap, independent digital thermometer to verify the internal temps. If the numbers don’t match, you need to know how to recalibrate your refrigerators internal thermometer for better cooling to keep your food safe. Looking toward the future of home appliances, we are going to see more machines that use AI to predict these failures before they happen. But until then, you are the primary sensor. I highly recommend you spend ten minutes this weekend checking your fridge settings; you can actually save money on your electric bill by changing three fridge settings that most people leave on factory defaults. Go grab a thermometer and check your freezer right now—if it’s not exactly 0°F (-18°C), your settings need a tweak.
The Costly Lessons I Learned About Ignoring My Machines
It took me three years and two flooded laundry rooms to realize that a smart appliance is only as smart as its owner’s maintenance schedule. First, I learned that sensors are essentially the eyes of your machine; if they are blurry with residue, the brain makes bad decisions. Second, hard water isn’t just a nuisance for your skin—it’s a mechanical assassin that slowly chokes the life out of heating elements. Third, that ‘Eco Mode’ you love might be creating a grease graveyard in your pipes if you don’t run a hot cycle occasionally. Finally, the most important lesson: if it sounds different, something is wrong. Don’t wait for the error code to tell you what your ears already know.
What I Keep in My DIY Maintenance Drawer
You don’t need a professional toolkit to keep things running. I swear by a 24-inch flexible dryer brush—it reaches the lint that your vacuum simply can’t touch. I also suggest keeping a dedicated bottle of high-purity rubbing alcohol; it is the best way to clean those sensitive metal moisture bars without leaving behind a new film. For anyone looking at the future of home appliances, I highly recommend keeping the manufacturer’s PDF manuals on a cloud drive. #IMAGE_PLACE_HOLDER_FINAL# Having instant access to error code cheat sheets has saved my sanity more times than I can count. Also, mastering the secret to preventing freezer burn in your smart refrigerator starts with a simple $10 thermometer, not a service call.
Take Back Control of Your Smart Home Today
Owning these high-tech tools should make your life easier, not more stressful. When you take ten minutes to check a seal or wipe a sensor, you are taking back control of your home. If you want to dive deeper, check out these choosing the right refrigerator tips from industry experts to see how the pros maintain their own gear. Your home appliances are the workhorses of your daily life—treat them well, and they will return the favor for a decade. This commitment to care is the foundation for an ultimate guide to smart home appliances that actually works for you. Which of these maintenance steps are you going to try first this weekend? Let me know in the comments below!