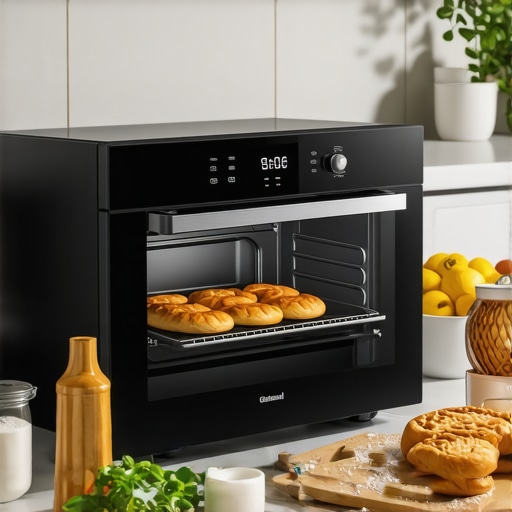
Imagine this: you’re eagerly preparing a dinner that promises to impress, only to find your baked chicken comes out burnt on the outside and undercooked inside. Frustrating, right? That was me a few months ago. I thought I had everything under control with my new smart oven—until I noticed my baked goods were inconsistent at best. It was a lightbulb moment: my oven wasn’t calibrated properly.
That realization led me down a rabbit hole of troubleshooting and finally mastering the art of calibration. Trust me, once I aligned my oven’s temperature sensors correctly, cooking became easier and results more predictable—no more guessing games in the kitchen.
Why Proper Calibration Can Make or Break Your Cooking Experiences
Many home cooks overlook the importance of calibrating their appliances, assuming that factory settings are always accurate. But the truth is, even a bit of miscalibration can lead to undercooked roasts or burnt pastries—and that destroys your confidence and messes with your meal plans. Proper calibration ensures your oven’s actual temperature matches what the display shows, making your cooking predictable and efficient.
Here’s a piece of eye-opening info: studies show that inaccurate oven temperatures can cause up to 20% of cooking failures in home kitchens. That’s a huge margin, especially for those of us who rely on our appliances for meals, celebrations, and daily nourishment. If you’re tired of inconsistent results, calibrating your smart oven might be the best kitchen investment you make.
One common mistake I made early on was trusting the oven’s digital readout without verifying its accuracy—a rookie error that can lead to major setbacks. For more insights into common appliance pitfalls, you might want to see this article about washing machines.
Will Calibrating Your Oven Actually Make a Difference?
This is probably your first question. The answer depends on how far off your oven’s temperature is. Even a small discrepancy can throw off recipes, especially baking. But correctly calibrating it can restore your confidence, save ingredients, and elevate your cooking game. Ready to learn how to do it? We’ll walk through the simple steps to fine-tune your smart oven for consistently perfect results.
Gather the Tools and Set Up
Start by acquiring an accurate oven thermometer—think of it as your oven’s blood pressure cuff. Place the thermometer in the center of the oven on a middle rack. Turn on your oven and set it to the temperature specified on the calibration menu, usually around 350°F (175°C).
Monitor the Temperature Readings
After the oven preheats, wait for 15-20 minutes for the temperature to stabilize. Compare the thermometer reading with the digital display. If there’s a difference greater than 5°F, you’ll need to adjust.
Storytime: My First Calibration Attempt
I remember my first try—setting my oven to 350°F, but my thermometer read 340°F. I diligently followed the calibration instructions, adjusting the sensor accordingly. The next bake resulted in perfectly cooked cookies—no more burnt edges or raw centers.
Adjust the Temperature Sensor
Locate the calibration adjustment screw inside your smart oven’s control panel—refer to your manual or online guide for your model. Using a screwdriver, turn the screw slightly clockwise to increase actual temperature or counterclockwise to decrease it. Make small adjustments—1/8 of a turn at a time.
Re-Test and Fine-Tune
Repeat the heating process with the thermometer. Continue adjusting until the reading matches the oven’s digital display within a 2°F margin. Patience here ensures accuracy; rushing can lead to inconsistent results.
Validate Across Different Temperatures
Don’t rely on a single calibration point. Set the oven to 375°F and 425°F, then repeat measurements and adjustments. This creates a calibration curve, ensuring consistent performance across your typical cooking range.
Document Your Settings
Once calibrated, record your adjustments in a notebook or digital note. Some smart ovens permit saving calibration profiles—use these to simplify future adjustments or resets after power outages.
Pro Tip: Prevent Sensor Drift Over Time
Regularly recheck your calibration every 6-12 months or if your cooking results suddenly become inconsistent. Sensors can drift, similar to how washing machine sensors may need retuning over time (check this guide for washing machine calibration).
Many homeowners assume that once appliances are purchased, they require little to no maintenance or nuanced understanding. However, common beliefs like trusting factory settings or believing that newer models are always better can lead to costly mistakes. For example, a prevalent myth is that high-efficiency washers always clean better than traditional ones, but in reality, many high-efficiency models can leave residues like brown spots on white shirts if not properly maintained—more on this in [this guide](https://smartappliancereview.com/why-your-high-efficiency-washer-leaves-those-mystery-brown-spots-on-your-white-shirts).
A significant oversight is neglecting the calibration of digital controls or sensors in smart appliances. Many users assume these features are always accurate, but sensors like temperature probes in refrigerators or moisture sensors in dishwashers can drift over time, causing inefficiency or damage. For instance, an uncalibrated fridge sensor might lead to incorrect cooling, increasing energy bills or spoiling food—learn how to prevent this [here](https://smartappliancereview.com/why-your-refrigerator-compressor-runs-constantly-without-cooling-anything).
Within the realm of dishwashers, a common mistake is ignoring the importance of proper loading and understanding the nuances of detergent dissolution. Digital controls might seem foolproof, but improper loading or using incompatible detergents can lead to poor cleaning results and residue buildup. Check out [how to troubleshoot detergent issues](https://smartappliancereview.com/why-your-dishwasher-tablets-are-not-dissolving-completely) for more.
When it comes to refrigerators, many believe that the temperature settings are always accurate after initial setup. But factors like ventilation, door seals, or sensor placement can cause uneven cooling. Regular calibration of temperature sensors ensures optimal performance and food safety. Discover calibration tips [here](https://smartappliancereview.com/your-smart-fridge-app-keeps-crashing-on-your-phone).
What about appliance lifespan? A surprisingly overlooked aspect is that high-tech features or continuous Wi-Fi connections can introduce vulnerabilities or cause rapid wear if not managed well. Many users neglect firmware updates or sensor maintenance, leading to unexpected breakdowns. Staying proactive with updates and small fixes can extend your appliances’ lifespan and save money.
Finally, the assumption that smart devices operate flawlessly without user intervention is false. Regular maintenance, understanding sensor nuances, and avoiding common pitfalls—like overloading or ignoring calibration—make a profound difference. For example, calibrating your smart fridge’s temperature sensor not only prolongs its life but also ensures food stays fresh longer.
Are you falling into any of these traps? Do you have tips to share? Let me know in the comments and keep your home appliances running smoothly by understanding these hidden nuances.
The Power of Precision Tools in Appliance Maintenance
When it comes to keeping your appliances in top shape, having the right tools can make all the difference. I personally swear by a high-accuracy infrared thermometer, such as the Fluke 62 MAX, because it allows me to quickly check appliance surfaces like refrigerator coils or oven elements to detect hotspots or inefficiencies. This tool helps catch issues early, preventing costly repairs down the line.
Additionally, a digital multimeter is indispensable for diagnosing electrical issues, verifying sensor outputs, and ensuring that control boards are functioning correctly. I prefer the Klein Tools MM6000 because of its durability and precision. Regularly testing your appliance’s voltage and resistance can reveal hidden problems before they turn into major failures.
Leveraging Software for Smart Appliance Care
Beyond physical tools, monitoring software and apps link directly to many smart appliances, providing real-time diagnostics. My go-to is the manufacturer’s companion app—like Samsung SmartThings or LG ThinQ—which offers firmware updates, usage analytics, and troubleshooting tips. Keeping your device’s software current ensures optimal performance and security.
I also use specialized maintenance software that scans sensor data logs and predicts potential failures, similar to what this article details about smart fridge apps. These predictive tools can alert you before a sensor drifts out of calibration, saving downtime and extending appliance life.
Automate Regular Check-Ups
In my routine, I schedule monthly inspections using these tools, focusing on critical components such as door seals, filters, and sensors. For refrigerators, checking door gasket integrity with a simple bill test can prevent energy loss and mold. For dishwashers, inspecting spray arms with a toothpick ensures proper water circulation.
Integrating smart alerts—like notifications for filter replacements or error codes—helps me stay proactive. Remember, consistent minor maintenance tasks outperform reactive repairs. Regular calibration of sensors, such as those in your refrigerator, can be accurately checked with tools like a calibration pad, which I recommend for precision tests. This approach is especially vital as sensors drift over time, much like in high-efficiency washers (see related guide).
How do I maintain my appliances over time?
To ensure your appliances last, establish a maintenance schedule that combines physical tools and digital monitoring. Regularly cleaning filters, inspecting seals, and calibrating sensors—using accurate tools—can reduce energy bills, prevent breakdowns, and improve performance. Consider investing in a magnetic sensor calibration kit for precise adjustments of fridge or washer sensors, which are becoming more common as appliances grow smarter and more complex.
Looking ahead, I predict increased integration of AI-driven diagnostics that will further simplify maintenance. This evolution could mean appliances will automatically self-calibrate or alert homeowners when sensors drift, potentially reducing service calls significantly. Until then, combining high-quality tools with proactive routines remains your best strategy for smart home appliance longevity.
Try setting up a monthly inspection routine using your infrared thermometer and digital multimeter. It might seem detailed now, but you’ll thank yourself when your appliances operate flawlessly for years to come!
What I Wish I Knew Before Calibrating My Appliances
One of the biggest lightbulb moments was realizing that factory settings aren’t set in stone—sensors drift, and calibration is ongoing. I used to think once an appliance was calibrated, I could forget about it. But I learned that regular checks are essential, especially for smart appliances whose sensors can become inaccurate over time.
Another lesson was understanding that tools matter. Investing in a reliable oven thermometer changed my calibration game entirely. Accurate readings are the backbone of any successful adjustment, and low-quality tools can lead you astray.
Lastly, I discovered that patience is key. Small adjustments, repeated tests, and cross-checked temperatures across different settings are what truly lead to perfection. Rushing through calibration often results in missed accuracy, which defeats the purpose of the effort.
Tools, Resources, and Strategies I Trust for Optimal Appliance Performance
For precise temperature calibration, I swear by the Fluke 62 MAX infrared thermometer—it’s dependable and quick, helping me verify oven and refrigerator sensor accuracy. To diagnose issues more thoroughly, my go-to is a digital multimeter like Klein Tools MM6000, which helps me track sensor resistance and electrical integrity.
Among software solutions, the manufacturer’s official apps such as LG ThinQ or Samsung SmartThings provide invaluable diagnostics and firmware update features. They keep my appliances at peak performance and alert me if any sensors are drifting outside normal ranges.
I also follow dedicated blogs and online forums where experienced homeowners share calibration tips and troubleshooting stories. These insights often reveal tricks that aren’t in manuals but make a huge difference, like specific calibration screw adjustments or sensor cleaning routines. If you’re serious about appliance longevity, regular use of calibration and diagnostic tools is an investment that pays off long-term.
Keep Moving Forward: Your Appliances Deserve It
Remember, mastering appliance calibration isn’t just about fixing a problem—it’s about empowering yourself to maintain a smarter, more efficient home. Each small calibration check is a step towards fewer breakdowns, lower energy bills, and better results in your cooking and cleaning routines. Don’t shy away from taking control; your appliances will thank you for the extra care, and you’ll gain confidence in your home maintenance skills. Are you ready to start fine-tuning your appliances and enjoy consistent, reliable performance? Share your experiences or ask questions below, and let’s keep learning together.
About the Author
Can Imir
Senior Technologist – Product Designer – Mentor
Can Imir is a Senior Technologist and Product Designer with extensive expertise in the home appliance industry. With a career focused on platform design and radical innovation, Can brings a deep technical understanding of how modern appliances are engineered, manufactured, and optimized for the consumer market. His background encompasses everything from incremental facelifts to the complete design and installation of production lines, providing him with a unique inside-out perspective on the products reviewed at smartappliancereview.com. As a specialist in cost optimization and industrial design, Can understands the balance between cutting-edge technology and practical value. He leverages his years of experience in the appliance sector to provide readers with authoritative insights into product durability, efficiency, and technological advancement. His work in the industry ensures that his reviews are grounded in engineering reality rather than just marketing claims. Beyond his technical achievements, Can is a dedicated mentor who is passionate about sharing his knowledge and helping others navigate the complexities of modern home technology.