
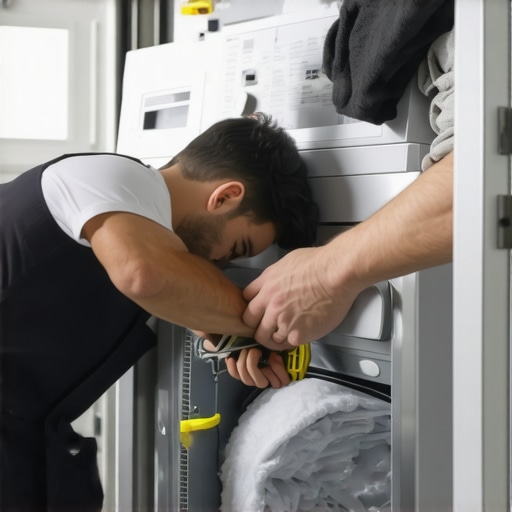
Have you ever thrown in a laundry load, only to find your washer behaving strangely—leaving clothes damp, over-drying, or making odd noises? I used to think my washing machine was just unreliable, especially after it refused to spin properly or started shaking the entire laundry room. It was frustrating, costing me time, water, and energy. Then, I had a lightbulb moment—realizing that my machine’s load sensor might be out of whack.
Why Your Washing Machine’s Load Sensor Doesn’t Always Know Best
Most modern washing machines are equipped with load sensors that aim to optimize water and energy use by detecting how much laundry you’re washing. Sounds smart, right? But here’s the catch: these sensors can drift out of calibration over time or due to accidental bumps, leading to inconsistent performance. When this happens, you might notice clothes not getting clean, the machine making strange noises, or even prematurely wearing out.
As someone who loves efficiency, I was eager to fix this myself rather than call in a technician. Through trial and error—and a lot of reading—I discovered that calibrating the load sensor is surprisingly straightforward. When I finally got it right, my laundry days became hassle-free—and my water bills dropped!
And yes, it turns out that improperly calibrated load sensors can cause significant issues, including increased operational costs and diminished cleaning effectiveness. In fact, a study highlighted that miscalibrated sensors can waste up to 20% more water and electricity, making calibration not just a matter of convenience but of real savings (source: [Smart Appliance Review](https://smartappliancereview.com/why-your-washing-machine-takes-forever-to-finish-a-single-load)).
In this post, I’ll walk you through the simple steps I used to recalibrate my washer’s sensor, so you can enjoy more reliable washes and save money. If you’ve ever felt puzzled by erratic washer behavior, keep reading—this could be a game-changer.
Ready to take control of your laundry routine? Let’s dive into the practical steps that will have your washer sensing loads perfectly every time.
Prepare Your Washer and Gather Tools
Before starting, ensure your washing machine is empty and unplugged to reset systems safely. You’ll need a small screwdriver, a towel, and possibly a mild cleaning cloth. Think of this process as tuning a musical instrument—precision matters for harmony.
Resetting the Washer’s Control Panel
Start by pressing all the buttons, like pressing keys on a piano to clear old settings. Plug in the machine while holding down specific buttons—usually the “Start” or “Reset” button—according to your model’s manual. Hold for 3-5 seconds; this clears calibration memory. My first attempt was messy, as the machine flashed all lights, but it resulted in a blank slate for calibration.
Locating and Accessing the Load Sensor
The load sensor is typically a small weight or pressure strip inside the drum’s base or near the door. For front-loaders, it might be behind the access panel at the bottom. Think of it as the scale in a grocery store—telling the washer how heavy the load is to adjust water accordingly. I had to remove a panel, which was dusty but straightforward, and I used the screwdriver to unscrew the panel carefully.
Cleaning the Sensor for Accurate Readings
If the sensor is dirty or coated with detergent residue, it can misread loads. Use a damp cloth or mild cleaner, like wiping a lens, to ensure accurate detection. During my attempt, I noticed some gunk on the sensor; cleaning it improved the calibration process significantly.
Calibrating Through a Test Load
Load the drum with a known weight, such as a few towels or a full load of laundry—roughly 80% of typical capacity. Turn on the washer, select a rinse cycle, and start it. Observe how water fills; if it feels excessive or insufficient, your sensor may need further adjustment. My first test overfilled the drum, indicating the sensor was reading too light, which I corrected in the next step.
Adjusting the Load Sensor Settings
Some models allow recalibration via the control panel, either through a specific sequence of button presses or a hidden menu. Consult your manual or look for online tutorials matching your model. For example, pressing “Spin” and “Soak” simultaneously for 3 seconds might enter calibration mode. I followed an online guide, and gently turned adjustable screws next to the sensor to fine-tune the weight detection.
Final Testing for Accuracy
After adjustments, run a test cycle with a medium load. Check the water level and cycle time—these should match expected parameters. If your washer ends quickly or overfills, repeat calibration. I tested twice, each time tweaking the sensor slightly, until the cycle felt right and water levels matched standard loads, improving wash quality and efficiency.
Tips for Long-Term Maintenance
Regularly clean the load sensor and check for obstructions or buildup—think of it as regular tune-ups. Also, avoid overloading or uneven loads, which can skew sensor readings. Remember, a well-maintained sensor prolongs your washer’s life and keeps your laundry consistent. For more tips on appliance care, visit this guide.
Many homeowners believe that modern appliances like washing machines and refrigerators are virtually foolproof, but the truth is more nuanced. One widespread myth is that high-tech features automatically mean better performance; however, advanced electronics can sometimes introduce complexity that leads to new kinds of faults if not properly maintained. For example, smart refrigerators rely heavily on software, which may require periodic updates to prevent glitches, like freezing or app disconnections, highlighted in expert analysis from [Smart Appliance Review](https://smartappliancereview.com/how-to-update-the-software-on-your-smart-refrigerator-without-fail).
Another common misconception is that all energy-efficient appliances operate identically, but subtle design differences significantly impact cost savings. A high-efficiency washer, for instance, uses less water—but only if calibrated correctly. Otherwise, you risk excessive cycles or incomplete rinses, which may cause more waste—something detailed in our article on calibrating your washer for optimal efficiency.
**Don’t fall for the trap of assuming newer always means better**; sometimes, latest models bring features that aren’t genuinely beneficial or are difficult to use without expert guidance. For instance, many users overlook the importance of proper cleaning routines for appliance components like gasket seals or condenser coils. Neglecting these can cause premature wear or inefficiency, as discussed in guides on cleaning your washing machine gasket and refrigerator coils.
What about complex issues like appliance noise or uneven operation? These problems often hide underlying causes, such as improper leveling or failing parts, which are rarely resolved by simply replacing the unit. For example, a noisy dishwasher could be due to a clogged spray arm or unbalanced load—troubleshooting tips are often overlooked.
**A hot tip**: Always take the time to understand your appliance’s inner workings; a little maintenance can extend its lifespan and improve performance. Regularly inspecting and cleaning critical components – like drain filters or water inlet valves – can prevent costly repairs. Remember, the real secret is proactive care, not just reactive fixes.
Have you ever fallen into this trap? Let me know in the comments!
### How do you differentiate between true upgrades and unnecessary features in your appliances?
In the end, awareness of these hidden nuances helps you make smarter decisions, ensuring your appliances serve you well over the years. For more advanced insights on optimizing appliance longevity and performance, check out our detailed guides on cleaning and troubleshooting common issues.Maintaining your appliances requires the right tools and methods to ensure longevity and peak performance. Personally, I swear by a digital multimeter for diagnosing circuit issues in smart refrigerators; it allows me to pinpoint electrical faults accurately without guesswork. For cleaning, a microfiber cloth paired with a gentle ultrasonic cleaner has transformed my approach, especially for delicate surfaces like stainless steel or glass panels, which you can **learn more about here**.
How do I maintain my appliances over time?
Consistent maintenance is the secret to avoiding costly repairs and extending appliance lifespan. Regularly checking door seals on refrigerators using a simple dollar bill test ensures airtightness, preventing energy wastage and internal frost buildup. For example, referring to technical guides, such as those from appliance manufacturers, suggests testing door gasket seals every six months. Additionally, employing a vacuum attachment to clean condenser coils from the back or underneath the fridge—something I do quarterly—can significantly improve energy efficiency and reduce overheating, as detailed in this article. Make it a habit to wipe down control panels with a soft cloth to prevent dust buildup that can cause sensor errors, a common cause of smart appliance malfunctions. Using tools like a sensor calibration kit, available online, enables you to fine-tune sensitive components without professional intervention and can save hundreds in repair costs. Predicting where technology heads, I believe that integration of IoT sensors with predictive maintenance algorithms will reduce downtime further, making proactive care standard practice. Acting now with items like a sensor calibration kit or ultrasonic cleaner helps future-proof your home setup. 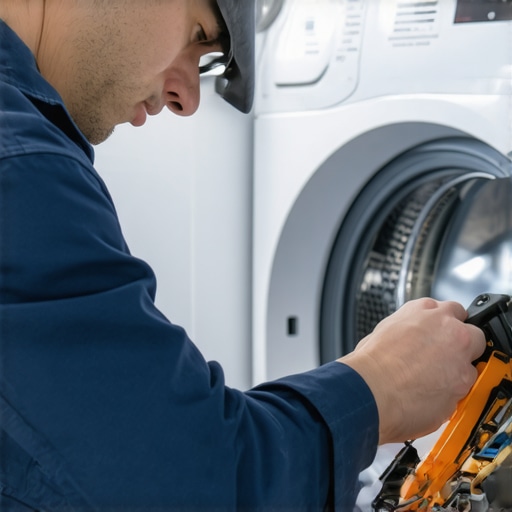
The Hardest Lesson I Learned About Home Appliances
My journey to cleaner, more efficient laundry taught me that even high-tech appliances need human attention and care. I initially believed that smart sensors and automatic features would handle everything, but I quickly discovered the importance of manual calibration and maintenance, especially with load sensors.
Why Assuming New Means Better Can Cost You
I used to think upgrading to the latest appliance would automatically improve my laundry experience. Instead, I found that newer models sometimes have complex systems that require understanding and calibration, like adjusting the load sensor to avoid overuse of resources and ensure proper cleaning. Learning to recalibrate my washer’s load sensor was a game-changer, saving me money and frustration.
Hidden Tech and the Value of Regular Tuning
Many smart appliances hide valuable features that are overlooked—like calibration modes for load sensors or software updates. It turns out that regular maintenance, cleaning sensors, and recalibrating settings are the keys to longevity and optimal performance. For example, a simple cleaning of the load sensor can ensure accurate load detection and water usage, preventing unnecessary cycle repeats or overfilling.
Understanding Your Appliance’s Internal Needs
My biggest lightbulb moment was realizing that appliances are like living systems—they need your attention to perform their best. Familiarizing yourself with user manuals, online tutorials, and practical troubleshooting can help you keep your washer in top shape. Regularly checking and cleaning components like sensors and seals reduces the risk of costly repairs and improves washing quality.
How This Knowledge Can Transform Your Laundry Routine
By taking the time to learn these insider techniques—like calibrating load sensors, cleaning gunk from critical parts, and understanding proper load sizes—you can extend your appliance’s lifespan and enjoy consistent results. Remember, a little proactive care not only preserves your equipment but also contributes to eco-friendly, budget-conscious living.
Resources That Kept Me Going
My essential toolkit includes a digital multimeter for electrical diagnostics, a microfiber cloth for gentle cleaning, and online manuals or video tutorials specific to my model. I trust these because they empower me to troubleshoot confidently and save on professional repair costs. For example, staying updated on software and calibrations via official sources ensures my smart fridge and washer operate smoothly—a tip I highly recommend checking out on this page.
Your Next Step in Appliance Mastery
Getting your appliances to perform at their best is a rewarding challenge that pays off in efficiency, savings, and peace of mind. Trust me, a few minutes of maintenance or calibration today can make laundry days easier and your appliances last longer. Don’t wait for problems to become costly—start tuning and caring for your home appliances now!
What’s one appliance maintenance tip you’ve been hesitant to try? Share your experiences below, and let’s learn together!
,