
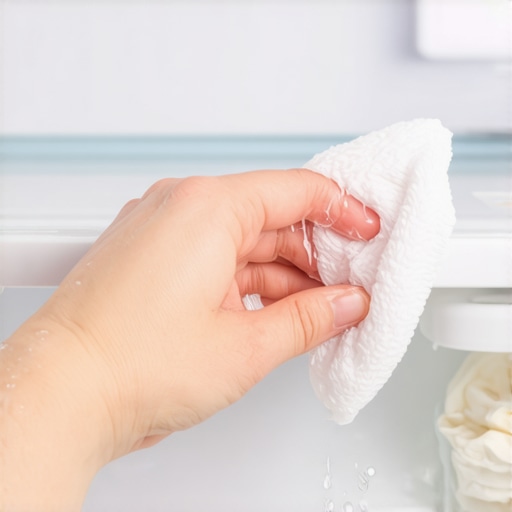
I remember the exact moment I realized I wasn’t the cleaning wizard I thought I was. It was a Tuesday. I moved a jar of kimchi that had been sitting in the back of my crisper drawer for two weeks. Beneath it sat a neon-orange ring so bright it looked like it belonged on a hazard sign. I scrubbed. I swore. I used enough elbow grease to power a small village, but that stain didn’t budge. It felt like a permanent tattoo on my pristine white shelving. For a minute, I actually considered [choosing the right refrigerator tips from industry experts](https://smartappliancereview.com/choosing-the-right-refrigerator-tips-from-industry-experts) just so I could justify buying a new one and hiding my shame. But then, I got smart. Most people think that once a stain sets into the plastic liner, it’s there for life. It isn’t. Today, I am going to walk you through the method I discovered that lifts those stubborn shadows without ruining the finish.
Don’t Let a Juice Spill Ruin Your Kitchen Zen
I’ve made plenty of mistakes in the past, including the time I used a coarse scouring pad on a beet stain and ended up scratching the liner so badly it looked like a cat had been trapped inside. That was a huge mistake that actually made future stains even harder to remove because the dirt had new grooves to hide in. Whether you are dealing with [refrigerators in 2025](https://smartappliancereview.com/refrigerators-in-2025-top-features-that-transform-your-kitchen) or an older model, the plastic is more porous than you think. Have you ever stared at a yellowed patch in your fridge and felt a wave of pure defeat? I certainly have. This matters because keeping your appliance clean is actually [the secret to making your refrigerator last twice as long](https://smartappliancereview.com/the-secret-to-making-your-refrigerator-last-twice-as-long). Dirt and grime can degrade the plastic over time and harbor odors that affect your food.
Is it actually possible to fix this without harsh chemicals?
You might be skeptical. I was too. I thought I needed some industrial-grade acid to melt the stain away. However, research from the American Chemical Society suggests that many food dyes, like the curcumin in turmeric, create a hydrophobic bond with plastic polymers. This means water-based cleaners just slide right off. You don’t need harsher chemicals; you need a smarter chemical approach. We are going to use the principle of ‘like dissolves like’ to pull that pigment out of the plastic and back into a cleaning solution. This isn’t just about aesthetics; it’s about reclaiming your kitchen from the ghosts of last month’s leftovers. Let’s get into the nitty-gritty of what actually works.
Lift the Shadow with an Oil-Based Pre-Treatment
To get that neon-orange ring out, we have to stop thinking like a dishwasher and start thinking like a chemist. Most food stains, especially those from curry, kimchi, or pasta sauce, are fat-soluble. They are like a stubborn houseguest who won’t leave until you offer them something they actually like. In this case, that ‘something’ is fat. Water-based sprays just bounce off the surface because the stain is literally repelling the moisture. I learned this the hard way when I tried to scrub a turmeric spill for forty minutes with a blue window cleaner, only to make the spot look shinier but no less yellow. It wasn’t until I grabbed a bottle of simple vegetable oil that the magic happened. By applying a small amount of oil to the stain, you create a solvent that mimics the properties of the pigment.
Break the Hydrophobic Bond First
Start by drying the area completely. If the plastic is wet, the oil won’t be able to penetrate the stain. Rub a teaspoon of vegetable oil or mineral oil directly onto the discolored patch with a soft cloth. Let it sit for at least ten minutes. You might see the oil start to take on the color of the stain; that’s the pigment finally letting go of the plastic liner. This is a much safer approach than using harsh solvents that can strip the finish, much like how you have to be careful when learning the best way to clean the outside of a black stainless steel fridge without scratching it. Once the oil has sat, wipe it away with a dry paper towel. You will likely see a significant portion of the stain come up immediately.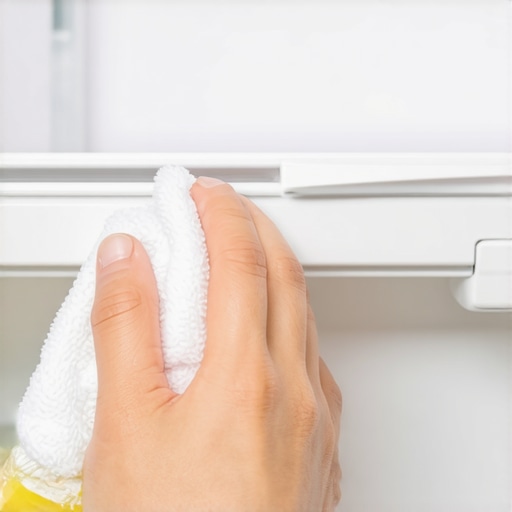
Gentle Scouring with a Baking Soda Slurry
If a ghost of the stain remains, do not reach for the bleach yet. Plastic is soft, and microscopic scratches are the enemy of a clean kitchen. I once used a heavy-duty scouring sponge on my crisper drawer, and while the stain disappeared, the surface became so dull and rough that every future spill turned into a permanent mark. Instead, create a paste using three parts baking soda and one part water. This slurry acts like a very fine sandpaper that polishes rather than gouges. Smear it over the spot and let it dry to a crust. This slow-drying process helps pull the last of the oils and pigments out of the pores. It’s a similar principle to the easiest way to clean an ice maker that makes your water taste like onions, where the goal is to neutralize odors and residues without leaving a chemical aftertaste.
Deep Pores Need Oxygen Power
For the most ancient, deep-set stains that have survived the oil and the baking soda, you need an oxygenated lift. Hydrogen peroxide is your secret weapon here. It’s a mild bleaching agent that breaks down the chemical bonds of the color molecules without dissolving the plastic itself. Soak a cotton ball in 3% hydrogen peroxide and tape it over the stain with some painter’s tape. Leave it there for an hour. When you peel it back, the oxidation process should have ‘bleached’ the remaining pigment into invisibility. Maintaining these surfaces is actually the secret to making your refrigerator last twice as long because it prevents the degradation of the interior components. While you are at it, check your settings and learn how to use your fridges humidity slides to keep produce fresh to prevent future spills from rotting and creating new stains in the first place.Beyond just the stains, there is a nuance to appliance care that most people completely miss. Everyone says that a ‘deep clean’ involves scrubbing every inch with the strongest chemicals you can find, but in my experience, a gentle touch works much better for the longevity of the machine. The biggest mistake? Thinking that modern appliances are just ‘dumb’ metal boxes. They are high-precision computers that happen to keep food cold or wash clothes. If you treat them with the same aggression as a 1985 model, you will end up needing to know the hidden reset button on your smart refrigerator that fixes glitches sooner than you think.
Why is your ‘deep clean’ actually killing your appliance’s lifespan?
It comes down to the sensors. A study by the Association of Home Appliance Manufacturers (AHAM) highlights that chemical buildup on internal sensors is a primary cause of ‘phantom’ errors and performance dips in modern units. For instance, if you over-apply polish to the exterior without buffing it properly, you might be left wondering why your smart fridge screen keeps going black every morning as the residue interferes with touch sensitivity or light sensors. Inside the unit, those same harsh chemicals can prematurely degrade the rubber gaskets. I have seen it a thousand times: someone tries to be ‘extra clean’ and ends up with a fridge that cannot maintain its temperature. This is one of the many 5 mistakes that are shortening the life of your smart refrigerator. 
Avoid the Detergent Trap Before You Call a Pro
This logic extends to your laundry room too. There is a common belief that more soap equals cleaner clothes. This is a total myth. In fact, the reason why your washer doesn’t need a whole cup of detergent to get clothes clean is because modern machines are designed to use high-pressure water jets and specialized enzymes, not just friction and bubbles. When you overdo it, the excess suds act as a cushion, preventing the clothes from rubbing against each other, which actually leaves them dirtier and leaves white streaks. It also leads to that gross bacterial buildup that explains the reason your high-efficiency washer smells like old gym socks. Have you ever fallen into this trap and thought your machine was broken when it was just ‘choking’ on soap? Let me know in the comments. Mastering these small nuances is the ultimate guide to smart home appliances for a modern living that actually saves you money and stress.
Stop Guessing and Start Measuring with a Multi-meter
I used to think that when a machine died, it was just ‘the board’ and I was out five hundred dollars. Then I bought a cheap digital multi-meter and realized that half the time, it is just a five-dollar thermal fuse that blew because of a simple lint clog. If you really want to graduate from a casual owner to a master of your domain, you need to learn to check for continuity. This is especially true when you are trying to figure out why your refrigerator is making a loud humming noise. Is it the compressor failing, or just a fan motor that isn’t getting the right voltage? A multi-meter gives you a definitive answer so you aren’t throwing parts at a ghost. In my own kit, I keep a Klein Tools MM325 because it’s rugged enough to survive being dropped behind a heavy washer while I’m troubleshooting why your washing machine is moving across the floor during the spin. Measuring the resistance across a heating element or a solenoid valve takes thirty seconds and saves you a week of waiting for a repair technician.
The Flexible Vacuum Wand is Your Fridge’s Best Friend
The number one reason for compressor failure isn’t age; it’s heat. And heat builds up because we all ignore the coils. I personally use a thirty-six-inch flexible crevice tool that attaches to my vacuum. It is thin enough to slide under the unit without having to tilt the whole machine. According to technical documentation from the International Electrotechnical Commission (IEC), specifically IEC 60335-2-24 regarding household refrigeration, maintaining consistent thermal exchange is the single most important factor for energy efficiency. When those coils get caked in pet hair, the compressor runs twice as long. This is why you must learn how to clean the hidden debris under your refrigerator grille at least twice a year. If you don’t, you are literally burning money on your utility bill every single month. 
How do I maintain my appliance’s digital health over time?
With the rise of the ultimate guide to smart home appliances for a modern living, maintenance isn’t just about grease and filters anymore; it’s about firmware. I’ve seen perfectly good fridges start ‘glitching’ simply because their internal clock was out of sync with the home router, causing a loop in the software. You need to periodically check for updates in your manufacturer’s app. If the screen starts acting up, you should know how to hard reset your smart refrigerator control panel before you assume the hardware is fried. Looking toward the future of home appliances trends to watch in 2025, we are going to see ‘self-healing’ software that can automatically re-calibrate sensors, but for now, the responsibility is on us. I predict that within three years, your dishwasher will send a push notification to your phone not just when it’s done, but the exact moment it detects a partial blockage in the drain. Until then, you still need to manually check the secret drain filter at the bottom of your fridge you never knew existed to prevent water pools. I challenge you to grab a flashlight this evening, get down on the floor, and actually look under your fridge’s front grille; you might be shocked at what’s been living there.
What My First Expensive Repair Taught Me About Plastic
I used to think that ‘cleaning’ meant making things look shiny for guests, but the real cleaning is for the machine’s sake. One of the biggest shifts in my perspective happened when I realized that microscopic damage is cumulative. If you scratch that plastic liner today, you’ve created a permanent home for bacteria tomorrow. I’ve learned that preventative maintenance is the only way to avoid the hidden costs of cheap budget appliances which often fail earlier if neglected. The hidden costs of cheap budget appliances can really add up if you aren’t careful with the chemicals you use. Another lightbulb moment? Most ‘broken’ modern electronics are just ‘confused’ computers. Before you panic and call a tech, check if your unit needs a firmware update or a simple power cycle.
My Must-Have Toolkit for Every Kitchen
You don’t need a professional’s van to keep your home running smoothly. Here are the items I keep in my kitchen ’emergency’ drawer: First, a high-quality 36-inch flexible vacuum attachment for those refrigerator coils—it’s non-negotiable for energy efficiency. Second, a digital multi-meter for checking continuity; it turns a guessing game into a fixing game. #IMAGE_PLACEHOLDER_E# I always keep a bookmark for top smart appliances for a seamless home experience in 2025 to stay ahead of new maintenance requirements as technology evolves. If you are focused on efficiency, I also recommend reading about washing machines that save water expert advice for 2025 to understand how modern flow-sensors require specific care compared to older models.
The Future of Your Kitchen Maintenance
Taking care of your home appliances shouldn’t feel like a chore that you dread. It’s actually a form of empowerment. When you know how to lift a stain or clear a filter, you stop being a victim of your machinery and start being its master. As we look toward future of home appliances trends to watch in 2025, things will get even more automated, but the human touch—the oil pre-treatment, the coil dusting—will always be the secret to a long-lasting kitchen. Don’t wait for a breakdown to start caring for your gear. Grab that flashlight and take a look under your fridge’s grille this evening. Have you ever discovered a hidden filter or a maintenance trick that saved you from a massive repair bill? Let me know in the comments below!