
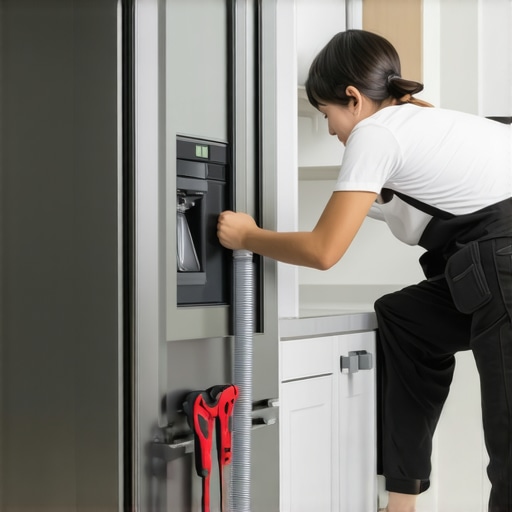
Have you ever felt that sinking frustration when your new smart fridge arrives, and suddenly, you realize you have no idea how to hook up its water supply? I remember the moment well—excited to finally upgrade my kitchen, only to be thwarted by a tangled mess of hoses and confusing instructions. That lightbulb moment hit me hard: installing a water line isn’t as complicated as it seems, especially when you have a clear, step-by-step plan.
Why Connecting Your Water Line Matters More Than You Think
I’ve learned that a properly installed water line isn’t just about convenience—it can significantly extend the lifespan of your appliance and prevent costly leaks. These appliances are smart, yes, but their core functionality depends on reliable water delivery. Without it, features like ice makers and water dispensers just won’t work, leaving you scratching your head and perhaps resorting to bottled water or ice trays.
As I dived into the process, I discovered that many folks overlook simple yet crucial details. For instance, early on, I made the mistake of neglecting to shut off the main water supply, which caused a small flood in my kitchen. Trust me, that was a lesson learned the hard way. If you’re concerned about making mistakes, you’re not alone—many homeowners worry about installing water lines correctly and safely.
Is Installing a Water Line for a Smart Fridge Really That Challenging?
The short answer is: not if you follow the right steps. With a basic set of tools and some patience, you can do it yourself. Plus, there are plenty of resources and guides—like this one—that can walk you through each phase. Just be cautious: rushing or overlooking small details can lead to leaks or inefficient water flow. Proper installation not only ensures your fridge functions flawlessly but also saves you from future headaches, like troubleshooting water issues or dealing with damage repairs.
When I started, I thought the hardest part would be plumbing, but I was wrong—it’s actually ensuring you have the right materials and understanding the layout of your home’s water system. If you’re feeling unsure, you might want to check out [this article](https://smartappliancereview.com/how-to-unclog-the-air-gap-on-your-kitchen-sink-and-dishwasher) for tips on managing household water lines. Ready to transform your kitchen with a properly fitted water line? Let’s dive into the six simple steps I recommend, based on my experience and some clever tricks I picked up along the way.
Gather Your Tools and Materials
Before starting, assemble essential tools: adjustable wrench, drill, Teflon tape, and a length of flexible water supply hose. Ensure you have the appropriate fittings for your refrigerator model. I learned this the hard way when I ran to the hardware store mid-project, wasting valuable time. Having all tools ready prevents delays and leaks during installation.
Shut Off the Main Water Supply
Locate your home’s main water valve and turn it off to prevent water flow. Picture it as cutting the power before repairing an electrical outlet. I forgot this step once, and water sprayed everywhere, turning my kitchen floor into a mini pond. Always double-check that the valve is fully closed before disconnecting any pipes.
Find the Ideal Connection Point
Identify a cold water line under your sink or near your fridge. Use a shut-off valve connector, which acts like a T-junction. For older homes, check the water pressure and pipe type to avoid incompatible fittings. I used a simple multi-tool to trace the pipes behind my drywall, saving me from unnecessary drywall removal.
Attach the T-Adapter and Connect the Hose
Installing the T-Adapter
Screw the T-connector onto the cold water valve, sealing it with Teflon tape to prevent leaks. Tighten firmly with an adjustable wrench. I once over-tightened and cracked the valve, which resulted in an unexpected leak. Follow manufacturer torque specifications to avoid such mishaps.
Connecting the Water Supply Line
Attach the flexible hose to the T-adapter, securing it with the provided compression nut. Hand-tighten, then give it a quarter turn with the wrench. This ensures a snug fit without damaging the fittings. Remember, a loose connection is a common cause of leaks—so don’t skip this step.
Run the Hose to Your Fridge
Extend the hose behind your appliances, avoiding sharp bends. Use clips to secure it along walls or cabinets, preventing unnecessary stress or kinks. I learned this the hard way when a kinked hose reduced water flow to my ice maker. Proper routing keeps water flowing smoothly and reduces future maintenance.
Connect to the Refrigerator and Turn On Water
Attach the hose to the fridge’s water inlet port, tightening securely. Turn the main water valve back on and check for leaks at all connections. I spent extra time inspecting each fitting and was relieved to find no leaks, saving me from a watery disaster later.
Final Checks and Testing
Activate the fridge’s water dispenser or ice maker to verify operation. Watch closely for drips or leaks over the next few hours. If you notice a drip, tighten the fittings incrementally. Regularly inspect your connections to ensure long-term performance—like I should have done after my initial install to catch a slow leak early.
For persistent issues like clogged or leaking water lines, consider consulting specialized guides or professionals. For example, if you experience persistent leaks, see this article for troubleshooting tips. With patience and attention to detail, you’ll have a reliable water line feeding your smart fridge, enhancing its functionality and your kitchen’s convenience.
Avoid the Oversimplified Views on Appliance Efficiency
Many homeowners believe that choosing the most energy-efficient model automatically guarantees the best performance. However, real-world usage reveals that factors like maintenance routines and installation quality often overshadow the appliance’s STAR ratings. For example, a refrigerator might be rated highly for energy efficiency but can underperform if its condenser coils are dirty, leading to increased electricity bills and faster wear. According to a study published by the Department of Energy, neglecting regular cleaning and upkeep can reduce an appliance’s efficiency by up to 30%, highlighting the importance of nuanced understanding beyond basic specs.
Why Your Dishwasher Is Surging in Popularity
There’s a common misconception that older dishwashers are inherently less efficient or effective than modern, smart models. On the contrary, many vintage units are surprisingly durable if properly maintained. Additionally, certain modern features like automation cycles or Wi-Fi connectivity might seem like advantageous add-ons but can introduce complications, such as software glitches or compatibility issues with your home network. This highlights a hidden nuance: the importance of assessing the actual performance and compatibility of features rather than being swayed by marketing buzzwords.
Is a Counter-Depth Refrigerator Really Worth the Extra Cost?
People often assume that a slimmer, counter-depth fridge is just a style choice, but in reality, this design can compromise internal storage capacity, leading to less efficient use of your available space. If you’re trying to maximize your kitchen’s storage without sacrificing accessibility, it’s crucial to weigh aesthetic benefits against practical needs. Analyzing user reviews and expert insights reveals that the decision heavily depends on individual kitchen dimensions and lifestyle preferences. For comprehensive guidance, check out this detailed comparison.
Beware of the Hidden Traps in Appliance Maintenance
Many people overlook small but critical maintenance tasks, assuming they are optional. For instance, neglecting to regularly clean your appliance’s rubber seals or filters can lead to leaks and malfunctions. One common mistake is ignoring service warnings or error messages—thinking they are false alarms—only to face costly repairs later. For example, a leaking dishwasher might seem minor initially but can cause damage to cabinetry if left unchecked. Regular inspections and proactive servicing, like thoroughly cleaning condenser coils or replacing worn gaskets, help prevent these issues. To learn more about common pitfalls, explore this guide.
Tackle the Advanced Question: How Do I Optimize Smart Appliance Performance Without Overloading My Network?
This is a question many advanced users grapple with. Smart appliances depend on stable Wi-Fi connections, but network congestion can cause delays or disconnections, reducing your system’s efficiency. Experts recommend segmenting your network, dedicating a separate band for smart devices, and updating firmware regularly. Additionally, positioning your Wi-Fi router centrally and away from interference sources ensures optimal signal strength. It’s a nuanced balance—investing in better routers or Wi-Fi extenders can significantly improve performance and prolong device lifespan.
Have you ever fallen into this trap? Let me know in the comments. Understanding these hidden nuances and debunked myths can save you time, money, and frustration, ensuring your appliances serve you well for years to come.
How do I maintain my appliances over time to prevent costly repairs?
Consistent maintenance is key to prolonging the lifespan of your appliances, and having the right tools makes all the difference. Personally, I swear by a few specific items that have saved me time and money. One must-have is a digital infrared thermometer. I use it regularly to check if my refrigerator’s compressor is running at optimal temperatures, preventing early failure. Additionally, a good set of nut drivers and small screwdrivers help me access components like door gaskets or condenser coils without damaging delicate parts.
Another essential is a high-quality condenser coil cleaning brush, which allows me to remove dust and debris from tightly packed coils without calling a pro. Regular cleaning with this tool helps maintain energy efficiency and prevent overheating—something I learned the hard way after ignoring my fridge’s dirty coils for months. For more advanced cleaning techniques, exploring step-by-step guides on this resource can be incredibly helpful.
Recommended software and network tools improve smart appliance upkeep
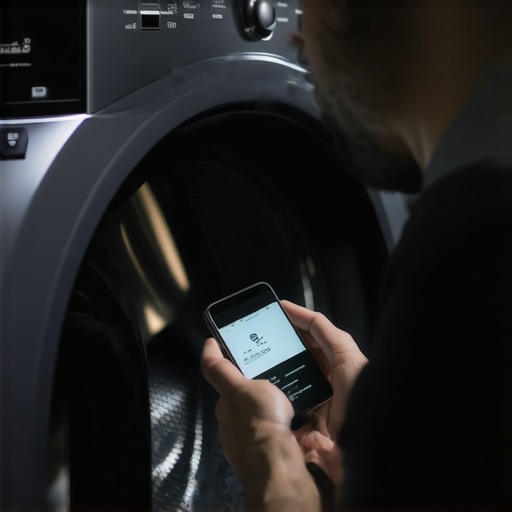
Keeping your smart appliances in top shape isn’t just about physical tools; monitoring their performance through dedicated apps is equally important. I recommend using a network diagnostic tool like Fing, which helps identify weak Wi-Fi signals or bandwidth bottlenecks that could disrupt device operation. I personally run periodic speed tests and analyze network traffic to ensure my smart fridge and washer stay reliably connected, avoiding frustration caused by dropped signals or delayed updates.
Looking ahead, I predict that appliances will increasingly integrate AI-driven diagnostics that notify you of potential issues before they escalate, similar to predictive maintenance in industrial settings. Embracing these emerging technologies will help you stay ahead of problems and extend your appliance’s lifespan.
What’s the secret to long-term appliance health?
It’s simple: regular checks combined with proactive tools. For example, regularly inspecting the rubber seals on dishwashers or washing machines with a silicone-based lubricant can prevent cracking and leaks. For more stubborn leaks or drainage issues, I use a small drain camera, which I inserted into the dishwasher’s drain line to identify obstructions—saving me hundreds on professional repairs. Investing in these specialized tools might seem trivial, but they pay off in reliability and peace of mind.
In the future, I believe smart diagnostics integrated into appliances will become standard, automating routine maintenance alerts. To make the most of this trend now, I recommend setting up scheduled performance checks using off-the-shelf tools like this guide. Give one of these tips a try today, and see how it transforms your appliance care routine.
Lessons I Wish I Didn’t Have to Learn About Smart Fridges
One of the biggest revelations for me was realizing that even basic installation steps, like shutting off the main water supply, are crucial for avoiding disaster. I once overlooked this simple task and ended up with a mini flood. Now, I double-check all valves before beginning any water-related work. Additionally, I found that investing in the right tools—like a quality Teflon tape and a flexible supply hose—makes the process smoother and prevents leaks. Lastly, patience in tightening fittings without overdoing it can save a lot of headaches, a lesson that took me some pain to learn but now saves me time and messiness.
My Go-To Resources for Appliance Success
- Fing Network Scanner: I rely on this tool to troubleshoot Wi-Fi issues with my smart appliances, ensuring smooth operation and quick fixes—it’s my first line of defense against connectivity chaos.
- How to Clean a Dirty Condenser Coil Without Calling a Pro: This guide helped me keep my refrigerator running efficiently without hiring service techs, saving money and extending appliance lifespan.
- This Comprehensive Guide on Dishwasher Maintenance: Regular cleaning of spray arms and filters, as detailed here, has prevented early breakdowns in my dishwasher, maintaining peak performance.
- Smart Appliance Compatibility Articles: I trust these to help assess if new gadgets will truly mesh with my existing setup and avoid costly incompatibilities.
The Fire Behind My Appliance Confidence
Getting your appliances right is about more than just following instructions—it’s a mindful process that saves you from costly repairs and frustrations. Trust yourself to learn, adapt, and seek out the best resources; your kitchen’s efficiency depends on it. Remember, every challenge is an opportunity to improve your understanding, and your confidence in managing appliances will grow as you accumulate experience. So go ahead: take that first step, keep learning, and enjoy the process of transforming your home into a well-oiled smart space.
Have you ever struggled with a tricky water connection or maintenance task? Share your story below—I’d love to hear how you tackled it or what you learned along the way!