
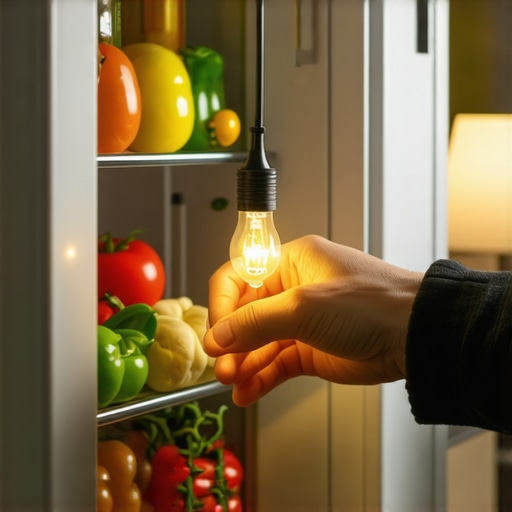
It was 2 AM, and I was on a mission for the last slice of leftover pizza. I pulled the handle of my sleek, French-door beast, expecting that familiar, heavenly glow. Instead? Pitch blackness. I stood there, squinting at the ghostly silhouettes of mustard bottles and feeling like I’d been betrayed by my own kitchen. It is amazing how a simple burnt-out bulb can make even the most expensive refrigerators in 2025 feel like a damp, prehistoric cave. If you are currently squinting into your crisper drawer with a flashlight in one hand, don’t worry. I have been exactly where you are, and I promise we can get your kitchen’s heartbeat back to normal without you having to call a repairman who charges eighty bucks just to show up.
Stop Squinting and Start Fixing
In the old days, you just unscrewed a warm glass pear and popped in a new one from the hardware store. Today, things are a bit more… temperamental. Manufacturers love to hide their bulbs behind complex plastic housings and proprietary LED strips. I’ll be the first to admit that why modern refrigerators don’t last as long as your grandma’s is a topic I rant about often, and these tricky lighting setups are a prime example. I once spent forty-five minutes prying at a lens cover with a flathead screwdriver, only to hear a sickening crack because I didn’t realize there was a hidden release tab on the far left. It was a costly mistake that taught me one big lesson: finesse always beats force. We are going to solve this today by identifying exactly what kind of bulb you need and how to access it without shattering your interior trim.
Will this repair break my smart fridge motherboard?
This is the biggest fear I hear from neighbors. They worry that messing with the electrics might trigger a cascade of errors, much like why your smart fridge screen keeps going black during a software glitch. Rest assured, as long as we cut the power first, your motherboard is perfectly safe. Interestingly, Consumer Reports has noted that many modern LED light failures are actually caused by heat trapped within the housing rather than the light ‘burning out’ in the traditional sense. It is often a simple component swap. Have you ever felt like your fridge was intentionally trying to keep you in the dark? Let’s get that light back on. This isn’t just about seeing your snacks; it’s about maintaining the life of your smart refrigerator by ensuring every part is in top working order. Stick with me, and I’ll walk you through the prep work you need to do before we even touch that bulb housing.
Unplug the Beast Before You Reach In
Safety might sound like a boring lecture, but in the world of smart appliances, it is about protecting your boards as much as your fingers. Before you even think about touching the light housing, pull that plug. I learned this the hard way when I went to tighten a loose bulb in a high-end French door unit without cutting the juice. A tiny spark jumped, and suddenly my control panel was as dead as a doornail. I spent the next hour frantically searching for how to reset your smart fridge after a power outage just to get the cooling back on. If your outlet is buried behind five hundred pounds of steel, hit the breaker instead. It is a three-second task that saves you from a three-hundred-dollar motherboard replacement. Plus, it gives you a chance to see if the plug itself is loose, which is as common as how to fix a loose handle on your stainless steel refrigerator when it comes to minor household annoyances.
Mastering the Art of the Hidden Plastic Tab
Most modern fridge covers do not use screws anymore; they use plastic tabs that are as brittle as dry leaves. This is where most people fail. You want to use a plastic putty knife or a thin credit card—never a metal screwdriver if you can help it. Think of the cover like a stubborn Tupperware lid that has been in the freezer too long. You need to apply gentle, constant pressure until you hear a soft ‘pop.’  I once helped a buddy who tried to ‘force’ his LED cover off with a flathead screwdriver. He ended up with a jagged hole in his interior liner that looked like a shark had taken a bite out of it. This kind of physical damage is one of the 5 mistakes that are shortening the life of your smart refrigerator. Once that cover is off, do not just let it hang by the wires. Support it with one hand while you inspect the interior for any signs of scorched plastic or loose mounting brackets.
Identify Which Light Technology You Are Dealing With
Pulling the cover reveals the truth: are you looking at a classic screw-in bulb or a modern LED module? If it is an LED strip, do not panic. These are actually easier to swap than they look, though they require a bit more finesse than a lightbulb. These modules are part of the complex electronics that distinguish the difference between inverter and traditional refrigerator compressors—they are designed for efficiency but can be finicky. If you see a small green circuit board with tiny yellow dots, that is your LED. If it is a standard bulb, just make sure you check the wattage. Putting a 60-watt incandescent in a socket rated for 25 watts will melt your plastic housing faster than an ice cube on a sidewalk in July.
Check the Wiring Before You Buy a New Module
Before you run to the store or hop online to find parts, check the connection. Vibrations from the compressor can actually wiggle wires loose over time. I have seen cases where a ‘broken’ light was just a molex connector that had backed out a few millimeters. Give the wires a gentle tug. If they feel firm, then you know the component itself has failed. This is a great time to do a general health check on your machine. For instance, if you notice your lights are fine but the display is wonky, you might be dealing with why your smart fridge touchscreen is unresponsive rather than a simple lighting issue. According to choosing the right refrigerator tips from industry experts, maintaining these small electrical connections is the secret to getting fifteen years out of a machine instead of seven.Stop believing the myth that those fancy LED strips are ‘lifetime’ components. In my years of tinkering, I have found that the ‘smart’ in smart appliances often stands for ‘sensitive.’ While manufacturers claim these lights will outlive the fridge, the reality is quite different. The cooling cycles—the constant shifting from cold to slightly less cold—put immense stress on the solder points.
Could a ghost in the machine be faking a burnt bulb?
Sometimes the bulb is fine, but the fridge thinks the door is closed when it is actually open. This is where you need to check the reed switch or the mechanical plunger. If your interior light is dead, but you have noticed your refrigerator isn’t alerting you when the door is ajar, the problem isn’t the light—it is the sensor. This is a classic ‘oops’ factor where people spend a hundred bucks on an LED module they do not need. Much like the truth about eco mode on modern dishwashers, what looks like a hardware failure is often just the machine’s logic system being thrown for a loop.
Stop Believing the Myth of the Forever LED
Many people assume that because they aren’t using a vacuum-sealed tungsten filament, the light is indestructible. However, a study published in the Journal of Electronic Packaging highlights that power fluctuations in household grids are the primary killer of residential LED drivers. If you have heard a high-pitched whistling noise coming from your control panel lately, that is often a sign of a capacitor on its way out, which can send ‘dirty’ power to your lights, shortening their lifespan significantly. 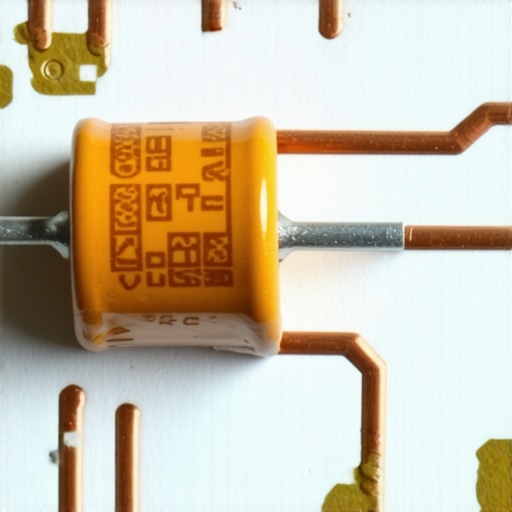
Don’t Buy a Replacement Until You Check the Serial Prefix
This is the biggest trap for the DIYer. You find a part that looks exactly like yours on a giant online marketplace, it says it fits your model, and you hit buy. Two days later, you are staring at a connector that is two millimeters too wide. Manufacturers often change parts mid-year without changing the main model number. You must look at the ‘Serial’ or ‘Series’ number. Ignoring this is one of the top mistakes that are shortening the life of your smart refrigerator, as forcing a slightly wrong connector can short the main control board. Always verify the ‘Rev’ (revision) code on the sticker inside the fridge wall before clicking checkout. It is a nuanced detail that separates a successful fix from a week of waiting for a return label. Beyond the bulb itself, consider the environment. We often pack our fridges so tight that the air vents for the light housings are blocked. This creates a micro-greenhouse effect inside the plastic cover. Even in a cold fridge, a poorly ventilated LED housing can reach temperatures high enough to degrade the phosphor coating, leading to that weird blue or purple tint you see right before the light dies. Understanding choosing the right refrigerator tips from industry experts means recognizing that airflow isn’t just for your milk; it is for your electronics too. Have you ever fallen into this trap of ordering a ‘universal’ part that turned out to be anything but universal? Let me know in the comments below!Once you have the right part in your hand, do not just jam it in. If you want to do this like a pro, you need a can of electronic contact cleaner. I personally use DeoxIT D5 because it does not just clean; it leaves a microscopic protective layer that prevents the oxidation responsible for half the flickering issues we see in high-humidity kitchen environments. Spritzing the connector before you snap it back together is the difference between a one-year fix and a ten-year fix. This isn’t just for fridges either; it is a game-changer when you are trying to figure out how to update the firmware on your smart kitchen appliances and the USB or data port is acting flaky.
How do I keep my smart appliance electronics healthy for a decade?
The secret to longevity isn’t just cleaning filters; it is managing the unseen environment. According to the IPC-A-610 standards, which govern the acceptability of electronic assemblies, thermal stress is the number one cause of solder joint failure in consumer products. In a refrigerator, you have a literal battle between freezing air and the heat generated by the LED drivers and control boards. To combat this, I recommend keeping your fridge at least two inches away from the wall to allow the rear vents to breathe. If your unit is struggling, you might hear it protesting—knowing how to silence a chirping smart fridge control panel is often the first step in diagnosing a power supply that is being overworked by poor ventilation.  I am also a big fan of using a digital multimeter for every repair. You do not need to be an electrical engineer to use one. Just set it to the continuity beep setting. If you touch the probes to each end of a fuse or a wire and it does not beep, you have found your break. It takes the guesswork out of the equation. This tool is invaluable when you are looking at choosing the right refrigerator tips from industry experts and trying to decide if an old unit is worth saving or if it is time for a 2025 upgrade. Looking ahead, I see a massive shift coming. The future of home appliances trends to watch in 2025 suggest we are moving toward plug-and-play modularity. Companies are finally feeling the pressure of Right to Repair laws. Soon, swapping an LED strip will not require prying brittle plastic; it will be a magnetic snap-in component that even a toddler could replace. Until then, we have to rely on our wits and a good set of plastic spudgers. If you really want to level up your kitchen maintenance game, go grab a small tube of dielectric grease. Apply a tiny dab to the pins of your new light module before you install it. This seals out the moisture that naturally occurs when you open the door and warm air hits the cold interior. It is a five-second step that professional technicians use to ensure they never get a callback for the same issue twice. Give it a shot on your next repair and see the difference!
The Realities of Modern Fridge Maintenance I Learned the Hard Way
After years of prying into the guts of high-end appliances, a few truths have become crystal clear. First, the ‘door open’ sensor is the most overlooked component in the lighting circuit; if your fridge doesn’t know it’s open, it won’t give you light. Second, modern LED drivers are far more sensitive to power surges than old-school filaments. Finally, never assume a part fits just because the model number matches; the ‘Rev’ or revision code is your only true friend in the parts catalog. If you skip this step, you are likely to end up with a part that looks identical but features a completely incompatible pin layout.
Gear I Use to Avoid Breaking My Fridge
- Nylon Spudgers: These are non-negotiable. They allow you to pop those brittle plastic light covers without leaving gouges or cracks in your liner. It is a small investment that prevents permanent cosmetic damage to your machine.
- Digital Multimeter: Essential for checking continuity. It’s the only way to know if a wire is dead or if you just need to calibrate your refrigerator thermometer while you’re already digging around in the settings.
- Dielectric Grease: A tiny bit on the connector pins prevents the moisture-driven oxidation that causes flickering lights. This is the secret professional tip that prevents you from having to do the same repair six months later.
- Energy Monitoring Plugs: To keep an eye on total machine health, I use the best smart plugs for monitoring appliance energy use to spot power spikes before they fry my expensive LED boards.
Take Control of Your Kitchen Again
Repairing a light might seem like a small win, but it’s the gateway to feeling confident about maintaining all your top smart appliances for a seamless home experience in 2025. You don’t need a degree in electrical engineering to keep your machine running; you just need patience and the right approach. Now that you’ve mastered the light, why not look into the best refrigerator shelving hacks for more space to truly transform your storage game? Your refrigerators in 2025 deserve to be more than just cold boxes; they should be efficient, well-lit hubs of your home. Stop letting a tiny component dictate how you use your kitchen and take the power back into your own hands.
Have you ever had a plastic light cover snap on you while trying to change a bulb? Let me know your horror stories or your successful DIY wins in the comments below!