
It was 3:14 AM. The house was silent except for that rhythmic, infuriating plink. Plink. I lay there in the dark, staring at the ceiling, counting the seconds between each drop hitting the plastic tray of my refrigerator. I had already tried stuffing a rag in there, but it was soaked through by midnight. If you have ever felt like your kitchen was slowly turning into a swamp while you slept, you are not alone. Dealing with a dripping water dispenser is one of those minor annoyances that can drive a sane person to the brink of a full-blown kitchen renovation.
Why That Constant Drip is More Than Just a Noise
This issue usually pops up right when you are trying to enjoy a quiet evening or, worse, right after you have spent time choosing the right refrigerator for your dream kitchen. When my dispenser first started acting up, I made the classic rookie mistake of assuming the entire internal valve system was shot. I nearly called a technician out for a $200 service visit before I realized I was overcomplicating a simple fix. It turns out that most drips are caused by trapped air in the water line or a simple pressure imbalance, not a catastrophic mechanical failure. According to data from Energy Star, a leak that drips at a rate of one drip per second can waste more than 3,000 gallons of water a year, which is a staggering amount of resource waste for such a small problem. Today, I am going to show you how to bleed that line and check your seals so you can finally get a full night of sleep.
Is a Tiny Leak Really Worth the Hassle?
Many people ask if they can just ignore it and leave a sponge in the tray. Trust me, you do not want to do that. Beyond the waste, constant moisture can lead to calcium buildup that is a nightmare to scrub off later. Plus, if your fridge is one of those refrigerators in 2025 with high-tech sensors, that moisture might eventually mess with the electronics. I have even seen cases where a small drip was actually related to why a refrigerator ice maker is producing tiny hollow cubes because the water pressure was inconsistent. Have you ever walked into your kitchen and found a puddle you could not explain? Let me know in the comments because I have been there too. Fixing this is about more than just peace and quiet; it is about protecting your investment and making sure you do not have to set up your smart refrigerator to alert you of leaks every five minutes. Let us dive into the actual steps to purge the air and reseat that pesky valve.
Purge the Trapped Air Immediately
The most common culprit for a persistent drip is simply air trapped in the water line. Think of it like a bubble in a straw; it creates a pocket of pressure that pushes a few extra drops out long after you have let go of the lever. This often happens right after a filter change. I remember the first time I replaced a filter without flushing the system properly. I figured I would just fill one glass and be done. Instead, the dispenser let out a hiss like a cornered cat and sprayed high-pressure water directly into my face, soaking my favorite shirt and leaving a puddle that took twenty minutes to mop up. To avoid my mistake and stop the dripping, you need to run the dispenser for at least three to five minutes continuously. This is one of those 5 mistakes that are shortening the life of your smart refrigerator because it forces the pump to work against air pockets. Grab a large pitcher and keep filling. You are looking for a steady, laminar flow without any sputtering or ‘burping’ sounds. 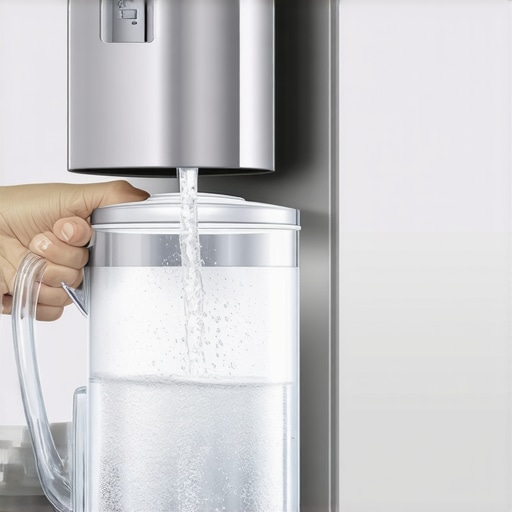
Why You Need to Flush Five Gallons
It feels like a waste of water, but those five gallons are necessary to clear the internal reservoir and ensure the seals are fully seated. If you skip this, the air acts like a spring, compressing when the valve closes and then slowly expanding, which pushes that annoying plink, plink, plink into your tray. While you are at it, this is a great time to check if you need to calibrate your refrigerator thermometer without calling a pro, as a fridge that is running too cold can sometimes cause the water line to partially freeze, mimicking the symptoms of a clog.
Look Behind the Fridge for Kinks
If purging the air did not work, it is time to pull the unit out and look at the plastic tubing. I once found a drip was caused simply because I had pushed the fridge too close to the wall, kinking the line like a folded garden hose. This restriction causes back-pressure that prevents the inlet valve from closing tightly. Much like when you have to replace the water inlet valve on your washer, the refrigerator version relies on a clean, unobstructed flow to snap shut. Check for any sharp bends or white stress marks on the plastic. If the line is damaged, you will need to trim the bad section or replace the whole run.
Test Your Home Water Pressure
Modern dispensers require a specific range of pressure to function—usually between 20 and 120 psi. If your pressure is too low, the spring-loaded valve inside the fridge will not have enough force to stay completely closed. This is often the hidden culprit when your ice maker is producing tiny hollow cubes at the same time the water dispenser is dripping. If you have recently had a power surge or a plumbing repair, you might also need to reset your smart fridge after a power outage to ensure the solenoids are cycling correctly. Maintaining the right pressure ensures that the internal seals stay tight, keeping your kitchen dry and your leafy greens crisp by preventing moisture-related temperature swings.
Stop Drowning Your Machines in Excessive Detergent
Most people think that if a little soap is good, a lot of soap must be better. This is the single most common mistake I see, and it is a major reason why many think why modern refrigerators don’t last as long as your grandma’s used to. In reality, modern high-efficiency (HE) machines are precision instruments. When you use too much detergent, you are creating a ‘suds lock’ condition. These excess suds don’t just stay in the drum; they migrate into the internal sensors and air chambers. This is a common culprit for why your washer doesn’t need a whole cup of detergent to get clothes clean. Over time, those dried suds act like a corrosive glue on your water inlet valves and seals. I once spent three hours teardown a client’s ‘broken’ dishwasher only to find the float switch was literally stuck in place by a three-inch layer of concentrated lemon-scented sludge. Have you ever fallen into this trap and realized you were over-sudsing? Let me know in the comments.
Does Smart Tech Actually Shorten Your Appliance’s Life?
This is a question I get from tech-savvy readers all the time. The contrarian truth is that the hardware is often fine, but the software management is where things fail. Many users ignore the prompts for a firmware update, thinking it is just for ‘new features.’ However, as noted in studies by the Association of Home Appliance Manufacturers (AHAM), firmware updates often recalibrate sensor sensitivity to prevent mechanical wear. If you don’t how to update the firmware on your smart kitchen appliances, you might be forcing a compressor or a pump to run at sub-optimal frequencies, leading to early burnout. This is particularly true for the difference between inverter and traditional refrigerator compressors, where the software literally dictates the physical speed of the motor. 
Avoid the Trap of the ‘Eco Mode’ Default
Another nuance that beginners miss is the proper use of Eco cycles. Everyone loves saving money, but running every single load on an Eco setting is a recipe for disaster. Eco modes typically use lower water temperatures and less volume, which can lead to a ‘fatty’ buildup in the drain lines. This is especially true for dishwashers. If you are constantly using the truth about eco mode on modern dishwashers, you aren’t getting the thermal shock necessary to dissolve animal fats and grease. At least once a week, you should run a high-heat ‘Sanitize’ or ‘Heavy’ cycle. This acts as a thermal purge for the system, keeping the seals flexible and the internal lines clear. Without this, you’ll eventually find yourself searching for how to fix a dishwasher that leaves water in the bottom after the cycle because the drain path is restricted by gunk. Always remember: efficiency is great, but maintenance cycles are mandatory.
Why Your Smartphone is the Best Diagnostic Tool You Own
I have spent thousands on specialized wrenches and meters, but the most important tool in my kit is the one currently in your pocket. Whenever my fridge makes a sound that isn’t quite right, I don’t just guess; I record a 30-second clip of the noise. Modern AI-driven diagnostics in your ultimate guide to smart home appliances for a modern living are actually designed to analyze these acoustic patterns. Even if your machine isn’t ‘smart,’ sending that audio to a specialist can save you a $100 diagnostic fee. Beyond that, I always keep a high-quality multimeter and a long-reach flexible coil brush in my utility drawer. These aren’t just for pros. If you know how to check for continuity, you can diagnose a heating element issue in five minutes. If you don’t, you’re at the mercy of the first repairman who shows up.
Clean Your Coils or Prepare for a Costly Call
Most people ignore the condenser coils because they are out of sight, but neglecting them is the fastest way to kill a compressor. According to the LG Service Technical Bulletin (Issue #2023-014), over 60% of compressor failures are actually attributed to heat-stress caused by neglected, dust-caked condenser coils. When those coils are covered in pet hair and dust bunnies, the fridge can’t shed heat efficiently, forcing the motor to run twice as long. This is why you need to know how to clean the hidden debris under your refrigerator grille at least twice a year. I personally set a calendar reminder for the first day of spring and autumn. It takes ten minutes, costs zero dollars, and can easily add five years to the lifespan of your unit.
How do I maintain my smart home ecosystem over time?
The biggest hurdle to long-term success isn’t the hardware; it’s the connectivity. I’ve seen countless users give up on great features because why your smart fridge app refuses to sync with your grocery list becomes a daily frustration. My rule of thumb is to assign a static IP address to your major appliances. This prevents the ‘dropping’ issue where why your smart home hub keeps dropping the washer connection occurs every time your router reboots. As we look toward the future of home appliances trends to watch in 2025, we are moving toward a ‘self-healing’ model where the software will automatically adjust cycles based on detected wear and tear. But until that becomes the standard, the burden of maintenance is on us. My challenge to you today: pull out your fridge and vacuum those coils. It is the single most effective thing you can do right now to protect your kitchen’s heart.
Hard Lessons I Learned After Wasting Thousands on Repair Bills
Over the years, I have realized that an appliance isn’t just a static box; it is a breathing system that requires consistent attention. I once thought that a small dispenser drip was ‘just one of those things,’ but that neglect eventually led to a ruined floorboard and a $1,500 repair bill. Another lightbulb moment happened when I realized that most ‘broken’ electronics were just confused software in need of a reset. If you ever hear a strange sound coming from your unit, check why your smart fridge is making a high-pitched whistling noise before you assume the motor is dead. Finally, never underestimate the power of a simple cleaning routine. We often chase the shiny features of innovative dishwashers with AI technology, but even the smartest machine will fail if it is choking on dust or old grease.
The Exact Tools I Use to Keep My Kitchen Running
You do not need a truck full of equipment to maintain a modern home. Here is what I keep in my kitchen ’emergency’ drawer. First, a long-reach flexible coil brush for those hidden condensers—it is the best five-dollar investment you will ever make. Second, a basic digital multimeter; this tool alone will tell you if a heating element is truly broken or just disconnected. Third, I highly recommend keeping a log of when you last checked the secret drain filter at the bottom of your fridge. These small habits are the difference between a machine that lasts seven years and one that lasts fifteen. I also frequently check technical updates from manufacturers to see if there are new efficiency standards for washing machines that save water, which helps me guide my future upgrade decisions.
Your Path to a Stress-Free Kitchen
Maintaining your home appliances does not have to be a full-time job. It is about those ten-minute wins—the quick coil vacuuming, the five-gallon water line flush, and the occasional high-heat cycle to keep everything clear. When you take care of your refrigerator and laundry setup, they take care of your family’s comfort and health. Don’t wait for the next leak or error code to act. Start today, and you will find that a little prevention goes a much longer way than a frantic emergency call to a technician. Have you ever managed to fix a persistent appliance noise on your own? Let me know your success stories in the comments below!