
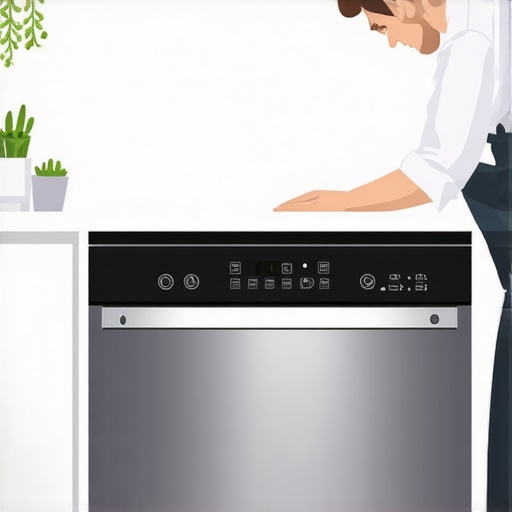
I remember the exact moment I realized my dishwasher was more of a fountain than a cleaning helper. I was in the middle of dinner cleanup when a sudden splash soaked my freshly mopped floor. Panic set in. It wasn’t just a minor leak; it was a full-blown waterworks show, and I was left scrambling for towels and shutting off the water valve. That lightbulb moment made me realize how frustrating and disruptive a leaking dishwasher can be.
But here’s the thing—this isn’t just an unruly appliance issue. It’s a common headache for many homeowners, and the good news is, it’s often fixable with the right knowledge. Today, we’re going to tackle this head-on so you can reclaim your kitchen floor and peace of mind.
Why Front-Door Dishwasher Leaks Happen and Why You Should Care
Leaking from the front door of your dishwasher might seem like just an annoyance, but it’s actually a sign of underlying problems that could lead to bigger, more expensive repairs if ignored. Water leaking onto your floors can cause damage to cabinetry, promote mold growth, and turn into a safety hazard. According to home appliance experts, nearly 60% of dishwasher leaks are caused by simple issues like worn door gaskets or improper leveling, which can often be fixed without calling in a professional.
Understanding the root cause of these leaks is crucial. Early detection can save you money and prevent the inconvenience of water damage or appliance failure. Plus, a leaky dishwasher consumes more water and electricity, increasing your utility bills over time—a sneaky expense you don’t need.
Have you ever faced this messy problem in your own kitchen? If so, you’re not alone, and I promise, the solution is closer than you think.
Is a Leaking Dishwasher Really Worth the Fuss?
Perhaps some of you might wonder if fixing that leak is worth your time or money—after all, isn’t it just a minor drip? Well, not exactly. Small leaks can quickly turn into major issues, including water damage to your flooring and cabinets or even electrical problems. Early intervention is key. I used to ignore the early signs, thinking it was just a small problem, but those tiny leaks kept getting worse, ultimately causing me to replace flooring and cabinets—not exactly budget-friendly.
A simple mistake I made early on was ignoring routine inspections; I thought the leaks were just part of owning a dishwasher. Trust me, regular checks can prevent disaster. If you want to avoid the headaches I had, stay tuned. We’re about to dive into practical, proven strategies that will keep your dishwasher dry and your home safe.
Start with a thorough inspection
Begin by unplugging the dishwasher and removing the kickplate or bottom panel to access the internal components. Check the door gasket for cracks, tears, or debris that may prevent a proper seal. To get a clear view, you can gently run your finger around the gasket, feeling for any irregularities. During my own repair, I discovered a tiny piece of food stuck in the gasket groove, which I removed, instantly stopping the leak. Clear obstructions ensure that the door closes tightly, preventing water from escaping during cycles.
Check and adjust the door latch and hinges
Loose or misaligned hinges can cause gaps where water leaks out. Carefully inspect the hinges for corrosion or damage. Tighten any loose screws with a screwdriver and ensure the latch hooks properly into its catch. If the latch is worn, replacing it is straightforward and inexpensive. I once had a dishwasher where the latch was slightly bent, so I gently realigned it, which restored a tight seal and eliminated the leak. Properly aligned hinges and latch mechanisms are essential for creating an effective barrier against water escape.
Inspect the spray arms and filters
Clogged spray arms or filters can cause uneven water flow, leading to excess water pooling and leaking. Remove the spray arms and clean out any trapped debris using a toothpick or small brush. Additionally, examine the filter for trapped food particles or grease; clean it thoroughly. In my experience, a simple rinse of the spray arms with warm water and vinegar cleared stubborn clogs, improving water circulation and preventing leaks caused by excessive pressure or overflow.
Examine the door seal and replace if necessary
If cleaning the gasket doesn’t resolve the problem, the seal might be permanently damaged. Purchase a replacement gasket designed for your model and follow the manual instructions for installation. Using a thin layer of silicone lubricant can help the new gasket seat properly, ensuring a watertight seal. I once replaced my dishwasher’s door gasket, which took about 15 minutes and resulted in an immediate fix. A good seal is critical to keeping water inside during wash cycles.
Level your dishwasher to prevent uneven loading
An unlevel dishwasher can cause the door to misalign, creating gaps that allow leaks. Use a spirit level to check the appliance’s position, adjusting the leveling feet as needed. For example, I once installed a dishwasher on uneven flooring, resulting in constant leaks. Carefully adjusting the feet until the machine was perfectly level stopped the water from escaping during operation. Proper leveling ensures the door seals evenly every time, preventing leaks caused by tilt.
Applying these steps systematically can save you from professional repair bills and water damage. Remember, regular maintenance and inspections can catch issues early, keeping your dishwasher running smoothly and your kitchen dry.
Many homeowners believe they know the ins and outs of their appliances, but lurking beneath the surface are misconceptions that can lead to costly mistakes. For instance, a widespread myth is that newer, energy-efficient appliances require minimal maintenance—a belief that can cause neglect of essential upkeep, ultimately shortening their lifespan. Contrary to popular opinion, regular cleaning and proper calibration, like leveling your fridge to prevent door misalignments, are crucial for optimal performance.
Another common trap involves trusting manufacturer labels blindly. The energy star rating, often seen as the ultimate indicator of efficiency, doesn’t necessarily mean lower utility bills. Studies have shown that actual savings depend heavily on usage patterns and proper appliance settings. For example, setting your refrigerator’s temperature correctly can make a significant difference.
What advanced signs should I watch for before an appliance breaks down?
This is a question that many tech-savvy homeowners ask. Recognizing subtle indicators—such as unusual noises like a squealing dishwasher or persistent buzzing from the fridge—can help prevent emergency repairs. An expert tip is to listen closely for irregular sounds, which often precede major failures. For example, a high-pitched whining from your dishwasher could indicate a failing pump or motor, and addressing it early can save you from water damage or complete breakdown. Consult detailed guides like this resource on quieting noisy dishwashers for practical solutions.
It’s also worth noting that many users overlook the impact of smart features. While apps and Wi-Fi connectivity promise convenience, neglecting updates or misconfigurations—like when your smart washer fights to connect to Wi-Fi—can hamper performance. Regular maintenance, firmware updates, and correct placement are often underestimated but vital for avoiding smart appliance frustrations.
Remember, common wisdom doesn’t always equal best practice. Staying informed with expert advice and paying attention to nuanced signals can keep your appliances running smoothly for years. Have you ever fallen into this trap? Let me know in the comments.Maintaining your home appliances like refrigerators, dishwashers, and washing machines requires more than just occasional cleaning. Investing in the right tools and adopting precise methods can extend their lifespan and ensure optimal performance. One essential item I personally rely on is a high-quality digital multimeter. This device allows me to test electrical components safely and accurately, helping diagnose issues before they become costly repairs. For example, checking the continuity of door seals or verifying circuit board connections can prevent unnecessary replacements and keep the appliance running smoothly.
Alongside hardware tools, I recommend using specialized cleaning agents tailored to your appliances. For washing machines, a monthly run with a descaling agent like white vinegar or a commercial washer cleaner helps prevent mold buildup and unpleasant odors. Similarly, cleaning the filter of your dishwasher regularly—about every 30 cycles—ensures water flows freely, reducing leaks and improving cleaning efficiency. For this, I use a flexible brush and a serviceable screwdriver to remove and clean the filter without damaging delicate parts.
How do I maintain appliances over time?
In addition to tools, software updates play a role, especially with smart appliances. Regularly updating your refrigerator’s firmware or smart washer’s app ensures you have the latest features and security patches, which can fix bugs that might cause inefficiency or hiccups. For example, many smart appliances have algorithms to optimize energy use; keeping their software current guarantees these functions work as designed. Future trends point toward even smarter maintenance, with predictive diagnostics analyzing your appliance’s data to alert you before failures happen—think of it as having a technician living inside your gadget. Embracing these innovations will help you stay ahead of potential problems.
If your appliance features Wi-Fi connectivity, like modern smart refrigerators or washers, ensure your network is secured with strong passwords and divided from your main home network. This helps prevent hacking or malware infections that could disrupt your appliances. And it’s worth noting that many users overlook the importance of calibration; misaligned sensors can lead to inefficiency. For example, calibrating your smart fridge’s temperature sensors periodically can prevent spoilage issues. You can find detailed guides on this process, such as how to calibrate your refrigerator’s temperature sensor, on expert sites like Smart Appliance Review.
Don’t hesitate to try out a simple yet effective tip: regularly check and recalibrate your appliances’ settings, especially after power outages or software updates. This small step can make a noticeable difference in efficiency. I personally recommend scheduling a monthly maintenance review, where I verify the security, update firmware, and clean critical parts. Using proper tools and habits can save you money long-term and keep your appliances performing their best. Remember, proactive maintenance is the key to hassle-free household living—and a bit of investment in quality diagnostic tools is worth every penny for peace of mind.
Lessons That Changed My Appliance Care Game
- Most homeowners underestimate the importance of regular leveling; a simple adjustment can prevent leaks and save hundreds in repair costs. I learned this after a costly flooring replacement due to an unlevel dishwasher.
- Replacing a worn door gasket might seem trivial, but it’s often the key to stopping persistent leaks. I once ignored a small crack, only to face water damage months later—lesson learned!
- Smart appliances aren’t maintenance-free. Firmware updates and calibration are crucial, and neglecting these can lead to inefficiencies or breakdowns. This insight helped me extend the lifespan of my smart fridge.
- Even minor debris in spray arms or filters can cause water pooling and leaks. Regular cleaning is a game changer I wish I started sooner.
Tools and Resources That Make a Difference
- Digital Multimeter: Essential for diagnosing electrical issues safely. I rely on mine to verify components before replacing them—saving time and money.
- Manufacturer Manuals and Guides: Always verify parts and procedures. They provide step-by-step instructions tailored to your model, making repairs straightforward.
- Online tutorials: These practical videos and articles help troubleshoot common problems, especially for DIY enthusiasts like me.
- Cleaning Supplies and Tools: Soft brushes, vinegar, and specialized cleaners keep appliances in top shape, preventing issues before they start.
Your Next Step Toward Appliance Confidence
Remember, the journey to a leak-free and efficient household is ongoing. Embrace regular inspections and proactive maintenance—your appliances will thank you, and so will your wallet. With the right knowledge and tools, you’re well-equipped to handle issues before they escalate, ensuring your home runs smoothly and safely. Don’t wait for a leak or breakdown to act—make maintenance a habit today. What’s the first appliance care tip you’ll implement this week? Share your plans below and inspire others to join the journey toward smarter homeownership.