
I opened my dishwasher last Tuesday and actually recoiled. It wasn’t the fresh, steamy scent of a clean kitchen I expected; it was the unmistakable, heavy smell of a damp locker room that had been sealed shut for a decade. I’ve spent years reviewing the latest innovative dishwashers with AI technology, and yet, there I was, humbled by a machine that smelled like a literal swamp. For the longest time, I thought the only way to kill that funk was to douse everything in harsh bleach. I was wrong. In fact, I once made the amateur mistake of using way too much chemical cleaner, which ended up leaving a chalky film on my coffee mugs and nearly ruining the rubber gaskets. It was a Saturday morning I will never forget—eyes watering from the fumes, and the smell was still there! Today, I’m going to show you exactly how to banish those odors using items you probably already have in your pantry. We are going to reclaim your kitchen’s freshness without turning it into a hazmat zone or risking your appliance’s health. [image_placeholder]
Get Rid of That Swampy Kitchen Smell for Good
The truth is, most of us wait until the smell is unbearable before we act. We assume the dishwasher cleans itself every time we run a cycle. It’s a logical thought, right? But it’s also a trap. Food particles, grease, and hard water minerals build up in the nooks and crannies. According to researchers at the NSF International, a leading global health and safety organization, dishwashers can be a breeding ground for fungi and bacteria if the humidity and organic matter aren’t managed properly. If you’ve ever wondered why your dishwasher bottom is full of standing water, you know that moisture is the enemy when it’s left to sit and stagnate. I learned the hard way that bleach isn’t the magic wand I thought it was. Not only is it tough on the environment, but it can actually damage the stainless steel interiors and the delicate seals of many modern units. Instead, focusing on the best way to sanitize your dishwasher after a long vacation or a heavy week of hosting involves simple, acidic cleaners like white vinegar and baking soda. These staples work with the machine’s heat to break down the biological film that creates the stench.
Do these natural methods actually work better than chemicals?
It’s a fair question to be skeptical about. We’re conditioned to think that if it doesn’t smell like a hospital, it isn’t truly clean. But the chemistry of vinegar is surprisingly effective at breaking down the limescale and grease that hold onto odors. I’ve found that preventing mold growth in your dishwasher seal is far more about consistent, gentle care than the raw strength of the chemical you use. Have you ever opened your machine and felt like you needed a gas mask? Tell me your worst kitchen-smell horror stories—I promise I won’t judge, because I’ve been there too. Now that we know why that smell is sticking around, let’s get into the step-by-step process of cleaning it out without the toxic fumes. It starts with the one thing most people forget: the filter.
Pull Out the Filter and Face the Truth
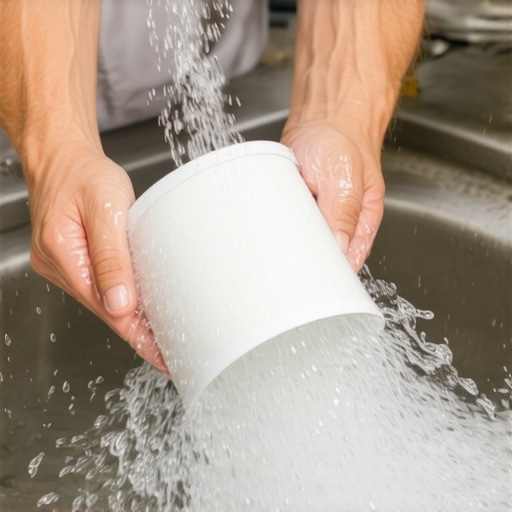
The filter is essentially the kidney of your dishwasher. It is designed to catch the ‘big stuff,’ but if you haven’t touched it in months, it is likely the source of that swampy aroma. I remember the first time I actually learned how to clean the hidden filter in your high-end dishwasher. I pulled it out and found a decomposed sticker from a tomato sauce jar and several lemon seeds that had turned a fuzzy shade of gray. It was a biological disaster zone. Removing this physical blockage is non-negotiable. If you have been noticing why your dishwasher still has standing water in the filter area, it is almost always because this mesh cylinder is choked with grease and old food. Twist it out, scrub it in the sink with a soft toothbrush and warm soapy water, and pop it back in. It takes two minutes and solves half of your odor problems instantly.
Let White Vinegar Do the Heavy Lifting
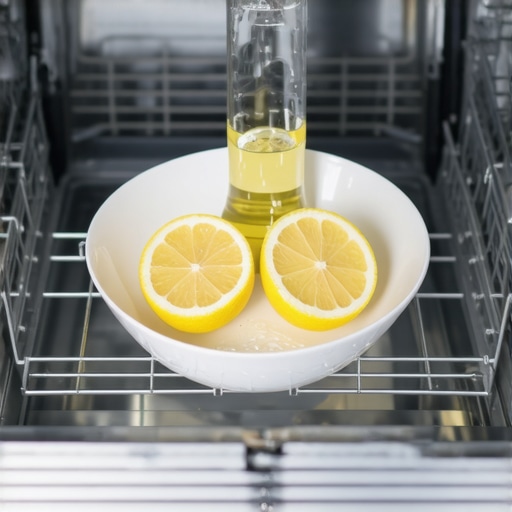
Once the filter is clear, you need to tackle the microscopic film that covers the interior walls. Think of white vinegar as a gentle, natural acid bath for your machine’s guts. Place a dishwasher-safe bowl on the top rack and fill it with two cups of white vinegar. Do not add any detergent or other cleaners. Run a full cycle on the hottest water setting. As the water sprays, it will slowly disperse the vinegar, cutting through hard water deposits and dissolving the grease that builds up in the pipes. This is a much safer approach than using industrial chemicals and ensures you won’t be left wondering why your dishwasher leaves a chalky film on your coffee mugs after the next wash.
Kill the Last of the Odor with a Baking Soda Blast
While vinegar handles the minerals and grease, baking soda is the ultimate deodorizer. After the vinegar cycle is finished, sprinkle one cup of baking soda across the very bottom of the tub. Run a second, shorter cycle with the hottest water possible. This creates a foaming action that scours the remaining surfaces and neutralizes any lingering acidic smells. It follows the same logic as the best way to clean a stinky garbage disposal using kitchen staples—simple chemistry often beats brute force. I once tried to skip this step to save time, but the ‘locker room’ scent returned within forty-eight hours. The baking soda is the closer; it finishes the job.
Don’t Ignore the Gunk Hiding in the Door Seal
The rubber gasket around the door is a magnet for moisture and mold because it stays damp long after the cycle ends. If you skip this, the smell will return before your next grocery run. Use a damp cloth dipped in a vinegar-water solution to wipe down the entire perimeter. You have to be careful here; you should learn the best way to clean your dishwasher door seal without tearing it because a ripped gasket is a one-way ticket to a flooded kitchen floor. While you are down there, check the spray arms for clogs. If the tiny holes are blocked with hard water minerals, the machine cannot effectively rinse away the very gunk you are trying to eliminate.
It’s easy to think that if a little detergent is good, a lot must be better. But here is the truth that appliance repair techs wish you knew: over-sudsing is the number one cause of long-term appliance failure and persistent odors. Whether you are dealing with your dishwasher or wondering why your washer doesn’t need a whole cup of detergent to get clothes clean, the logic remains the same. Modern High-Efficiency (HE) units use very little water. When you dump in excess soap, it doesn’t all rinse away. Instead, it creates a sticky biofilm that coats the outer drum and hidden pipes. This residue becomes a feast for bacteria, leading directly to that damp locker room smell we all dread. If you’ve ever wondered why your front load washer always smells like a damp locker room, you are likely looking at the aftermath of a soap scum party that has been happening behind the scenes for years.
Why the Eco-Setting Might Be Ruining Your Appliance
We all want to be environmentally conscious, and the future of home appliances is certainly leaning toward sustainability. However, there is a nuance most people miss: if you only ever run Eco or Quick cycles, you are never reaching the thermal threshold required to kill fat-loving bacteria. I’ve seen innovative dishwashers with AI technology struggle with odors simply because the owner never ran a heavy-duty, high-heat cycle. A study published in the Journal of Applied Microbiology highlights that low-temperature washing cycles below 40 degrees Celsius are often insufficient to break down the complex biofilms that protect odor-causing bacteria. To keep things fresh, you must run at least one Sanitize or high-heat cycle every month to melt away the accumulated fats and oils that cooler water simply moves around.
Can your smart appliance actually tell when it’s dirty?
While we rely on technology for a seamless home experience in 2025, don’t assume your sensors see everything. A dishwasher might detect clear water, but it won’t necessarily sense the mold growing in the drain hose. The same goes for your kitchen’s centerpiece; you might notice why your high-efficiency fridge runs more often than your old one, but the AI won’t tell you that the condenser coils are choked with pet hair, causing the motor to overwork and the interior to stay slightly too humid. Expert care requires human intuition alongside those smart features. Have you ever fallen into this trap of over-soaping or over-relying on eco-modes only to be met with a mystery smell? Let me know in the comments. We are in this together, and sometimes the simplest oops is the most expensive one to fix.
Once you’ve tackled the smells, the next hurdle is ensuring your machines don’t just work, but work efficiently for the next decade. I’ve found that the difference between a five-year lifespan and a fifteen-year lifespan usually comes down to three specific tools I keep in my utility drawer. First, a long-handled, flexible coil brush is non-negotiable. I use it every six months to clean the hidden debris under your refrigerator grille. If those coils are choked with dust, your compressor has to work twice as hard, which is often why your high-efficiency fridge runs more often than your old one. Second, I always keep a digital probe thermometer on hand. It’s the only way to truly know if your settings are accurate, and it helps when you need to calibrate your refrigerator thermometer without calling a pro. Finally, a simple level is my best friend for preventing the dreaded ‘walking’ washer. If your machine isn’t perfectly flat, the bearings will wear out prematurely, leading to that terrifying moment why your washing machine is moving across the floor during the spin cycle.

How do I keep my high-end appliances running smoothly for decades?
The secret is moving from reactive repairs to proactive calibration. In the world of smart tech, we often forget that these machines are part mechanical, part digital. According to technical guidelines from the Association of Home Appliance Manufacturers (AHAM), even a slight deviation in internal temperature or water pressure can lead to a 20-30% drop in energy efficiency over time. This is why I periodically check for software lags. If your interface is acting up, you might need to find the hidden reset button on your smart refrigerator that fixes glitches before they become permanent hardware failures. We are seeing a massive shift in the future of home appliances where AI will eventually predict these failures for us, but for now, the ‘human touch’ of monthly inspections is your best insurance policy.
As we look toward a seamless home experience in 2025, the focus is shifting toward ‘modular longevity.’ Manufacturers are beginning to realize that users want to repair, not replace. I’ve started paying closer attention to how smart washing machines can simplify laundry day by alerting us to load imbalances before the drum sustains damage. It’s all about listening to the machine. That slight hum or tiny vibration isn’t just noise; it’s data. If you want to take your maintenance to the expert level, I challenge you to do this one thing today: pull your fridge out, vacuum those coils, and check the level of your washer. You’ll likely save yourself a thousand-dollar repair bill down the road. Stay tuned, because next, we’re going to wrap all of this up into a daily checklist that will make your kitchen feel brand new every single morning.
Lessons from a Kitchen That Once Smelled Like a Swamp
After years of testing everything from the ultimate guide to smart home appliances for a modern living to basic hand-wash cycles, I’ve realized that the most expensive repair is usually the one caused by neglect. Here is what I’ve learned on the front lines of home maintenance:
- The ‘Self-Clean’ Myth: No matter how many sensors a unit has, physical debris doesn’t disappear into thin air. You have to be the human hands that remove it from the filter.
- Less is More: Whether it’s detergent or heat, the ‘more is better’ philosophy is one of the 5 mistakes that are shortening the life of your smart refrigerator and dishwasher alike.
- Air is Your Ally: Simply leaving the door cracked for an hour after a cycle can prevent 90% of the mold issues I used to battle.
My Go-To Toolkit for a Lifetime of Freshness
I don’t believe in cluttered cabinets, so I keep my maintenance kit lean and mean. I trust these specific tools above any fancy commercial gimmick:
First, white vinegar is my non-negotiable for the best energy efficient settings for your new dishwasher because it cleans without leaving chemical residues. Second, I rely on the AHAM (Association of Home Appliance Manufacturers) technical guidelines to understand the limits of my machines. Third, a digital probe thermometer—it’s how I discovered why your fridge is freezing everything on the top shelf and saved a month’s worth of groceries. Finally, a long-handled coil brush for the refrigerator, because a dusty motor is a dying motor.
Reclaim Your Kitchen’s Soul Today
Maintaining your home doesn’t have to be a daunting weekend project. It starts with a simple sniff test and a five-minute filter scrub. When you treat your appliances with respect, they reward you with a home that smells like a sanctuary instead of a locker room. Don’t be afraid to poke around your machine’s ‘hidden’ areas; knowledge is the best tool you have to keep your kitchen running perfectly. Which part of your dishwasher or fridge do you find hardest to keep clean? Let me know below!