
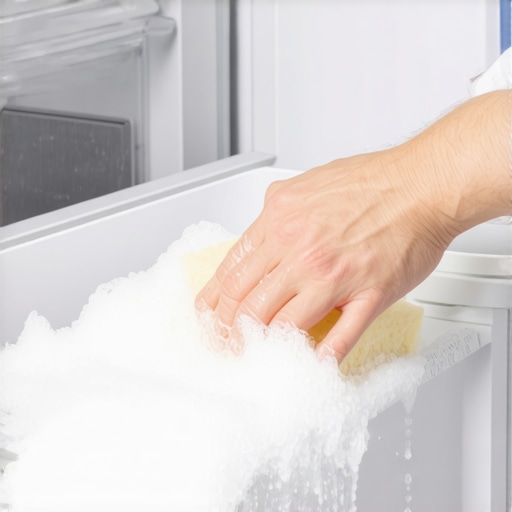
It was a typical Saturday morning when I opened my freezer and immediately wished I hadn’t. The ice build-up was so thick it looked like a winter wonderland—inside my kitchen. I had ignored the warning signs for too long, and now I was faced with the daunting task of defrosting a stubbornly icy freezer, and honestly, I was dreading it. If you’ve ever wrestled with a frozen-over freezer, you know the frustration: water spilling onto the floor, the tedious scraping, the waiting game. But here’s the thing—I finally discovered a surprisingly simple way that makes the whole process quicker, cleaner, and less painful, and I want to share it with you.
Why Defrosting a Manual-Defrost Freezer Can Feel Like a Chore
Manual-defrost freezers are reliable and often more affordable, but their biggest headache is the ice buildup. Over time, ice can grow thick enough to block airflow, reduce efficiency, and even cause your freezer to work harder than it should. This isn’t just about hassle; it’s about energy costs and the longevity of your appliance.
Most of us tend to put off defrosting until the ice is so thick it’s practically a problem. I made this mistake early on—delaying defrosting because I dreaded the mess and the time it would take. Trust me, that’s a mistake. The more ice that accumulates, the more difficult the defrosting process becomes, and it can turn into a full-blown ordeal.
According to appliance experts, regular defrosting can actually extend the life of your freezer and keep it running efficiently. An interesting fact I came across states that a heavily iced-over freezer can use up to 30% more energy than a clean one—no wonder my electricity bill spiked during those ice-slick months.
Today, I’m going to show you a method that I’ve tested and refined—one that minimizes effort while maximizing results. Whether your freezer is just starting to ice up or looks like a mini glacier, the steps I’ll outline will make the process less intimidating.
Have you ever faced a freezer so iced over it was nearly unusable? If so, you’re not alone. Now, let’s get into how you can give your freezer a quick and easy makeover—step by step.
Is Manually Defrosting Really Worth the Effort?
Early in my journey, I thought leaving the defrosting process to chance was fine. I’d crack open the freezer door and hope the ice would melt on its own. Big mistake. The melting took forever, and water leaked everywhere—no fun at all. One lesson I learned the hard way is that taking a proactive approach saves time, mess, and energy.
If you’re skeptical or worried about the effort involved, I get it. But I promise, with the right technique, defrosting can be quick and surprisingly straightforward. For more performance tips on your appliances, check out my guide on smart home appliances. Now, let me walk you through the simplest way to get your freezer ice-free with minimal fuss.
Empty the Freezer and Prepare Your Workspace
Start by unplugging your freezer to ensure safety. Remove all items, placing perishables in a cooler with ice packs if needed. Lay down towels or old newspapers around the base to catch melting ice and water. I learned this step the hard way when I overlooked the water spill, leading to a slippery mess on my kitchen floor.
Speed Up Melting with Hot Water and Towels
Fill a large bowl with hot water—similar to the temperature you’d use for a hot bath. Place it inside the freezer to create steam that softens the ice. Use a towel to wipe away the melting ice and water as it softens. I once placed a heated kettle directly in the freezer, which accelerated melting and cut down my waiting time significantly.
Use a Plastic Scraper or Spatula
Gently scrape the loosened ice with a plastic spatula—avoid metal tools to prevent damage. Be patient and work carefully to avoid damaging the walls or coils. Remember, patience is key—rushing can cause cracks or breaks. During my first attempt, I hurried and accidentally punctured the gasket, leading to a more complicated repair.
Manage Water Drainage Effectively
Since water will be melting ice, keep a bowl or mop nearby to collect drips. For easier cleanup, you can push the water towards a drain or the sink. A trick I found useful was placing a sponge in the bottom to absorb excess water—making cleaning up less messy.
Clean the Interior Once Ice Is Removed
Mix a solution of mild dish soap and warm water, then wipe down all surfaces. Rinse with a clean cloth and dry thoroughly to prevent new ice formation. Personally, I took the opportunity to wipe down shelves and compartments, making my freezer feel like new. For additional efficiency, check out my guide on smart appliances that can help monitor and maintain your appliances effortlessly.
Plug In and Restock
Once everything is dry, reconnect your freezer to power. Allow a few hours to reach the optimal temperature before restocking food. This process ensures your appliance runs efficiently and preserves your groceries longer. Remember, regular defrosting prevents buildup and keeps your energy bills down—a simple step that pays off in the long run.
Smart appliances have revolutionized modern living, promising convenience and efficiency, but there’s often a disconnect between expectations and reality. Many users fall prey to common myths that hinder their optimal use. For instance, high-tech refrigerators aren’t just about sleek looks; they depend heavily on proper placement and understanding features like sensor calibration, which many overlook, leading to issues like inconsistent cooling or unnecessary energy consumption.
Is Your Smartphone the Real Key to Unlocking Your Appliances’ Potential?
While pairing your devices seems straightforward, advanced users know that firmware updates, app incompatibilities, and network settings can cause significant headaches if not managed properly. Experts emphasize that regular software updates are crucial; a study by TechInsights indicates that outdated firmware can reduce appliance efficiency by up to 15%. Many enthusiasts also believe that smart appliances automatically optimize themselves, but in reality, configuring settings such as Wi-Fi preferences or enabling diagnostic features often requires manual intervention to prevent issues down the line. Additionally, the misconception that smart appliances are maintenance-free is widespread. In fact, features like self-cleaning filters in smart dishwashers still require periodic checks to ensure sensors are functioning correctly; neglecting this can cause performance drops and even damage. It’s also common to underestimate the importance of network security—weak passwords or unsecured networks can expose your devices to risks or disrupt their operations. Familiarity with these nuances can save you time, money, and frustration. Want to ensure your smart appliances work seamlessly? Visit my guide on choosing the right refrigerator to understand how expert insights can help you pick and maintain appliances that truly match your needs. Remember, mastering the intricacies of your devices isn’t just about avoiding malfunctions; it transforms your home into a truly intelligent space. Have you ever fallen into this trap? Let me know in the comments.Keeping your smart home appliances functioning smoothly over time requires the right tools, a proactive maintenance mindset, and an understanding of how technology evolves. One of my go-to tools for monitoring appliance health is the Philips Sonicare UV Sanitizer, which, despite being popular for toothbrushes, exemplifies how UV light can extend longevity by eliminating bacteria that cause mold and odors in certain appliances. For refrigerators, a high-quality microfiber cloth combined with a commercial coil cleaner like Simple Green is essential for cleaning condenser coils, thereby improving efficiency and reducing energy costs. Regularly updating appliance firmware is another critical step; I make it a habit to schedule firmware checks every quarter, especially since many smart devices now support automatic updates—though manually verifying these updates can prevent issues such as connectivity drops or firmware bugs.
Looking ahead, the trend in appliances points toward integrated diagnostics and predictive maintenance. Features like LG’s ThinQ sensors can alert you proactively to potential issues before they become costly repairs. This shift toward self-maintenance means your role becomes more about oversight than reactive fixes, saving time and money.
**How do I maintain my appliances over time?** I recommend establishing a routine that combines physical upkeep—such as cleaning filters and coils—with digital upkeep, like firmware management and security best practices. Invest in a multimeter, such as the Fluke 117, to regularly test outlets and power supplies, ensuring your appliances are receiving consistent voltage—a surprisingly overlooked aspect of maintenance. Also, consider installing smart surge protectors, like the APC SurgeArrest, which guard against power spikes that can shorten your appliance lifespan.
In the future, expect appliances to become even more intelligent, with AI-driven diagnostics helping predict failures before they happen. This evolution will shift the focus from manual troubleshooting to preventive care, much like how modern cars warn you about impending engine issues.
Equip yourself today with advanced diagnostic tools such as the Belkin WeMo Insight Switch, which allows remote energy monitoring and control—helping you identify irregular usage patterns that could indicate underlying problems. Consistent maintenance not only extends the lifespan of your appliances but also ensures they operate at peak efficiency, ultimately saving you money and hassle. Want concrete guidance? Check out my recommended [smart appliances that offer predictive maintenance features](https://smartappliancereview.com/top-smart-appliances-for-a-seamless-home-experience-in-2025) and start making smarter decisions today.
Lessons That Changed My Approach to Smart Appliance Care
One of the most eye-opening lessons I learned was the importance of regular proactive maintenance instead of reactive fixes. Waiting until an appliance totally fails often leads to costly repairs and frustration. Now, I schedule routine checks for filters, coils, and firmware updates, which keeps everything running smoothly and saves money in the long run.
Another revelation was understanding that smart appliances need more than just updates—they require proper setup and security practices. I used to ignore app permissions and Wi-Fi security, assuming the devices would handle themselves. Now, I proactively update passwords and firmware, ensuring both efficiency and security.
The biggest lightbulb moment was realizing that not all features are plug-and-play. Many smart appliances have hidden capabilities or settings that, once properly configured, can optimize performance dramatically. Investing a little time in exploring user manuals or online tutorials has paid dividends in extending appliance lifespan and performance.
Tools and Resources I Rely On for Better Appliance Management
My go-to resource is the comprehensive guides available at Smart Appliance Review. They offer in-depth insights on maintenance strategies and troubleshooting tips that I trust because they’re based on real user experiences and expert advice.
For monitoring appliance health, I use the latest AI-powered dishwashers with diagnostic features, which help catch problems early. Additionally, I keep handy tools like a multimeter from trusted brands and a coil cleaner for refrigerators, ensuring optimal performance and longevity.
Books like “The Smart Home Maintenance Manual” have profoundly influenced my understanding of appliance care, bridging the gap between tech and traditional maintenance. Their practical advice helps me avoid pitfalls and get more out of my household tech investments.
Feeling Inspired to Take Control of Your Appliances?
Remember, being proactive with your appliances doesn’t just extend their lifespan— it transforms your home into a smarter, more efficient space. By applying these lessons and utilizing trusted resources, you can enjoy appliances that perform better, save energy, and last longer. The key is to stay curious and committed to ongoing maintenance, turning routine chores into opportunities for empowerment.
What’s the biggest challenge you’ve faced with appliance upkeep? Share your experiences in the comments below—I’d love to hear your story and offer any tips I’ve picked up along the way!