

I’ll never forget the sound of that crunch. It wasn’t the satisfying snap of a solid ice cube meeting a tooth; it was more like the sad crackle of a lightbulb shattering in my glass. I was hosting a summer barbecue, trying to be the “host with the most,” when my neighbor pointed out that my scotch-on-the-rocks looked more like scotch-on-the-slush. My ice maker wasn’t making cubes anymore. It was spitting out these fragile, translucent shells that disappeared before the drink even hit the table. It was pathetic. I felt like I’d failed at basic adulting.
The Frustrating Mystery of the Disappearing Ice Cube
We rely on our refrigerators for so much, but we often ignore them until they start acting up. When mine started producing those hollow, “sad” cubes, I went down a rabbit hole of frustration. I assumed I needed a whole new unit. I even looked into refrigerators in 2025 with top features just to see if I could escape the problem by upgrading. But before you drop a grand on a new appliance, let me tell you: the fix is usually much simpler (and cheaper) than you think. The real reason your ice maker is failing usually boils down to one of two things: water flow or temperature. If the mold doesn’t fill up all the way, you get a shell. If the freezer is too warm, the center never solidifies. Early on, I made the classic mistake of thinking a dirty water filter was the only culprit. I swapped it out three times in six months, wasting money while the cubes stayed tiny. It turns out, I had a partially clogged inlet valve that was barely letting a trickle through.
Does My Ice Maker Just Suck?
It’s easy to blame the brand or the model. You might think, “They just don’t make ’em like they used to,” and while modern refrigerators might not last as long as grandma’s, a hollow cube is rarely a design flaw. It’s a symptom. According to industry data from the Association of Home Appliance Manufacturers (AHAM), consistent water pressure between 20 and 120 psi is critical for the timed fill cycles most ice makers use. If your pressure is low, your cubes will be “low” too. I’ve spent way too many weekends elbow-deep in freezer frost to let you suffer the same fate. Whether you’re dealing with tiny or hollow cubes or your fridge is freezing everything on the top shelf, there is always a logical path to a fix. Have you ever reached into your ice bin and pulled out something that looked more like a snowflake than a cube? Now, let’s get into the nitty-gritty of how to actually get your freezer back to producing those solid, glass-clinking bricks we all love.
Stop Guessing and Start Testing the Water Line
The first thing you need to realize is that your ice maker is a creature of habit. It operates on a timer, not a sensor. It doesn’t ‘know’ when the mold is full; it just knows it’s supposed to let water flow for exactly seven seconds. If your water pressure is weak, those seven seconds only fill the mold halfway. Think of it like trying to fill a bucket with a kinking garden hose—you’re going to end up with a shallow puddle instead of a full pail. I learned this the hard way last spring when I pulled my fridge out to clean the coils and inadvertently crushed the copper supply line against the wall. For three weeks, my ice cubes looked like delicate communion wafers that shattered the moment they hit my glass. Before you buy any parts, pull your fridge out and make sure that line is as straight as an arrow.
The Water Inlet Valve is Your First Priority
If the line is clear but the flow is still a trickle, the culprit is almost always the water inlet valve. This is the electronic gatekeeper that sits at the bottom back of your unit. Over time, calcium and sediment from your home’s pipes can clog the tiny mesh screen inside the valve. When this happens, the valve might be fully ‘open’ electrically, but physically, it’s like trying to breathe through a cocktail straw. This is the most common reason why your ice maker is producing tiny or hollow cubes. I once spent two hours dismantling my entire freezer assembly only to find a single grain of sand wedged in that valve screen. Replacing the valve is a twenty-minute job that requires nothing more than a nut driver and a bit of patience.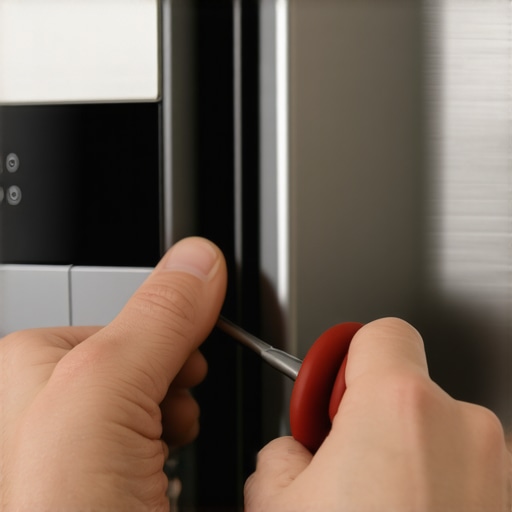
Get the Temperature Down to Zero
Temperature is the silent saboteur of the perfect ice cube. Most people think ‘freezing is freezing,’ but that’s not true for clear, solid ice. If your freezer is hovering around 10°F or 15°F, your food will stay frozen, but the center of your ice cubes won’t solidify fast enough. When the ice maker starts its ‘harvest’ cycle, it uses a small heating element to loosen the cubes from the mold. If the core of the cube is still liquid, that liquid spills out, leaving you with a hollow shell. To fix this, you need to ensure your freezer is set to 0°F (-18°C) or even slightly lower. If your dial is just a ‘1 to 7’ setting, you should learn how to calibrate your refrigerator thermometer without calling a pro to see what’s actually happening inside. While you’re at it, make sure you aren’t blocking the air vents with that giant bag of frozen peas. Proper airflow is vital, otherwise, you might find that your fridge is freezing everything on the top shelf while the ice maker stays too warm to work properly.
Clearing the Path for Better Flow
Finally, don’t ignore your water filter. A bypass valve that is only partially engaged or a filter that is six months past its prime can drop your water pressure significantly. I’ve seen cases where a ‘generic’ bargain filter didn’t sit quite right in the housing, restricting flow just enough to ruin the ice harvest. If you notice a change in your water dispenser’s speed, your ice maker is suffering too. If the flow is fine but you hear a strange groaning sound during the fill, you might want to investigate how to tell if your refrigerators fan motor is failing, as a struggling evaporator fan can also mess with the consistent temperatures needed for solid ice. Keeping the internal climate stable is just as important as the water itself, especially if you want to maintain the best refrigerator temperatures for keeping leafy greens crisp while simultaneously churning out bricks of ice.
The Great Pre-Rinse Myth That is Ruining Your Dishwasher
We’ve all been told that we need to scrub our plates clean before they ever touch the dishwasher rack. It feels like common sense, right? If the plate is clean going in, it’ll be cleaner coming out. But here is the nuance most people miss: modern dishwashers are actually smarter than you think, and your ‘help’ is actually hurting. Most mid-to-high-end units manufactured in the last five years use turbidity sensors to measure how dirty the water is. If you pre-rinse everything to a shine, the sensor detects clear water and prematurely ends the cycle or reduces the temperature. This leaves you wondering why your dishwasher detergent isnt cleaning properly when the real culprit was your own elbow grease. Detergent enzymes are designed to latch onto food particles; without them, the soap just bounces off the ceramic and can eventually corrode your glassware.
Is Your Eco-Mode Actually Costing You More?
It sounds like a win-win: save the planet and save money. However, the truth about eco mode on modern dishwashers is that it relies on longer cycle times and lower temperatures. While this is great for energy, it’s a nightmare for grease buildup. According to a study by the American Council for an Energy-Efficient Economy (ACEEE), repeated use of low-temp cycles without an occasional high-heat ‘Sanitize’ run can lead to fatty deposits clogging the internal filters. I’ve seen countless ‘broken’ machines that just needed a single hot cycle to melt away months of accumulated gunk. The same logic applies to your laundry room; if you only ever use cold water, you’re likely going to find out why high efficiency washers smell like mold and how to stop it the hard way. 
The Over-Detergenting Trap
If a little soap is good, a lot must be better, right? Wrong. This is the single most common ‘oops’ factor I see in modern appliance maintenance. Modern washing machines that save water use a fraction of the liquid their predecessors did. When you over-fill that detergent tray, the machine can’t rinse it all away. This creates a ‘scrubbing’ effect on your clothes that wears down fibers and leaves a sticky residue that attracts more dirt. In dishwashers, too much soap can lead to the classic ‘suds lock’ where the pump can’t move water because it’s full of foam, often being the secret reason how to fix a dishwasher that wont drain completely involves less work than you’d expect. If you see white streaks or feel a film on your ‘clean’ items, you’re likely using double the soap you actually need. Also, pay attention to the hardware; sometimes why your dishwasher pod isnt dissolving completely is simply because you’ve blocked the dispenser door with a giant dinner plate. These machines are precision instruments, not garbage disposals. Have you ever fallen into this trap and realized you were ‘over-cleaning’ your way into a repair bill? Let me know in the comments below.Once you’ve mastered the soap-to-water ratio, the next step in appliance mastery is having the right tools on standby. I don’t mean a full mechanic’s chest, but two specific items have saved me thousands in repair bills: a digital multimeter and a dedicated slim-nozzle shop vac. I use the multimeter to test continuity on everything from dryer thermal fuses to heating elements. If you’re wondering how to diagnose a faulty lid switch on your top loader, a simple continuity test will tell you in five seconds if the switch is physically broken or if the board is just being temperamental. As for the shop vac, it’s my secret weapon for how to clean a front load washer filter without flooding the room. By sucking the standing water out of the drain hose before opening the filter cap, I avoid the dreaded laundry room flood that ruins baseboards. 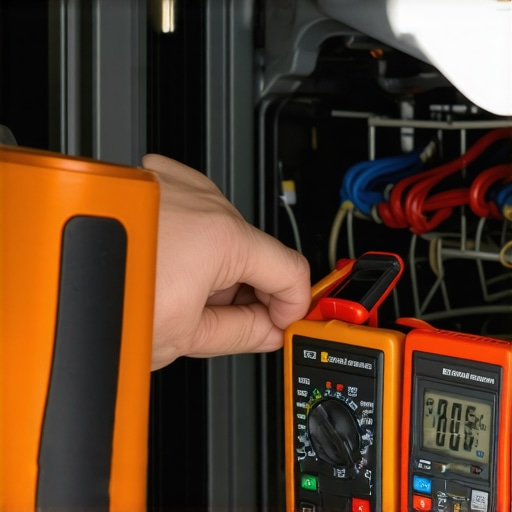
How can I keep these high-tech machines running for a decade?
Longevity in the 2020s isn’t about hope; it’s about scale and proactive habits. One of the most overlooked 5 mistakes that are shortening the life of your smart refrigerator is ignoring the airflow path at the back of the unit. According to technical documentation from the Association of Home Appliance Manufacturers (AHAM), restricted airflow over condenser coils is a leading cause of premature compressor burnout. Every six months, I use a coil brush to pull out the pet hair that chokes the motor. If the heat can’t escape, the compressor works double time, leading to early failure. This is why choosing the most reliable washing machine brands for durability only works if you also support the hardware with basic cleaning.
Don’t Ignore the Digital Brain of Your Kitchen
Maintenance isn’t just physical anymore; it’s digital. You absolutely need to know how to update the firmware on your smart kitchen appliances. Manufacturers often release patches that optimize pump timings or sensor sensitivity. A firmware update can literally recalibrate your sensors for better performance without you ever touching a wrench. Looking ahead, I see a shift toward proactive AI diagnostics. We’re moving past the era of ‘it’s broken’ and into the era of ‘it’s going to break.’ By 2025, according to the future of home appliances trends to watch in 2025, your fridge won’t just beep when the door is open; it will analyze the vibration of the compressor to warn you about internal wear, much like knowing how to tell if your washer bearings are about to fail gives you a head start in the laundry room. My challenge for you: Tonight, go into your smart appliance app and check for a firmware update. You might find a new mode waiting for you that wasn’t there when you bought the machine.
Hard-Won Secrets from My Appliance Graveyard
I used to think that ‘smart’ meant ‘hands-off,’ but the reality is that high-tech machines need a different kind of love. The biggest lightbulb moment for me was realizing that most ‘broken’ appliances are actually just ‘choked’—either by hard water minerals, pet hair, or too much soap. Another realization? Your ears are your best diagnostic tool. That slight change in the hum of your fridge or the rhythm of your washer usually happens weeks before the actual breakdown. If you listen and act early, you can save yourself a massive service fee. Also, never underestimate the power of a simple reset; sometimes the software just needs a fresh start to clear its digital throat.
The Only Gear You Actually Need in Your Utility Drawer
If you want to move beyond basic troubleshooting and truly master your home appliances, I swear by a few key resources. First, grab a digital multimeter; it’s the only way to stop guessing if a sensor is dead. Second, I always keep a bookmark on the ultimate guide to smart home appliances for a modern living because it bridges the gap between old-school mechanics and new-school software. For cleaning, skip the expensive specialized chemicals and keep a gallon of white vinegar on hand; it’s the most effective way to handle situations where your dishwasher leaves a chalky film on your coffee mugs without damaging the internal seals. These simple items are more valuable than any extended warranty.
#IMAGE_PLACE_FINAL#
Turn Your House Back Into a Home One Fix at a Time
You don’t need a degree in engineering to keep your household running smoothly. Appliance maintenance is really just about reclaiming control over the machines that are supposed to serve you. By taking ten minutes a month to check a filter or update firmware, you’re not just fixing a tool; you’re creating a stress-free environment for your family. Don’t be afraid to pull that fridge away from the wall or open that filter cap. Start small, perhaps by looking into the best ways to organize a bottom freezer drawer to ensure better airflow and more efficient cooling. Your future self, and your bank account, will thank you for being proactive. Have you ever managed to fix a major appliance issue with just a simple cleaning or a quick DIY adjustment? Let me know your biggest ‘I actually fixed it!’ moment in the comments below!