
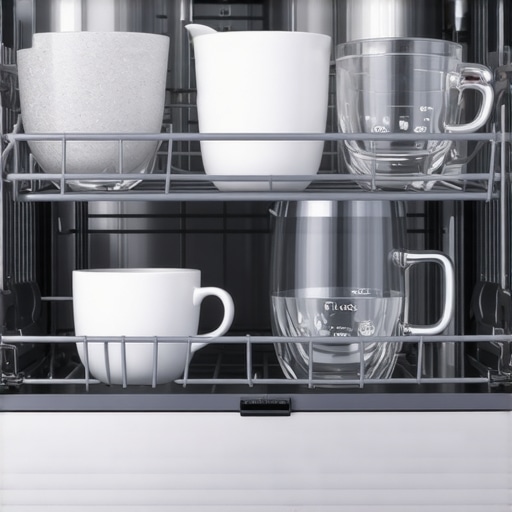
I pulled a ‘clean’ coffee mug out of my dishwasher last Tuesday, only to find a stubborn, crusty ring of yesterday’s caffeine still clinging to the ceramic. It was beyond frustrating. My top rack, which used to be completely reliable, had suddenly turned into a zone where soap goes to die and grit stays forever. If you are seeing cloudy glasses or bowls that feel like sandpaper when you unload them, I want you to know you are not alone. I spent weeks assuming I just needed a brand-new machine, but the truth is usually much simpler and a lot cheaper. Today, I am going to help you pinpoint exactly why that upper level is failing and show you how to get those glasses sparkling again without spending a fortune on a professional repairman. We are going to look at the guts of your machine together and fix this.
Your Top Rack Does Not Have to Be a Graveyard for Dirty Dishes
When this first started happening to me, I made the classic mistake of overcompensating. I went out and bought the most expensive, ‘ultra-platinum’ detergent pods on the market, thinking they would blast away the grime. Spoiler alert: they did not. I was actually making a common dishwasher detergent mistake that is etching your favorite glassware while the actual problem stayed hidden. The reality is that the top rack relies on a very specific dance of water pressure and clear pathways. Most people do not realize that the upper spray arm is often fed by a tube at the back of the machine. If that tube is not perfectly aligned with the rack, or if the rack is not pushed all the way in, your top dishes are basically just getting a light steam bath instead of a scrub. I felt like a total amateur when I realized I had just been loading my oversized platters in a way that blocked the spray arm from even spinning. Have you noticed your top rack performance dipping slowly over time, or was it a sudden total failure? Drop a comment and tell me about your situation because I bet we can figure it out together.
Is My Dishwasher Just Too Old to Work Right?
It is easy to get cynical and think everything is built to break after a few years. However, an authoritative study by Consumer Reports suggests that a huge percentage of dishwasher performance issues are actually caused by simple debris buildup rather than a total mechanical failure. Before you start wondering if your heating element is broken, we need to look at the basics of water flow. Often, the culprit is just a tiny piece of plastic or a stray popcorn kernel stuck in a nozzle. Knowing how to clean the internal spray arms can restore that vital water pressure in about five minutes. There is also a hidden sensor in your dishwasher that needs a manual scrub occasionally to ensure the machine knows the water is actually dirty. We are going to dive into exactly how to check these components so you can stop hand-washing those ‘clean’ dishes.
Clear the Spray Nozzles First
The very first thing you need to do is pull that top rack out and flip it over. Most people treat their dishwasher like a magic box, but it is really just a plumbing loop. Underneath that rack is a plastic arm that spins. This arm is your primary weapon against grease, yet it is incredibly easy to disable. Think of it like a garden hose with a pebble stuck in the nozzle; the water might still come out, but it loses the pressure needed to actually scrub. I remember a few months ago, my glasses were coming out looking worse than when they went in. I took the arm off—usually just a simple plastic nut—and found a single, solitary sunflower seed shell wedged perfectly inside one of the holes. That tiny piece of debris was enough to stop the arm from spinning entirely. Once I cleared it out using a toothpick, the difference was night and day. If you are seeing similar issues, learning how to clean the internal spray arms is the highest-value five minutes you can spend on your kitchen maintenance. 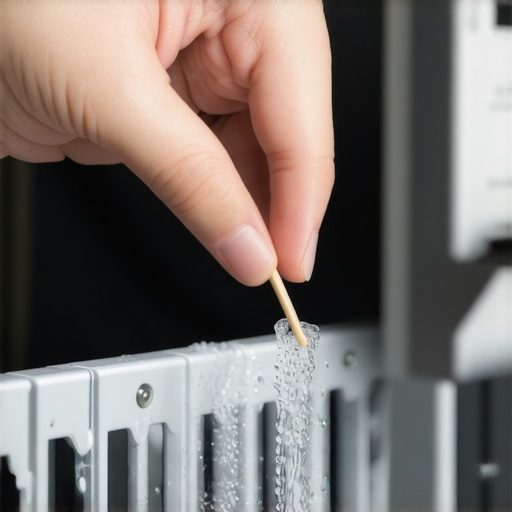
Check the Docking Station Connection
If your spray arms are clear but your dishes are still dirty, the problem is likely a ‘handshake’ issue. On the back wall of your dishwasher, there is a water delivery port. When you push the top rack in, a manifold (a fancy word for a plastic pipe) on the back of the rack must plug into that port perfectly. It is like a spacecraft docking with a space station. If the rack is slightly crooked, or if the gasket in that port has perished, the water pressure leaks out into the tub instead of going through the spray arm. This lack of pressure is often why your dishwasher is leaving a gritty white film on your plates because the detergent isn’t being fully rinsed away. Check the back of the rack to ensure the plastic pipe is not cracked and that it aligns vertically with the supply port.
Verify the Water Level and Drainage
Sometimes the top rack fails because the machine simply does not have enough water to reach that height. If your inlet valve is partially restricted, the dishwasher might stop filling before the water reaches the optimal level. Without enough volume, the pump cannot create the ‘head pressure’ required to push water all the way up to the top. This is also related to how well the machine empties. If there is a partial clog in the sink tailpiece or the hose, old dirty water stays in the loop. You need to know why your dishwasher isnt draining and how to clear the blockage to prevent that dirty slurry from being redeposited on your glasses.
Smart Features and Proper Loading
If you own one of the many innovative dishwashers with AI technology, check your app for any sensor errors. Sometimes the software can get confused by a faulty turbidity sensor. If the tech is fine, look at your loading. Many of us try to maximize space, but if a tall plate on the bottom rack blocks the rotation of the top spray arm, nothing on top will get clean. To avoid wet messes, use the trick to getting bone dry plastic containers out of your dishwasher by angling them so water cannot pool on the bottom.Most people think they are doing their dishwasher a favor by pre-rinsing every plate until it is practically clean before it hits the rack. In my experience, this is the quickest way to end up with cloudy, etched glasses. Modern dishwashers are smarter than we give them credit for. They use turbidity sensors to measure how much grime is in the water during the first rinse. If you have already rinsed everything off, the sensor tells the computer the load is light, so it uses less water and lower heat. According to the American Cleaning Institute, the enzymes in modern detergent pods are specifically engineered to attach themselves to food proteins and starches. Without those food particles to ‘eat,’ the detergent can become aggressive toward your finishes. This logic is also how to fix a smart dishwasher that wont recognize its own detergent pods because the sensor needs that feedback loop to function. You are essentially paying for a high-tech machine and then preventing it from doing its job. Have you ever fallen into this ‘clean freak’ trap? Let me know in the comments because I used to be the worst offender.
The Vinegar Myth Can Ruin Your Door Seal
We have all seen the ‘hacks’ suggesting you should place a bowl of white vinegar on the top rack to deal with hard water. While vinegar is a great descaler, it is also an acid. Constant use in a high-heat environment can degrade the rubber gaskets and seals over time. I have seen countless DIYers wonder how to stop your dishwasher from leaking water onto the kitchen floor only to realize they have eaten away their own door seal with too many ‘natural’ vinegar cycles. It is far safer to learn the truth about using white vinegar in your high efficiency dishwasher and stick to formulated citric acid cleaners or commercial descalers that are buffered to protect those vital rubber parts.
Why does my salt light stay on after I just filled the reservoir?
This is a question I get from readers who have recently upgraded to a machine with a built-in water softener. You buy the salt, you fill the tank, and yet that annoying red light keeps glaring at you. Usually, this is not a sensor failure but a simple physics problem: an air pocket. When you pour salt into the reservoir, it can trap a bubble of air around the float switch, keeping it in the ’empty’ position. The fix is remarkably low-tech. Take a wooden spoon and gently stir the water-and-salt mixture inside the reservoir to release the trapped air. If the light persists, it might be why your dishwasher salt light stays on after you have filled it—the float itself might just be stuck. 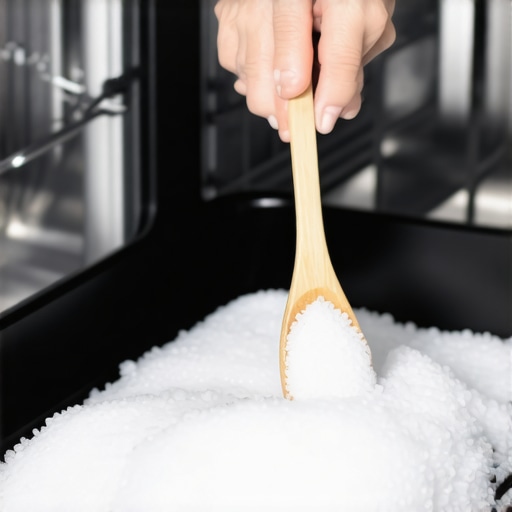
Detergent Dispensing Failures You Might Be Ignoring
Sometimes the top rack is dirty simply because the detergent door didn’t open at the right time. If you lean a large cookie sheet against the door, it can block the dispenser from popping open. But there is a more subtle issue: moisture. If your hands are wet when you put a pod in, or if the dispenser cup is damp, the pod can stick to the plastic. By the time it finally releases, the main wash cycle is almost over. If you find your pod only half-dissolved, you should also check why your dishwasher is not dispensing the rinse aid properly. Without rinse aid, the water doesn’t ‘sheet’ off the dishes, which is a major reason why the top rack—where the water has the farthest to travel—ends up with those stubborn spots. Transitioning into the smart appliances revolution and how to choose the best dishwasher for your home means understanding that these machines are precision instruments, not just metal boxes. They need the right chemistry and the right environment to thrive.Maintaining your fleet of appliances doesn’t require a degree in engineering, but it does require a few specific items in your toolkit. I personally keep a dedicated ‘appliance kit’ tucked away in my laundry room. It contains a pair of long-reach needle-nose pliers—essential for reaching into the dark recesses of a pump housing where a stray cherry pit might be rattling—and a small wet/dry shop vac with a tapered nozzle. If you have ever dealt with a flooded kitchen, you know that a vacuum is infinitely faster than a mountain of towels. I use mine specifically to suck out the standing water from the dishwasher sump before I even start a repair. This same proactive approach applies to your laundry room, especially when you need to focus on how to clean the debris filter on your front load washer effectively without drenching your flooring. Using a shop vac to clear the drain hose can save you hours of frustration.
How do I maintain my smart kitchen gear over the long haul?
The secret to longevity in the modern era is a combination of physical upkeep and digital hygiene. For my refrigerator, I check the magnetic door gaskets every six months using what I call the ‘dollar bill test.’ If you close the door on a dollar bill and it slides out easily, your seal is failing, and your compressor is working overtime. This is a critical step mentioned in the ultimate guide to smart home appliances for a modern living because even the most expensive smart fridge loses its utility if the cold air is constantly escaping. Beyond physical checks, you must treat these machines like the computers they are. You might find it annoying why your smart appliance app keeps asking for a firmware update, but skipping these is a major mistake. Manufacturers often release ‘over-the-air’ patches that recalibrate sensors to be more forgiving of hard water or more efficient during peak energy hours. According to technical bulletins from the Association of Home Appliance Manufacturers (AHAM), these software updates can occasionally improve sensor accuracy by up to 15%, which directly extends the life of your heating elements. 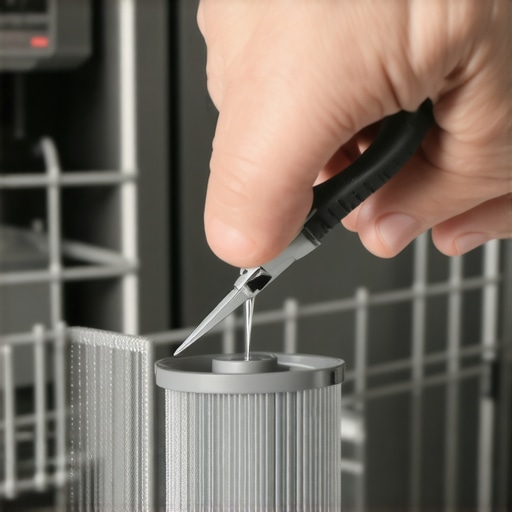 Looking toward the horizon, I predict the future of home appliances trends to watch in 2025 will shift toward ‘self-healing’ systems. We are already seeing prototypes of dishwashers that can detect a pump obstruction and use high-pressure air bursts to clear the line automatically. Until those become standard, however, you are the primary mechanic of your home. My challenge to you today is simple: go grab a high-powered flashlight and inspect the rubber door seals on your dishwasher and fridge. If they feel sticky or look cracked, wipe them down with warm, soapy water. It is the single easiest way to prevent a three-hundred-dollar service call next month.
Hard Truths About Grime That Changed My Kitchen Routine
After years of battling cloudy glasses, I realized that the ‘cleaner’ I tried to be, the worse my dishwasher performed. The biggest lightbulb moment for me was accepting that modern detergent needs a bit of ‘dirt’ to work effectively; without food particles, the chemistry turns against your glassware. I also learned that a simple toothpick is often a more powerful tool than the most expensive cycle. If your machine is still struggling with moisture after you clear the arms, you might want to look into the hidden sensor that stops your dishwasher from drying properly. Finally, never underestimate the power of a physical alignment check. If that back manifold isn’t perfectly seated, your water pressure is just a whisper instead of a roar.
My Go-To Maintenance Gear for Every Appliance
I don’t believe in buying every gadget on the shelf, but a few specific tools have saved me thousands in repair fees. First, a high-quality LED flashlight is non-negotiable for spotting hairline cracks in a spray arm or a perished gasket. Second, I always keep a small container of citric acid crystals; they are far safer for your machine’s internals than vinegar and do wonders for hard water buildup. For those who have embraced the ultimate guide to smart home appliances for a modern living, I recommend keeping your manufacturer’s app updated to catch those vital performance patches. Lastly, a simple set of leveling tools can prevent the vibration issues often discussed in guides on how to level a washing machine so it stops banging on tile floors, which applies to dishwashers too.
Stop Hand-Washing and Start Trusting Your Machine Again
It is incredibly liberating to close your dishwasher door and know with 100% certainty that every single item will come out pristine. You don’t need a brand-new kitchen to get professional-grade results; you just need to understand the simple physics of water flow and sensor health. By taking five minutes once a month to inspect the ‘guts’ of your unit, you ensure your home appliances work for you, rather than the other way around. Don’t be afraid to get your hands a little dirty today so you can have perfectly clean dishes tomorrow. Have you ever found something bizarre, like a toothpick or a bone, stuck in your spray arm nozzles? Let me know in the comments below!