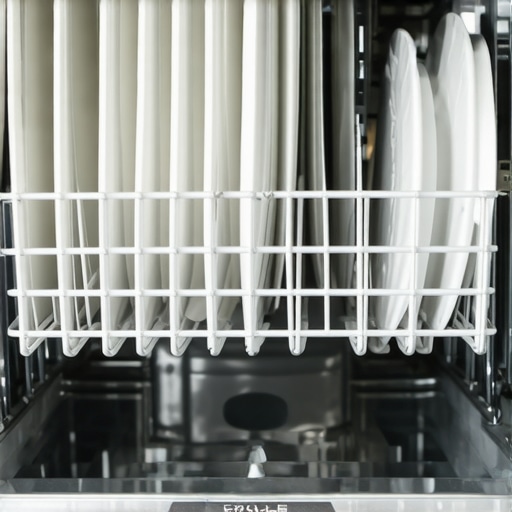
Ever opened my dishwasher after a cycle and found the dishes on the top rack covered in that annoying, gritty film? It’s happened to me more times than I care to admit, and let me tell you, it’s frustrating. One minute, I’m excited to enjoy sparkling clean dishes, and the next, I’m scrubbing away stubborn residue. That lightbulb moment hit when I realized I wasn’t alone—many homeowners face this issue, and it’s more common than you think.
The Dirty Truth About Residue on the Top Shelf
This problem isn’t just about aesthetics; it can signal deeper issues with your appliance or cleaning routine. Over time, mineral deposits, soap buildup, or clogged spray arms can leave behind that pesky film, especially on the top rack where water pressure and spray patterns differ. I used to think I was rinsing thoroughly before loading, but turns out, some mistakes were sneaking in—mistakes I’ll share soon so you can avoid my early blunders.
Keeping dishes spotless is essential not only for appearance but also for health. Residue can harbor bacteria, and nobody wants that lingering on their dinnerware. So, let’s dive into why this residue appears, why it matters, and most importantly, how you can get rid of it. Ready to restore that shine? I promise, the solutions I’ll share are straightforward—and they’ve worked magic in my own kitchen.
Is Your Dishwasher Efficient or Just Lazy?
At first, I blamed my dishwasher—thinking it was defective or old. But after some research, I learned that simple maintenance mistakes could be the culprits. For instance, neglecting to clean spray arms or using expired detergent can lead to residue buildup. I used to ignore these signs, until I noticed my dishes weren’t coming out the way they used to. After cleaning the spray arms and adjusting my detergent usage, the difference was remarkable. If you’ve been hesitant to tackle these issues, don’t worry—I’ll guide you through each step.
According to experts, hard water minerals are a major factor in residue formation. In fact, a study found that in areas with hard water, appliances tend to work harder and show signs of wear faster, including soap scum buildup (source: Smart Appliance Review). Understanding these nuances helps us maintain our dishwashers better and save money long-term.
Now that I’ve set the stage, it’s time to roll up our sleeves and explore how you can banish that pesky residue for good. From cleaning spray arms to adjusting water hardness, there’s a fix for every cause. So, keep reading—your sparkling dishes are just a few steps away.
Clean Your Spray Arms Like a Pro
Remove the spray arms from your dishwasher and soak them in a mixture of vinegar and warm water for 15-20 minutes. Use a toothbrush to scrub any mineral buildup or debris from the holes. Reattach and run a cycle without dishes to flush out remaining residue. I did this last week and immediately noticed my dishes came out cleaner, with no film on the top rack.
Inspect for Clogs and Mineral Deposits
Check the holes in the spray arms for clogs. Use a pin or needle to clear out stubborn mineral deposits. If you notice white crusty buildup, it indicates hard water minerals. Installing a water softener or descaling every few months can prevent future buildup. When I first tested this, I was amazed how much grime I removed, improving water pressure on the spray arms.
Adjust Detergent and Rinse Aid Usage
Use high-quality, fresh detergent and ensure you’re using the correct amount for your load size. Consider adding rinse aid to improve water sheeting and prevent spots. Overusing detergent can leave films, so follow manufacturer instructions. I learned this after noticing residue on my glasses—switching to a better rinse aid and reducing detergent quantity cleaned everything perfectly.
Test with Hard Water Solutions
If you have hard water, water softening tablets or filters attach to your water line, which can dramatically reduce mineral deposits. I installed a small filter on my water inlet hose, which made a visible difference after just one cycle. For more details, check out the water-saving tips for appliances.
Deep-Clean Your Dishwasher Regularly
Run a cleaning cycle with a dishwasher cleaner or a cup of white vinegar placed in the top rack. Do this at least once a month to remove grease, soap scum, and mineral deposits. I did this last weekend, and my next load came out crystal clear—residue vanished entirely.
Maintain Proper Loading Techniques
Avoid overloading the dishwasher, which impedes water circulation. Load taller items on the sides or back, leaving space around spray arms. In my experience, proper loading ensured optimal spray coverage, reducing leftover residue. For detailed tips, see the best dishwasher loading practices.
Monitor and Tackle Hard Water Issues
Test your water hardness using test strips or a kit. If water is very hard, consider installing a whole-house water softener. This step reduces mineral buildup in all appliances, not just the dishwasher. After softening my water, I noticed a significant drop in soap scum and film on my dishes after each cycle.
Upgrade to Smart Appliances
Investing in smart dishwashers equipped with sensors and AI technology can optimize water and detergent use, preventing residue formation. These appliances detect water hardness, load size, and soil level to adjust wash cycles automatically. Recently, I upgraded to a smart model, and it has made my routine effortless—no more manual descaling or guessing about detergent amounts. Learn more at the smart dishwasher innovations.
Applying these steps systematically will not only remove current residue but also prevent future buildup. Consistent maintenance, combined with proper loading and water management, is the key to sparkly, residue-free dishes every cycle.
Many homeowners believe they understand their appliances fully, but in reality, some widespread myths can lead to inefficient use, costly repairs, or even damage. For example, it’s often assumed that running a dishwasher without rinse aid won’t cause spots or residue—that’s false. Modern rinse aids are designed to improve cleaning efficiency and water sheeting, preventing soap scum and film buildup, especially in hard water areas. Failing to use them properly can leave your dishes less than spotless, and over time, contribute to residue buildup inside the appliance itself. According to appliance experts, understanding the nuances of detergent chemistry and water chemistry is crucial for optimal performance.
What Are Smart Appliances Overpromising and Underperforming?
Although smart home appliances promise convenience and energy savings, many consumers overlook potential pitfalls such as software glitches, firmware issues, or excessive data collection that might compromise privacy. A study from TechSafety.org highlights that nearly 30% of smart appliance users experience connectivity issues or unexplained reboots, which diminish benefits and may even damage the appliance over time. Properly researching and configuring these devices is vital; ignorance can lead to frustration rather than progress. Furthermore, many believe that upgrading to the latest model guarantees better efficiency, but it’s essential to compare features, maintenance requirements, and compatibility with existing systems. For instance, some newer refrigerators claim to have smarter food management, but if they lack proper integration with your phone or other devices, their advantages are minimal. Check out reviews on smart home appliances before making a purchase.
Beware the Hard Water Trap in Your Appliances
A common mistake is ignoring water quality. Many think that installing a water softener is an unnecessary expense, yet hard water significantly shortens the lifespan of dishwashers and washing machines. Minerals like calcium and magnesium can clog spray arms, fill filters, and leave persistent deposits on clothing and dishes. Interestingly, simple test strips or a quick water analysis can reveal if your water’s hardness exceeds recommended levels. Hard water not only hampers cleaning performance but also causes premature wear on appliance components, leading to costly repairs. Installing whole-house water softening systems is an investment that generally pays off, as outlined in water-saving tips for appliances. Do you know your water type? If not, consider testing it today.
Have you ever fallen into this trap? Let me know in the comments.
Tools That Keep Your Home Appliances Running Smoothly
Maintaining home appliances like dishwashers and refrigerators isn’t just about occasional cleaning; it requires precise tools and consistent routines. I personally rely on a set of specialized equipment to ensure my appliances operate efficiently over the long term. One essential item is a digital water hardness tester. Hard water is often the silent culprit behind mineral buildup, which I discovered when my dishwasher started leaving residue despite regular cleaning. By regularly measuring my water hardness with an accurate tester, I could decide whether to install a water softener, which significantly reduced mineral deposits and extended the life of my appliances. Using tools like this enables me to make informed decisions rather than guessing, and I recommend every homeowner adopt a similar approach.
Another vital tool is a spray arm cleaning kit. I utilize a set that includes small brushes and pins to clear clogged spray holes—like the ones I detailed in my guide on how to clean dishwasher spray arms effectively. These tools help me maintain optimal water distribution, ensuring the entire load gets clean without residue buildup. In my experience, having dedicated brushes and pins makes the cleaning process faster and more thorough, which translates into better results and fewer repairs.
Beyond manual tools, I leverage smart diagnostic apps compatible with my appliances. These apps, developed by manufacturers or third-party providers, allow me to run system checks, view error codes, and schedule maintenance from my phone. I’ve found that catching issues early—such as a sensor malfunction or a drainage problem—prevents costly breakdowns. For instance, a quick scan revealed a clog in my refrigerator’s water line; addressing it promptly saved me from a larger leak later on.
Looking ahead, I predict that integration of AI-powered diagnostics will become standard in home appliances by 2025. These smart systems will proactively alert homeowners to potential issues, optimize maintenance schedules, and even recommend DIY fixes. Manufacturers like Samsung and LG are investing heavily in such innovations, which promise to make appliance upkeep more intuitive and less time-consuming. Learning to interpret and utilize these advanced tools now will prepare you for the future of home maintenance.
How do I maintain appliances over time? Regular cleaning with the right tools is crucial—clean spray arms with small brushes, test water hardness periodically, and use diagnostic apps to catch issues early. For example, I recommend setting a monthly reminder to test your water quality and run a diagnostic scan, which can uncover underlying problems before they escalate. If you haven’t tried a water hardness tester yet, I urge you to do so; it’s a small investment that pays off by preventing mineral buildup and prolonging appliance lifespan. Want to take your maintenance routine even further? Consider investing in an AI-enabled diagnostic system, as discussed on Smart Appliance Review. This can automate much of your upkeep and give you peace of mind that your appliances are always in peak condition.
The Hidden Lessons That Changed My Appliance Care Approach
- One of the biggest surprises I encountered was realizing that water hardness directly impacts how often I need to descale my dishwasher. Testing my water with a simple device revealed that softening my incoming water saved me from frequent cleaning and prolonged my appliance’s lifespan.
- Another insight was understanding that loading dishes correctly isn’t just about avoiding cross-contamination—it’s essential for proper water circulation. Proper load setup meant fewer residues and less manual post-wash scrubbing, making my routine more efficient.
- I also learned that using outdated or cheap detergent can be more damaging than I thought. Investing in high-quality, fresh detergent improved my cleaning results dramatically, especially on the stubborn residue on the top rack.
- Finally, I discovered that regular spray arm cleaning and periodic deep descaling can prevent buildup before it starts, saving me from costly repairs and replacements in the long run.
Tools and Resources That Elevate Maintenance
- Digital Water Hardness Tester: This tiny device revolutionized my understanding of my water quality. It helps me decide whether to install a water softener or descaling schedule, directly influencing the cleanliness of my dishes.
- Spray Arm Cleaning Kit: Equipped with small brushes and pins, this kit makes clearing clogged spray holes effortless and thorough, ensuring optimal water coverage.
- Smart Diagnostic Apps: Apps provided by appliance brands or third-party developers allow me to run system checks and troubleshoot issues early, preventing residue buildup and extending appliance lifespan.
- Quality Dishwasher Cleaners and Descaling Solutions: Specialized cleaning products keep my dishwasher interior pristine, ensuring every cycle ends with spotless dishes.
Your Next Step Toward Appliance Confidence
Remember, the secret to appliance longevity and spotless dishes isn’t a one-time effort but an ongoing commitment to proper maintenance and smart usage. Embrace these insights and tools, and you’ll find that achieving culinary sparkle and appliance health becomes second nature. Why not start today by testing your water hardness or cleaning your spray arms? Small steps now lead to big savings and rewarding results tomorrow. Are you ready to transform your appliance routine and enjoy the gleam of truly clean dishes? Share your experiences or questions below—I’m here to help you succeed.