
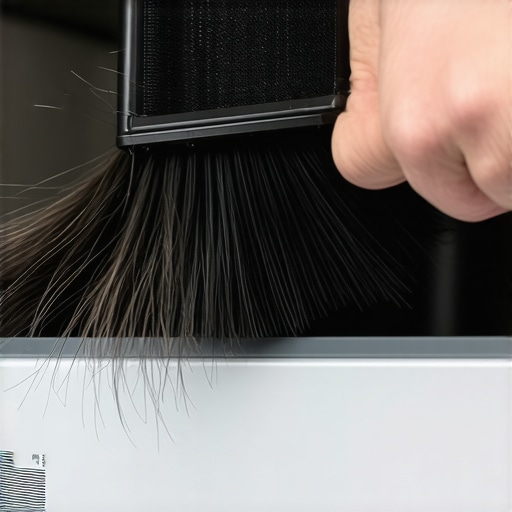
I stood there, staring at a rogue tumbleweed of husky fur disappearing into the intake vent of my three-year-old French door fridge. It was a visceral ‘uh-oh’ moment. My dog, Luna, is a shedding machine—a beautiful, snowy disaster. It turns out my kitchen’s most expensive appliance was basically acting as a high-powered vacuum for her coat. I realized I hadn’t peeked at the condenser coils in over a year. When I finally did, I didn’t see metal; I saw a thick, felted sweater of gray fur. It was gross. It was embarrassing. But mostly, it was dangerous for the longevity of my fridge. This isn’t just a ‘cleanliness’ thing—it’s a survival thing for your kitchen. Today, I’m going to show you exactly how to tackle this furry disaster before it leads to a total system meltdown. Believe me, I’ve learned the hard way that a little bit of dog hair can lead to a very big repair bill.
Stop Letting Your Golden Retriever Kill Your Refrigerator
Your fridge works by dispelling heat from the inside out through those condenser coils. When they are buried under a layer of pet hair, that heat has nowhere to go. It’s like trying to run a marathon while wearing a heavy down parka in July. I’ve seen firsthand how this neglect leads to the compressor working double time, which is often why your refrigerator is blowing warm air into the freezer instead of keeping your groceries fresh. When pet hair clogs the airflow, the compressor has to cycle on more frequently and stay on longer. This isn’t just a theory; I once measured the temperature coming off my fridge’s rear panel and it was hot enough to warp the baseboard. That constant heat degrades the electronic components of modern smart appliances much faster than you’d think. Early in my homeowner journey, I assumed that since the fridge was ‘new,’ it didn’t need maintenance. Wrong. I ignored the clicking sounds and the warmth until the whole unit just quit. [image_placeholder] According to the experts at Energy Star, a dirty condenser can actually increase your appliance’s energy consumption by up to 30%, which is a massive hit to your monthly budget. Have you noticed your kitchen getting unusually warm lately, or perhaps you’ve wondered why your new fridge is louder than the old model it replaced? It might just be screaming for a cleaning.
Does cleaning the coils really save that much money?
I get it. Moving a heavy appliance and getting on your hands and knees feels like a chore you’d rather skip. You might wonder if it actually impacts your daily life or if it’s just another ‘adulting’ task invented to make us miserable. The truth is, while you can save money on your electric bill by changing three fridge settings, those software tweaks won’t do a lick of good if the physical hardware is suffocating under a blanket of dander. If you don’t clear that fur, you’ll eventually need to know how to spot a failing refrigerator compressor before it dies because it simply burned itself out. Keeping these coils clean is the single most effective way to extend the life of your machine and keep your utility provider’s hands out of your pockets. So, have you ever pulled your fridge out and been absolutely horrified by what was lurking behind it? Let me know in the comments, because I promise, we’ve all been there. Now, let’s get into the nitty-gritty of the tools you’ll need and how to safely access those coils without breaking your back or your appliance.
Cut the Power and Clear the Path
Before you go poking around with metal tools, unplug the unit. I know it seems like a hassle to move it, but this is also the perfect time to learn how to level a refrigerator on an uneven kitchen floor if yours has been wobbling lately. I once tried to shortcut this by just reaching under the front, and I nearly tipped the whole thing onto my toes. Pull it out slowly to avoid tearing your linoleum or scratching the wood. If your fridge is a smart model, don’t worry about the settings; most modern units will retain your data through a brief power cut.
Locate the Hidden Dust Trap
Depending on your model, the coils are either behind a snap-off grille at the bottom front or hidden behind a panel on the back. For my French door unit, they were behind a thin metal plate held on by a few hex-head screws. Taking that panel off was like opening a time capsule of Luna’s shedding seasons. If you’ve noticed your unit struggling, cleaning this area is often how to stop a refrigerator from making that constant clicking sound caused by the compressor overheating and cycling improperly.

The Vacuum and Brush Combo You Need
You can’t just wave a vacuum wand at this and call it a day. The hair gets woven into the fins. I learned this the hard way when I spent twenty minutes vacuuming the surface only to find the core was still packed tight. You need a dedicated coil brush—a long, flexible tool that looks like a giant pipe cleaner. Push the brush into the coils and pull it back out to loosen the ‘felt.’ Keep the vacuum running right next to the brush to catch the debris before it floats into your lungs. Think of it like brushing a long-haired dog; you have to get through the undercoat, not just the top layer.
Check the Seal While You Are Back There
Since the fridge is already out, take a damp cloth and wipe down the rubber gasket on the doors. A dirty coil makes the fridge run hot, but a leaky gasket makes it run forever. It’s worth taking a minute to learn how to check if your refrigerator door seal is actually airtight using the dollar bill test. If the seal is failing, all your hard work cleaning the coils will be for nothing because the cold air is just escaping. Once everything is clean and sealed, you might find you can actually save money on your electric bill by tweaking your fridge settings back to a standard level rather than the ‘max cold’ you were forced to use when the coils were clogged.
Recalibrate for Peak Performance
Once you’ve vacuumed every nook and cranny and shoved the beast back into its hole, give it about an hour to stabilize before you start checking temps. If things still feel a bit off, you should look into how to recalibrate your refrigerators internal thermometer for better cooling. I found that after my ‘big clean,’ my fridge was actually getting too cold because it was suddenly breathing efficiently for the first time in years. It’s a great problem to have compared to a dead compressor.
Now that your fridge is breathing again, let’s dig deeper into the nuances of long-term appliance health. Most homeowners assume that once they’ve mastered the basics, they’re set for a decade. But there is a subtle ‘maintenance trap’ I see people fall into all the time: the over-cleaning paradox. We’ve been conditioned to think that if a little cleaning agent is good, a lot must be better. In reality, modern machines are far more sensitive than the ‘dumb’ tanks our parents owned. While you might be excited about how smart washing machines can simplify laundry day, no amount of AI can save a machine from the chemical erosion caused by well-intentioned owners.
Stop treating vinegar like a miracle cure-all
Here is a contrarian view that might ruffle some feathers: you need to stop pouring white vinegar into every cycle. It’s the ultimate internet ‘hack,’ but in my experience, it’s a recipe for disaster for modern seals. Vinegar is an acid, and while it’s great for breaking down hard water, it’s devastating to the ethylene-propylene diene monomer (EPDM) gaskets used in today’s high-efficiency machines. I’ve seen homeowners use it as a rinse aid only to find their unit leaking six months later. In fact, experts at the Association of Home Appliance Manufacturers (AHAM) have long warned that persistent acidity can degrade internal components much faster than standard detergents. If you want to keep your warranty intact, the truth about using vinegar in your high-efficiency washing machine is something you cannot afford to ignore.

Why your ‘Eco’ settings are smarter than you think
Another area where ‘common sense’ fails is the misunderstanding of efficiency cycles. I often hear people complain that their new dishwasher is ‘broken’ because it takes half the afternoon to finish. They think why your dishwasher is taking four hours to finish a single load is a sign of a failing motor. It’s actually the opposite. Modern sensors prioritize soaking time over high-heat water pressure to save energy. When you skip these cycles for a ‘Quick Wash,’ you’re actually forcing the machine to work much harder and use more electricity. To truly get the most out of your unit, you have to embrace the truth about the eco mode on your new dishwasher. It isn’t a gimmick; it’s the engineered sweet spot for the machine’s longevity.
Can you actually over-clean your appliances into an early grave?
The short answer is yes. Beyond the vinegar trap, the most common ‘advanced’ mistake is detergent overdose. If you’re seeing the reason your washing machine is leaving white streaks on dark clothes, it’s rarely a mechanical failure. Usually, it’s a buildup of undissolved soap scum that has turned into a breeding ground for mold behind the drum. Modern high-efficiency (HE) machines use so little water that even a tablespoon of extra soap can’t be fully rinsed away. This ‘scrub’ actually acts as an abrasive against the bearings over time. Have you ever fallen into this trap, thinking more bubbles meant a better clean? Let me know in the comments, because I’ve definitely been guilty of the ‘glug-glug’ method myself before I knew better. Mastering these hidden nuances is what separates a homeowner who replaces appliances every five years from one who keeps them running for twenty.
Put down the spray bottle and grab a real brush
Now that you’ve stopped drowning your machines in soap and vinegar, you need to arm yourself with the right hardware. I don’t mean a five-hundred-dollar toolbox; I mean the specific, unsexy tools that actually do the work. For me, the game-changer was a twenty-four-inch flexible refrigerator coil brush. It has a tapered head that reaches the back of the condenser where my vacuum wand simply can’t go. If you’re serious about your kitchen’s health, combining this with a specialized cleaning kit is the only way to avoid the burnout I described earlier. While you are at it, don’t forget the fluids. Knowing how to replace the water filter in your fridge without making a mess is critical because scale buildup in the water lines puts immense pressure on the intake valves, leading to those slow drips that ruin your flooring.
Your phone is now your most important wrench
We have to face the reality that modern appliances are essentially computers that happen to wash socks or chill milk. In this new era, ‘maintenance’ often means managing data and connectivity. I’ve found that the most reliable way to prevent system hangs is to stay on top of firmware. You absolutely must learn how to update your smart fridge software without crashing the system. These updates aren’t just for new features; they often include ‘logic patches’ that change how the compressor cycles during a heatwave. If you want a truly frictionless experience, I recommend you link your smart appliances to a single voice assistant. This allows you to set up ‘maintenance routines’—for example, my Alexa reminds me to check the dishwasher filter every third Sunday. It takes the human error out of the equation.
How do I maintain these high-tech systems over the long haul?
Consistency is more important than intensity. Instead of a once-a-year ‘deep clean,’ I advocate for quarterly ‘health checks.’ This involves checking the seals, clearing the lint traps, and running a diagnostic cycle. If you are building out a full ecosystem, our ultimate guide to smart home appliances for a modern living can help you map out a schedule that keeps all your devices in sync. The secret is to treat your appliances like a car—you wouldn’t wait for the engine to seize before changing the oil, so don’t wait for a ‘drain error’ to clear your pump filter. I also suggest keeping a digital log of your error codes. Most smart machines will give you a specific hex-code when they struggle; recording these helps a technician diagnose the issue in minutes rather than hours, saving you a fortune in labor costs.
The future is self-healing (and a little bit psychic)
Looking ahead, the future of home appliances is moving toward what industry experts call ‘predictive maintenance.’ According to technical reports from the International Electrotechnical Commission (IEC), we are moving toward a standard where appliances use vibration sensors to detect a bearing failure weeks before it happens. Soon, your washing machine might even order its own replacement part and schedule the repairman without you lifting a finger. Until that AI-driven utopia arrives, the burden is on us. My advice? Go pull your fridge out today. Use that coil brush. It’s the single most satisfying fifteen minutes of ‘adulting’ you’ll do all month. Trust me, your electricity bill—and your compressor—will thank you for the breathing room.
The Hardest Lesson I Learned About Keeping a Fridge Alive
After years of wrestling with shedding pets and failing compressors, I’ve realized that no amount of fancy software can replace manual maintenance. If you are choosing the right refrigerator tips from industry experts, they will often forget to mention the ‘pet hair factor’—it is the silent killer of modern cooling systems. Here are my top lightbulb moments:
- The ‘Out of Sight’ Trap: Just because your fridge looks clean on the outside doesn’t mean it isn’t suffocating. Make a physical calendar alert to check the rear panel.
- Sensors Aren’t Psychic: Even the most advanced ultimate guide to smart home appliances for a modern living won’t tell you exactly when a physical blockage is forming until the temperature starts to spike.
- Prevention Is Profit: A ten-dollar brush saves a five-hundred-dollar repair bill. Period.
What I Keep in My Kitchen Maintenance Kit
I don’t believe in over-complicating things, but these three items are non-negotiable for my household routine. First, a flexible 24-inch coil brush is the only way to reach the hidden dust. Second, I keep a digital copy of every manual on my phone to avoid hunting for paper when an error code pops up. Lastly, I rely on a high-quality handheld vacuum with a crevice tool. When you are learning how to set up a smart kitchen without spending a fortune, investing in these basic tools is more important than buying the newest gadget.
Give Your Kitchen a Second Life
It’s easy to feel overwhelmed by the complexity of modern home appliances, but at their core, they just need to breathe. Taking fifteen minutes to clear those coils isn’t just about chores; it’s about taking control of your home’s efficiency and protecting your investment. As we look toward the future of home appliances, maintenance might become more automated, but for now, your hands are the best tools you have. Have you ever pulled out your fridge only to find a ‘carpet’ of dust you didn’t know existed? Let me know in the comments below!