
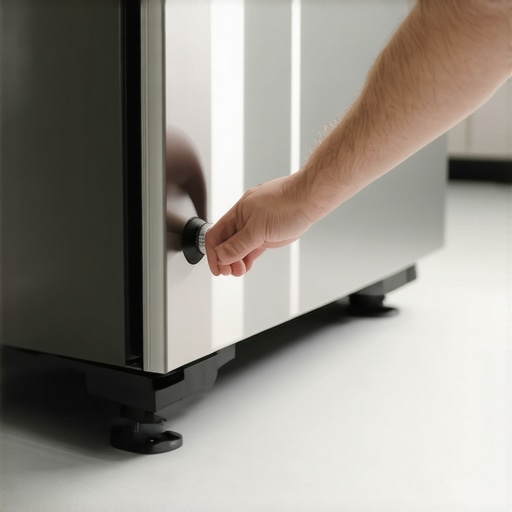
The sound started at 2 AM. Every time the compressor kicked in, my massive stainless steel fridge sounded like it was trying to march right out of the kitchen. Thump. Creak. Thump. I thought I could ignore it, but then I opened the door to grab a late-night glass of water, and the whole unit lurched toward me. It felt like wrestling a bear just to get to the crisper drawer. I’ll be honest: my first ‘professional’ repair was shoving a folded-up pizza box under the front left corner. It worked for a week, until the dampness from a spill turned that cardboard into a soggy mess, and the rocking returned with a vengeance. We aren’t just talking about a minor annoyance here; a refrigerator that isn’t sitting flat is a disaster waiting to happen for your flooring and your food. Dealing with a wobbly appliance is frustrating, but I promise you that fixing it is easier than you think. You don’t need a degree in mechanical engineering or a hundred-dollar service call to get things back on track.
Stop the Sway Before Your Compressor Gives Up
Look, I’ve been there—staring at a 400-pound appliance while holding a wrench and wondering if I’m about to tip the whole thing over. But making sure your fridge is level is about more than just stopping that rhythmic thumping. When your unit rocks, it puts unnecessary stress on the frame and the door hinges. Over time, this can lead to those dreaded door-ajar alerts because the seal isn’t lining up quite right. If you’ve already noticed why your new refrigerator is making a loud humming sound, the culprit is often just a lack of balance on your kitchen floor. It is actually a very similar problem to why your washing machine is moving across the floor during the spin, except you can’t just shove your fridge back into place as easily. According to appliance durability studies, excessive vibration in large compressors can lead to premature fatigue in copper refrigerant lines, which is a one-way ticket to a very expensive repair.
Is a slightly tilted fridge really going to break the bank?
You might be thinking that a 5-degree lean isn’t worth the trouble of crawling around on the floor. I made that same mistake early on. I ignored a slight backward tilt, thinking it helped the door swing shut. While a tiny bit of rearward pitch is actually recommended by many industry experts, a side-to-side wobble is a different beast entirely. It causes the coolant to pool unevenly and forces the motor to work harder than it should. This is definitely one of the 5 mistakes that are shortening the life of your smart refrigerator without you even realizing it. Have you ever tried the ‘folded coaster’ trick under your fridge only to have it fail miserably two days later? If so, you’re ready to do this the right way. It is much like how to level a washing machine on an old slanted floor; it requires a bit of patience and the right turn of a hex nut. Let’s dive into how we can stabilize your kitchen’s MVP using nothing more than a simple wrench and a bit of elbow grease.
Grab Your Level and Pop the Grille
Before you start cranking on any bolts, you need to see what you are actually working with. Most modern units have a plastic base grille at the bottom that hides the ‘feet.’ I remember the first time I tried this; I was so afraid of snapping the plastic tabs that I spent twenty minutes prying it with a butter knife. Don’t be me—most of the time, a firm pull at the corners is all it takes to snap it off. While you have that cover removed, it is the perfect opportunity to learn how to clean the hidden debris under your refrigerator grille. You would be shocked at how much pet hair and dust accumulates there, acting like a thermal blanket that suffocates your motor. Once the grille is aside, you will see the leveling legs or rollers. Think of these like the adjustable feet on a pool table; one wrong turn and your ‘balls’—or in this case, your jars of pickles—start rolling toward the back corner.
The Secret to Making Those Hex Bolts Behave
Now, grab a carpenter’s level. Place it on top of the fridge, but make sure it is sitting on the cabinet itself, not the doors. On many refrigerators in 2025, the doors are designed to be slightly adjustable, so using them as a reference point will give you a false reading. You want the side-to-side measurement to be perfectly level. If the bubble is drifting left, that left leg needs to come up. Most legs are essentially large hex bolts. Clockwise usually raises the corner, while counter-clockwise lowers it. I once worked on an old unit where the bolt was so seized I ended up skinning my knuckles when the wrench slipped. A quick spray of lubricant can save your skin and your sanity. If your model uses rollers, look for an adjustment screw located just above the wheel assembly. Turning this screw will raise or lower the chassis without you having to lift the full weight of the appliance. 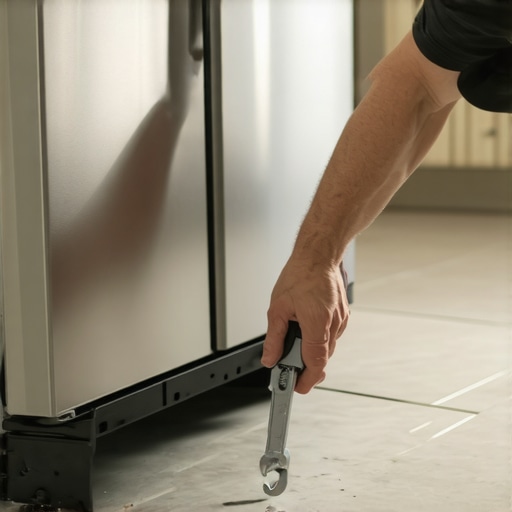
Does the Door Pass the Gravity Test?
While side-to-side must be flat, the front-to-back alignment needs a slight ‘cheat.’ You actually want the front of the fridge to be about a quarter-inch to a half-inch higher than the back. This slight rearward tilt is what allows gravity to help the door swing shut. If your fridge is perfectly level front-to-back, or worse, tilting forward, the door will hang open and cause the internal temperature to spike. This is a common reason for why your modern fridge is making a clicking sound every ten minutes as the compressor struggles to keep up with the lost cold air. Open the door about 45 degrees and let go. It should slowly glide shut and seal with a satisfying ‘thump.’ If it stays put, give the front legs another half-turn. This precision is even more vital if you are comparing the difference between inverter and traditional refrigerator compressors, as modern inverter types are highly sensitive to the mechanical stress caused by an uneven frame.
Stability Is More Than Just a Level Bubble
Sometimes the level says you are perfect, but the fridge still rocks when you pull the handle. This usually means one of the legs is ‘floating’—barely touching the floor. Even if you have followed the choosing the right refrigerator tips from industry experts, a poorly seated leg will cause the unit to vibrate. Get down on your hands and knees and try to wiggle the legs by hand. If one spins freely, it isn’t carrying its share of the weight. Extend it until it makes firm contact with the floor. If you have an uneven tile floor, you might need to adjust the legs independently of what the level says just to stop the physical rocking. It is a tedious game of millimeters, but once you find that sweet spot where the rocking stops and the door closes itself, your kitchen will suddenly feel much more professional.Most DIY guides tell you to get that bubble exactly in the center of the level, but if you do that, you are actually setting yourself up for failure. In my years of tinkering with kitchen setups, I have found that a perfectly level fridge is often a leaky or loud fridge. You see, these frames are engineered with a natural pitch in mind. If you do not account for the weight of a fully loaded door—sometimes holding forty pounds of milk, juice, and condiments—the moment you open it, the center of gravity shifts and the frame flexes. This is one of those [5 mistakes that are shortening the life of your smart refrigerator](https://smartappliancereview.com/5-mistakes-that-are-shortening-the-life-of-your-smart-refrigerator) because it puts lateral torque on the compressor mounts. It is a nuance that even some ‘pros’ miss when they are rushing through an install.
Why a Perfectly Centered Level Bubble is Often Your Enemy
We have been conditioned to think level means a perfect horizontal line, but with modern appliances, the goal is actually stability under a dynamic load. I once spent three hours trying to level a unit on a century-old hardwood floor, only to realize that every time I stepped near the fridge, my own body weight was changing the reading. This is very similar to [the reason your washing machine vibration pads arent working](https://smartappliancereview.com/the-reason-your-washing-machine-vibration-pads-arent-working); if the floor itself has give, no amount of leg adjustment will fix a rhythmic rattle. Expert installers often use the paper test instead of just relying on the tool. If you can slide a piece of paper under a leg while the door is open, your fridge is not actually seated, regardless of what the bubble says.
How Your Kitchen Subfloor Might Be Sabotaging Your Fridge
This is the advanced question most homeowners never ask: is the floor actually strong enough? A study by the Tile Council of North America highlights that floor deflection—the amount a floor bends under weight—is the hidden enemy of large appliances. If your joists are spaced too far apart, the three-hundred-plus pounds of your fridge creates a micro-crater in the subfloor. When the motor kicks in, the floor acts like a drum skin, amplifying the sound through the whole house. This is frequently [why your high-efficiency fridge runs more often than your old one](https://smartappliancereview.com/why-your-high-efficiency-fridge-runs-more-often-than-your-old-one) as it tries to compensate for the vibration-induced heat and mechanical stress. To fix this, you might need to move the unit a few inches left or right to sit more directly over a structural floor joist.
Stop Over-Tightening Your Adjustment Bolts Before They Snap
The biggest ‘oops’ factor I see in modern kitchens is people cranking the leveling hex bolts until they bottom out. When you over-tighten, you risk stripping the plastic housing or bending the mounting bracket. This is especially critical when considering [the difference between inverter and traditional refrigerator compressors](https://smartappliancereview.com/the-difference-between-inverter-and-traditional-refrigerator-compressors), as inverter models produce high-frequency vibrations that require the legs to act as dampeners, not rigid heat-sinks. If the leg feels stuck, do not force it. Instead, have someone slightly tilt the fridge back to unload the pressure while you turn the bolt by hand. Once you have got the pitch right, do not forget to [how to calibrate your refrigerator thermometer without calling a pro](https://smartappliancereview.com/how-to-calibrate-your-refrigerator-thermometer-without-calling-a-pro) to ensure that your new, stable setup is actually cooling correctly. Have you ever fallen into this trap of over-adjusting? Let me know in the comments below! 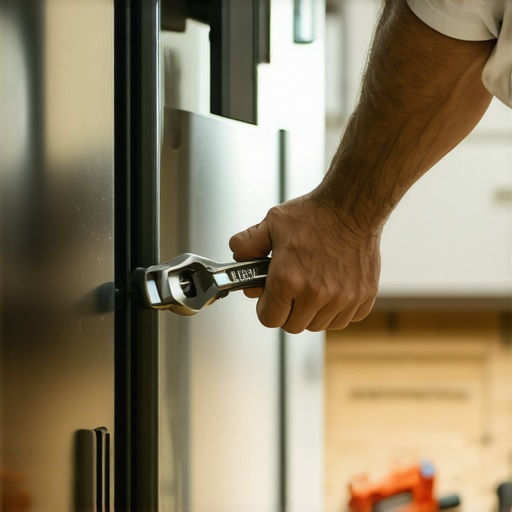 I used to rely on a cheap plastic torpedo level, but after seeing a master service tech use a digital inclinometer, I never looked back. If you are serious about your kitchen’s longevity, you need a tool that measures down to the tenth of a degree. I personally use the Klein Tools Digital Angle Gauge because its magnetic base sticks right to the metal frame, allowing me to adjust the legs with both hands while watching the readout change in real-time. This level of precision is exactly how you keep your smart fridge silent while your neighbor’s sounds like it is preparing for liftoff. When you are dealing with high-end refrigerators in 2025, the manufacturing tolerances are so tight that ‘close enough’ is a recipe for mechanical failure. If the frame is twisted even by half a degree, the door gaskets won’t seat with a perfect vacuum seal, which is one of the primary 5 mistakes that are shortening the life of your smart refrigerator.
How do I maintain my appliance’s balance over time?
The floor under your kitchen is not a static surface; it is a living part of your home that settles and shifts. Every six months, I recommend performing a ‘corner push’ test. Simply lean your body weight against the top corners of the unit. If you feel even a millimeter of play, your leveling legs have likely vibrated loose or the floor joists have compressed. This semi-annual check is the perfect time to learn how to clean the hidden debris under your refrigerator grille. Dust and pet hair act as an abrasive that can actually work its way into the threads of the leveling bolts, making them nearly impossible to turn after a few years. It is a very similar principle to the reason your washing machine vibration pads arent working; if there is a layer of grit between the machine and the floor, you lose the friction necessary for a stable, quiet home. 
Smart Sensors are the Future of Kitchen Stability
We are quickly moving away from the era of manual wrenches. According to the AHAM HRF-1-2019 standard, mechanical stability is now recognized as a critical factor in consistent thermal performance. Looking toward the future of home appliances trends to watch in 2025, I predict that ‘Active Leveling’ will become a standard feature in premium models. Imagine a fridge that uses internal gyroscopic sensors to detect floor settling and automatically deploys hydraulic micro-pistons to re-level itself. For now, we still have to use our hands, but we can use modern technology to assist us. I highly encourage you to download a seismograph or vibration-meter app on your smartphone. Place the phone on top of your fridge while the compressor is running and adjust the legs until the vibration peaks on the graph are at their lowest point. This ‘vibration-tuning’ method is far more effective than just looking at a bubble in a tube. If your unit is still rattling after a perfect level, checking why your new refrigerator is making a loud humming sound will help you determine if the issue is internal or just a stubborn floor resonance. Give the smartphone vibration test a try this weekend—it is the single best way to ensure your kitchen’s MVP stays in the game for the next decade.
Hard Lessons from a Wobbly Kitchen
I used to think that the bubble in the level was the final word, but the hardest lesson I learned was that a fridge is a moving target. As the compressor kicks on and off, and as the family raids the door shelves, the stress on those leveling legs changes constantly. I once spent an entire Saturday morning chasing a ‘perfect’ level only to realize my own weight on the kitchen floor was tilting the reading. Now, I always stand back and use a vibration-meter app to find the true sweet spot.
- The weight matters: A fridge leveled while empty will sit differently once it’s full of groceries.
- Floors are sneaky: Even a slight dip in your tile can cause the frame to twist, which is one of the 5 mistakes that are shortening the life of your smart refrigerator.
- Stability over levelness: If you have to choose between a perfectly level unit that rocks and a slightly tilted unit that is rock-solid, choose stability every time.
My Secret Weapon for Appliance Stability
If you are looking to level up your DIY game, I highly suggest the Klein Tools Digital Angle Gauge for its magnetic grip and accuracy. It’s far more reliable than a cheap plastic level. I also frequently reference the choosing the right refrigerator tips from industry experts to stay updated on how newer compressor designs handle floor vibrations. #IMAGE_PLACEHOLDER_E# Finally, if you’re dealing with a persistent rattle, check out vibration-dampening rubber pads; they are a game changer for homes with hardwood floors.
Stop the Shake and Save Your Compressor
Getting your fridge to sit perfectly is one of those small victories that pays off every single time you walk into the kitchen and hear… nothing. No thumping, no rattling, just the quiet hum of a machine running exactly as it was designed to. While you’re at it, you might want to learn how to fix a loose handle on your stainless steel refrigerator to make the unit feel brand new again. Don’t be afraid to get down on the floor and make those final micro-adjustments—your compressor and your grocery budget will thank you. If you’ve been wondering why your new refrigerator is making a loud humming sound, this simple leveling fix is usually the cure. Have you ever managed to level a fridge on a floor that was completely crooked? Let me know your tricks in the comments below!