
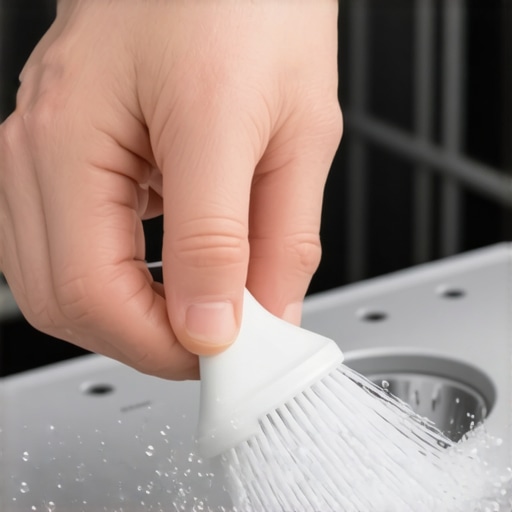
I remember standing in my kitchen last Tuesday, staring at a “clean” dinner plate that still had a crusty ring of dried lasagna on it. It is a special kind of frustration when you pay for a high-end machine and it starts acting like a glorified drying rack. My first instinct was to blame the detergent or assume the pump was dying. I even considered looking into how to choose the best dishwasher to replace my current one. But the real culprit was hiding in plain sight—clogged spray arms. If the water cannot reach the dishes, the most expensive soap in the world won’t help you.
Why Your Dishwasher Stopped Cleaning Like New
Most people think a dishwasher is a set-it-and-forget-it machine. I fell into that trap for years. I ignored the tiny holes in the spinning arms until my glasses started coming out cloudy and grit-covered. It turns out, minerals from hard water and tiny food particles build up inside those arms over time. If the water cannot get out, the dishes do not get clean. It is that simple. I once made the classic mistake of trying to poke the debris out with a toothpick, only to have the tip snap off and get permanently lodged inside the arm. Talk about a self-inflicted wound! According to research from Consumer Reports, even the highest-rated machines can lose significant cleaning performance if the spray arms and filters are not maintained at least every few months. This buildup is often the secret reason why your dishwasher is not getting the top rack clean anymore. Have you ever pulled out a bowl only to find it still covered in yesterday’s cereal? It is incredibly annoying, right?
Does Cleaning the Arms Actually Make a Difference?
You might be thinking that a little bit of lime scale or a few stray seeds shouldn’t matter much. I used to think the same thing until I realized that three out of five holes on my lower spray arm were completely blocked. Once I cleared them, the difference was night and day. If you have ever noticed why your dishwasher pods are not dissolving, it is often because the water spray isn’t hitting them with enough force to break the plastic casing. Today, I am going to show you exactly how to remove that grime without breaking your machine. Before we get into the tools, make sure you know the best way to load a dishwasher for maximum water flow, because even clean arms cannot wash what they cannot reach.
Empty the Racks to Get a Clear View
To start this process correctly, you need absolute access. Pull the bottom rack all the way out and set it aside on a towel. Most people try to work around the racks, but that is a recipe for a sore back and a dropped screw. While you have the tub exposed, take a quick look around the perimeter for any signs of moisture or rust; knowing how to stop your dishwasher from leaking water onto the kitchen floor often starts with spotting small drips before they become major floods. Once the racks are out, you can see the spray arms clearly. Think of them like the showerhead in your bathroom—if half the holes are clogged with mineral deposits, you are just getting a pathetic trickle instead of a high-pressure scrub. If you cannot see the holes, you cannot clean them properly.
Pop the Arms Off Without Snapping the Plastic
Most lower spray arms are designed to lift off with a firm tug or by unscrewing a large plastic nut by hand. I once spent forty minutes wrestling with the center spray arm, convinced it was glued on at the factory. I finally looked up the manual and realized it was a simple counter-clockwise twist. When it finally popped off, a literal cherry pit fell out of the water inlet. That one tiny pit had been rattling around inside for weeks, making my dishwasher sound like a gravel crusher. This is a classic symptom to look for when you are trying to figure out how to fix a rattling dishwasher that sounds like it has loose rocks. If the arm feels stubborn, do not use a screwdriver to pry it. Plastic parts in dishwashers become incredibly brittle over time due to the constant heat, and snapping a mount is a much more expensive mistake than just being patient.
Dissolve Calcium With a Simple Vinegar Soak
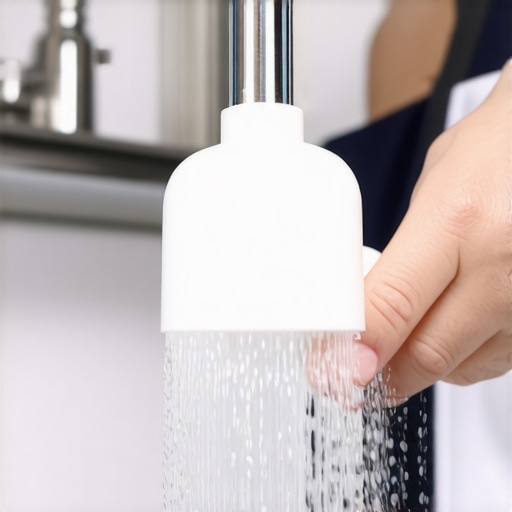
Once you have the arms in the sink, do not just rinse them under the tap. You need to dissolve the invisible scale that lives inside the plastic channels. I recommend filling a shallow basin with hot water and two cups of white vinegar. Submerge the arms completely and let them sit for at least thirty minutes. While you wait for the acid to do its work, you should use the trick to removing hard water spots from your dishwasher interior to make the whole tub shine. After the soak, use a soft pipe cleaner or a thin wire to gently poke through each nozzle. Avoid using toothpicks, as they can break and create a permanent blockage. You will be amazed at the gray sludge and food particles that flush out. If you have been frustrated because why your dishwasher is taking four hours to finish a single load, this buildup is almost certainly the cause. The internal sensors keep the cycle running because the dishes never get clean enough to signal the end of the wash.
How to Check the Spin After Reinstalling
When you put the arms back into place, give them a manual flick to ensure they spin freely. They should rotate smoothly without hitting the heating element or the tub walls. If they wobble or feel gritty when turning, you might have a worn-out bearing or a misaligned seal that needs attention. While you are already down on the floor, it is a great time to learn how to fix a leaky dishwasher door seal in under ten minutes, as a clean machine with open nozzles creates more internal pressure that can expose an old, weakened gasket. Finally, check the drain area for any remaining debris that might have been dislodged during the cleaning process. Ignoring a stray piece of plastic or a bone fragment here is the fastest way to trigger the common dishwasher error that causes a drain light to flash. A five-minute check now ensures your next load actually comes out sparkling.
Wait, before you turn that kitchen faucet on to “pre-wash” your plates—stop. I used to be a serial pre-rinser until an appliance technician practically scolded me during a service call. The common belief is that you are helping the machine, but in reality, you are likely tricking its sensors. Modern dishwashers, especially innovative dishwashers with AI technology, use turbidity sensors to measure how much soil is in the water. If you put in plates that are already sparkling, the machine assumes the load is light and shortens the cycle, often leaving behind a film of detergent. This is the nuanced reality behind the truth about the eco mode on your new dishwasher: it relies on those sensors to be accurate to actually save you money. According to the Association of Home Appliance Manufacturers (AHAM), detergents are formulated to hitch a ride on food particles; without them, the enzymes can actually begin to etch your glassware over time. If you are focused on sustainability, you should be more concerned with how to tell if your appliances eco-friendly tag is just marketing rather than doing the machine’s labor for it.
Why does my high-efficiency washer take three hours to finish?
I hear this question constantly from frustrated homeowners. We expect advanced technology to be faster, but high-efficiency (HE) machines operate on the opposite principle. Because they use significantly less water, they require much longer agitation periods to achieve the same cleaning results. A major trap I see people fall into is the “more is better” approach with detergent. Using standard soap in an HE machine—or even just too much HE soap—creates a “suds lock.” This forces the machine to add multiple extra rinse cycles to clear the foam, which is exactly why your high-efficiency washer takes so long to finish a cycle. Not only does this waste time, but it is a secret reason why your energy efficient washer leaves your clothes feeling crunchy because the fibers are still saturated with unrinsed surfactants.#IMAGE_PLACE_HOLDER_C#The same logic of “hidden maintenance” applies to your refrigeration. I have seen countless people turn their temperature settings to the absolute minimum, thinking it keeps food fresher. In reality, this just causes the compressor to run indefinitely, leading to premature wear and higher bills. If you want a truly efficient kitchen, look into top smart appliances for a seamless home experience in 2025 that handle these fluctuations automatically. However, even the smartest AI cannot clean its own condenser coils. Ignoring the dust bunnies under your fridge is the fastest way to kill the motor. Learning how to spot a failing refrigerator compressor before it dies starts with listening to how hard it struggles to breathe through that dust. Have you ever fallen into the pre-rinsing trap or accidentally triggered a suds lock? Let me know in the comments below—I would love to hear your appliance horror stories!I used to think my refrigerator was on its last legs because of a persistent hum, but it was actually just complaining about my uneven floorboards. If you have ever dealt with a door that refuses to stay shut or a mysterious rattle, you need to learn how to level a refrigerator on an uneven kitchen floor. I use a simple 12-inch magnetic spirit level for this; it sticks directly to the metal frame, leaving my hands free to adjust the leveling legs with a wrench. It sounds like a minor detail, but a tilted fridge forces the compressor to work harder to circulate coolant, leading to premature burnout. While you are down there with the wrench, grab a long-handled condenser coil brush. According to technical bulletins from the Association of Home Appliance Manufacturers (AHAM), dirty coils can increase energy consumption by up to 30%. This simple $10 tool is the best investment you can make to avoid needing to know how to spot a failing refrigerator compressor before it dies. I personally brush mine out every six months, especially since my golden retriever sheds enough to carpet the entire kitchen floor in a week. If you have pets, this is not optional; it is survival for your appliance. 
Stop the Vibrations Before Your Washer Walks Out the Door
It is a jarring feeling when your washing machine starts ‘walking’ across the laundry room during a spin cycle. I once found my front-loader nearly blocking the exit door because it had vibrated so far from the wall. This usually happens because of an unbalanced load or worn-out shock absorbers, but more often, it is just a clogged drain filter causing water to stay in the drum. You must master the secret to cleaning a front load washers hidden filter to keep the machine balanced and smelling fresh. If you ignore this, you will eventually be frantically searching for the 5 minute fix for a washing machine that wont drain while standing in two inches of soapy water. I make it a habit to check the filter every first Saturday of the month. It is also the perfect time to how to check if your refrigerator door seal is actually airtight using the dollar bill test—if you can pull the bill out easily when the door is closed, your seal is leaking cold air and wasting money.
How do I maintain my smart hardware over the long haul?
Maintenance in 2025 is not just about wrenches and brushes; it is about bits and bytes. When I updated my kitchen, I had to learn how to update your smart fridge software without crashing the system because a failed firmware update can actually turn your high-tech screen into an expensive brick. Looking ahead to the future of home appliances trends to watch in 2025, we are going to see machines that use ‘predictive health’ sensors. These will alert your phone when a pump is beginning to show electrical resistance before it actually breaks. Until then, we have to be the sensors. For those of us with limited space, using the best narrow refrigerators that do not sacrifice shelf space requires even more vigilance, as tighter tolerances mean less airflow. My challenge for you: Spend ten minutes this weekend checking your washing machine’s drain filter—it is the single most overlooked task that saves you from a service call and a flooded home.
The Hard Truth About Ignoring Your Filters
Over the years, I have realized that home maintenance is less about fixing what is broken and more about preserving what is working perfectly. One of the biggest shifts in my mindset occurred when I stopped viewing my appliances as indestructible boxes and started seeing them as living systems. For example, a tiny bit of grit in a filter doesn’t just slow down a cycle; it forces the motor to run hotter, shortening its lifespan by years. I have also learned that the sound of your machine is a language. If you hear a high-pitched whine from your fridge, it is likely crying out for help because it is trying to breathe through dusty coils. When you finally take the time to learn choosing the right refrigerator tips from industry experts, you see that airflow is the number one factor in longevity. Finally, I discovered that ‘eco’ doesn’t always mean ‘cleaner.’ While washing machines that save water are incredible for the planet, they require you to be more diligent about cleaning the drum to prevent mold buildup. Maintenance isn’t a chore; it is an investment in your home’s peace of mind.
The Toolkit That Saves Me Thousands in Repairs
You do not need a garage full of heavy machinery to keep your kitchen in top shape. I keep a dedicated ‘Appliance Kit’ in my utility closet that consists of just four things: a 12-inch magnetic spirit level, a long-handled condenser brush, a gallon of white vinegar, and a set of nylon pipe cleaners. I trust the level because a tilted machine is a dying machine; it is the first step in how to save money on your electric bill by tweaking your fridge settings. The vinegar is my go-to because it breaks down lime scale without the harsh fumes of chemical descalers. For everything else, I rely on the ultimate guide to smart home appliances for a modern living to stay updated on how the latest sensors are changing the way we interact with our gear. These simple tools, paired with a little bit of knowledge, have saved me at least three professional service calls in the last two years alone.
Your Path to a Stress-Free Kitchen
There is a unique sense of satisfaction that comes from hearing the clean, quiet hum of a well-maintained home. By taking ten minutes a month to check a filter or wipe down a seal, you are not just saving money; you are removing the invisible stress of a potential mid-week breakdown. Whether you are managing traditional gear or the latest smart appliances, the principles of care remain the same. Don’t be afraid to get your hands a little dirty today to ensure everything runs smoothly tomorrow. You have the tools, you have the knowledge, and now you have the plan. Which of these maintenance tasks have you been putting off the longest? Let me know in the comments below!