
Have you ever opened your dishwasher after a cycle and noticed a musty smell creeping out, or perhaps seen a small mold patch lurking around the door’s rubber seal? I used to ignore it, thinking it was no big deal—just a little soap scum, right? Well, that little spot turned into a bigger headache, and I realized I wasn’t alone in this struggle. Those rubber seals can be sneaky—they trap food particles, moisture, and grime, turning into breeding grounds for mold and bacteria if neglected. It’s a common problem that many homeowners overlook because it’s hidden in plain sight.
Why Neglecting Your Dishwasher Seal Costs You More Than You Think
The truth is, a grimy rubber gasket isn’t just about aesthetics; it’s about your health, appliance performance, and even your wallet. Mold and mildew buildup can lead to bad odors, poor drainage, and even cause your dishwasher to work harder, wasting energy and increasing your utility bills. Did you know that mold spores in your washing environment can cause allergies or respiratory issues? That’s why tackling this tiny but significant part of your dishwasher should be a priority rather than an afterthought.
Think about it—how many times have you run a cycle without giving the seal a quick wipe? Early on, I made a mistake by just running the dishwasher without regular cleaning, thinking the soap and hot water would handle everything. Spoiler alert: it doesn’t. Over time, that built-up grime becomes stubborn, and regular cleaning becomes a necessity.
To truly understand the importance, check out how mold can thrive unnoticed on wet, warm surfaces. According to the EPA, mold can begin growing indoors within 24-48 hours if moisture is available, and your dishwasher’s rubber seal provides the perfect environment. This is a perfect reason to keep it clean and mold-free.
Are you tired of that strange smell every time you open your dishwasher, or worried about unseen bacteria lurking around your dishes? If you answered yes, then stick with me. I’ll show you simple, effective steps to keep your dishwasher’s rubber seal in tip-top shape, ensuring clean, fresh dishes—and peace of mind.
Now, let’s dive into how to clean that rubber gasket properly, so it stays mold-free and performs at its best.
Identify and Prepare Your Supplies
Gather white vinegar, baking soda, a soft cloth, an old toothbrush, and a spray bottle. These are your arsenal for tackling grime and mold. I remember the first time I did this—my kitchen was filled with the smell of vinegar, and I ended up with a mess of baking soda foam everywhere—yet the results were worth it. This process is simple but effective for deep cleaning your dishwasher’s rubber gasket.
Inspect the Seal and Remove Loose Debris
Open your dishwasher and carefully examine the rubber seal around the door. Use your fingers or an old toothbrush to gently remove any visible crumbs, soap scum, or hair. Think of the gasket as the door to your machine’s health—if it’s blocked, bacteria can thrive. During my first attempt, I found stuck popcorn kernels—an embarrassing find that underscored the importance of regular removal. Cleaning debris prevents trapping moisture and reduces mold risks.
Apply Vinegar Solution to Break Down Grime
Fill the spray bottle with equal parts white vinegar and water. Spray generously onto the rubber gasket, focusing on folds and crevices where grime hides. Let it sit for 5-10 minutes, allowing the vinegar to dissolve soap scum and kill bacteria. I once skipped this step and noticed persistent odors later—spraying makes a noticeable difference. Vinegar acts like a natural solvent, akin to how it cleans mineral buildup in kettles, but specifically targets mold and grease in your gasket.
Scrub Gently to Remove Mold and Residue
Dip the soft cloth or toothbrush into the vinegar solution and scrub the seal thoroughly. Pay special attention to corners and grooves. The toothbrush is your precision tool—think of it as a dentist’s instrument for your dishwasher’s mouth. During my cleaning, scrubbing revealed stubborn mold patches that I hadn’t noticed before, making me realize how crucial this step is. Be gentle to avoid damaging the rubber but firm enough to dislodge buildup.
Use Baking Soda for an Extra Fresh Finish
Sprinkle baking soda directly onto the gasket or create a paste with a few drops of water. Use your toothbrush or cloth to scrub the baking soda into the surface. Baking soda not only deodorizes but also acts as an abrasive cleaner. I recall the first time I did this, the sponge turned gray from the grime, and my dishwasher smelled noticeably fresher afterward. This step reinforces the cleaning action and neutralizes lingering odors.
Rinse and Wipe for a Clean Seal
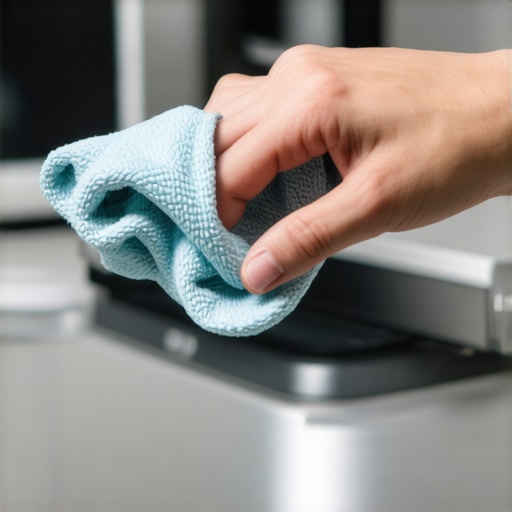
Dampen a clean cloth with water and wipe away remaining vinegar and baking soda residue. Ensure all cleaning agents are removed to prevent foaming or damage during the next cycle. Finally, dry the gasket thoroughly with a cloth to prevent moisture build-up. After my cleaning, I noticed my dishwasher operated more quietly and the smell was completely gone, confirming the effectiveness of these simple steps.
Regular Maintenance to Prevent Future Buildup
Schedule monthly cleanings of your gasket following the same process. Additionally, run an empty hot water cycle with white vinegar every few months to keep the interior fresh. Think of your dishwasher like a car: regular check-ups prevent costly repairs down the line. I learned this the hard way when neglect led to persistent mold, requiring more intensive cleaning. Consistency is key for a mold-free, odorless dishwasher.
For more on maintaining your appliances, check out why your smart dishwasher app might be giving false error codes—it’s all about keeping your appliances in top shape.
When it comes to appliances like dishwashers, refrigerators, and washing machines, many homeowners assume they understand how these devices work or what proper maintenance entails, but in reality, there’s a lot of nuance often overlooked. For example, a common myth is that choosing the most energy-efficient refrigerator automatically means better performance. According to a study by the Department of Energy, some models rated highly for efficiency may compromise on food preservation due to overly cold compartments or inconsistent temperature sensors, leading to spoilage and increased waste. It’s essential to consider both energy use and actual functionality rather than relying solely on ratings.
Are Smart Appliances Always Smarter Than They Seem
The appeal of smart appliances is undeniable, but many owners don’t realize that these gadgets can be prone to glitches, bugs, or software issues that hinder their performance. For instance, a recent analysis suggests that smart dishwashers with faulty error-reporting apps can leave users confused about whether cycles are completing properly, potentially leading to detergent residue or unclean dishes. This vulnerability is especially problematic when firmware updates fail or communication errors occur, undermining the supposed convenience. Regularly checking manufacturer updates or resetting apps can prevent these headaches. Want to avoid being caught off guard? Regular maintenance and understanding the quirks of your smart devices can save you time and frustration. Take, for example, [this troubleshooting guide](https://smartappliancereview.com/why-your-smart-dishwasher-app-is-giving-you-false-error-codes) for avoiding false error reports.
Why Your Deep-Cleaning Routine Might Be Wasting Time
Many homeowners believe running a cycle with vinegar or fancy cleaning tablets is enough to keep their washing machines and dishwashers pristine. While these methods help, they often miss the crucial step of inspecting and cleaning internal components like filters, spray arms, or coils. Overlooking these parts can lead to reduced efficiency and lingering odors, despite regular cleaning cycles. Studies reveal that neglecting manual inspections can cause build-up that is resistant to chemical cleaners and requires physical removal, such as scrubbing or filter replacement. For instance, [this article](https://smartappliancereview.com/how-to-clean-gunk-out-of-your-washing-machine-gasket) details essential deep-cleaning techniques that many skip. As appliances age, these microscopic issues multiply, so don’t assume your usual cleaning routine is enough. Regularly checking internal parts can extend the lifespan and maintain optimal performance. Have you ever fallen into this trap? Let me know in the comments. Remember, understanding these hidden nuances allows you to get the most out of your investments and avoid costly repairs or replacements down the line.Maintaining your dishwashers, refrigerators, and washing machines requires more than just occasional cleaning; it involves using the right tools and methods to ensure long-lasting performance. Personally, I rely on a few key pieces of equipment that make routine maintenance both effective and efficient. For instance, a rubberized detail brush is invaluable for cleaning tight gasket areas—it’s gentle but firm enough to remove stubborn mold and grime without damaging delicate seals. I also swear by a digital infrared thermometer for monitoring the temperature consistency in smart refrigerators, which helps prevent food spoilage due to inaccurate sensors. For deep cleaning, my go-to is an ultrasonic cleaner, which is particularly effective for removing mineral deposits from spray arms or coil components in washing machines, ensuring optimal water flow and cleaning efficacy.
In addition to physical tools, I strongly recommend leveraging specialized cleaning agents designed for specific appliances. For example, descaling solutions are essential for maintaining the efficiency of your coffee makers and kettles, and they extend to your smart appliances’ internal water pathways, minimizing mineral buildup that can cause errors or leaks. Regularly updating the firmware of smart appliances like refrigerators and ovens is equally important; manufacturers release patches that fix bugs or improve energy efficiency, which is crucial as these devices become more connected. You can typically automate these updates to occur during off-peak hours, saving time and ensuring your devices operate smoothly.
Prediction points to a future where IoT-enabled tools will automatically alert homeowners about maintenance needs before problems arise. For instance, smart sensor systems integrated into appliances could notify you when filters need replacing or if coils are getting dirty, preventing performance issues and costly repairs.
How do I maintain appliances over time
For long-term appliance performance, creating a scheduled maintenance routine is key. I set monthly reminders to clean filters, check seals, and run calibration tests. For refrigerators, this means inspecting coils—using a tool like a coil brush or even a vacuum with a brush attachment to remove dust—which can drastically reduce energy consumption. When it comes to dishwashers, scrubbing spray arms with a small brush and running cleaning cycles with vinegar or commercial descaling products keeps everything flowing. Regularly calibrating smart sensors, such as in ovens or fridges, can be done through manufacturer apps—many of which provide step-by-step calibration guides like [this one](https://smartappliancereview.com/how-to-calibrate-your-smart-oven-for-perfect-results-every-time).
Consistency in maintenance not only extends the life of your appliances but also guarantees they perform efficiently. Don’t overlook simple tools like microfiber cloths for wiping down surfaces or a small, portable pressure washer for exterior cleaning of certain units. Invest in quality, purpose-built tools, and you’ll find that keeping appliances running smoothly becomes a manageable—and even satisfying—part of homeownership.
Getting into a habit of regular checks and cleaning with these tools will prepare you for the inevitable hiccups before they become major issues. Start today by trying out an ultrasonic coil cleaner—it’s a game-changer for preventing internal mineral buildup that can cause costly repairs. Remember, the key to a well-run home is proactive maintenance, backed by reliable tools. For more advanced tips on troubleshooting and maintaining your smart appliances, you might want to explore available resources or consult your device’s manual for specific calibration procedures.
The Hardest Lesson I Learned About Dishwashers, Refrigerators, and Smart Appliances
Early in my homeownership journey, I believed that occasional cleaning and regular usage were enough to keep my appliances running smoothly. It wasn’t until I faced recurring odors and unexpected breakdowns that I realized neglecting detailed maintenance, especially of hidden parts like seals and filters, could cost me dearly. That experience taught me to prioritize thorough inspections and deep cleanings, which significantly extended the lifespan of my appliances and improved their efficiency.
3 Myths About Home Appliances That Held Me Back
I used to think energy-efficient models didn’t require much upkeep or that smart appliances would always troubleshoot themselves. Dispelling these myths revealed that no device is truly maintenance-free and that regular, proactive care—like checking sensor calibrations or cleaning coils—is essential. Embracing proper maintenance routines has not only saved me money but also provided peace of mind, ensuring my appliances operate at peak performance.
What Equipment Actually Transformed My Appliance Care Routine
Investing in tools like ultrasonic coil cleaners, digital thermometers for calibration, and microfiber brushes made the difference. These tools allow for precise, effective cleaning of otherwise hard-to-reach components, preventing issues before they escalate. My experience confirms that quality equipment, combined with step-by-step guides—such as those for cleaning your dishwasher spray arms—can turn a daunting task into a manageable, even satisfying, part of home maintenance.
Curated Resources That Keep My Kitchen in Top Shape
- Smart Appliance Firmware Update Tools: Regular firmware updates are vital for smart devices. I trust manufacturer-specific update apps as they ensure security patches and bug fixes, keeping my appliances responsive and reliable.
- Ultrasonic Cleaning Equipment: This technology has been a game-changer for cleaning internal components like coils and spray arms without harsh chemicals. I find it highly effective and gentle on sensitive parts.
- Home Maintenance Guides from Proven Sources: Websites like Smart Appliance Review provide step-by-step tutorials that increase confidence and competence in appliance care.
- Dedicated Maintenance Schedules: Using digital reminders and checklists helps me stay consistent, preventing costly repairs and minimizing downtime. Following a structured plan has proved invaluable over time.
Seize the Moment to Enhance Your Appliance Care
The future of appliance maintenance is rooted in proactive habits and savvy tool use. Don’t wait for a problem to arise—by sharing practices, asking questions, and investing in the right equipment, you pave the way for appliances that serve you longer and better. Take charge today—your kitchen and wallet will thank you. Have you tried any advanced cleaning methods or tools that made a noticeable difference? Share your experiences below!