
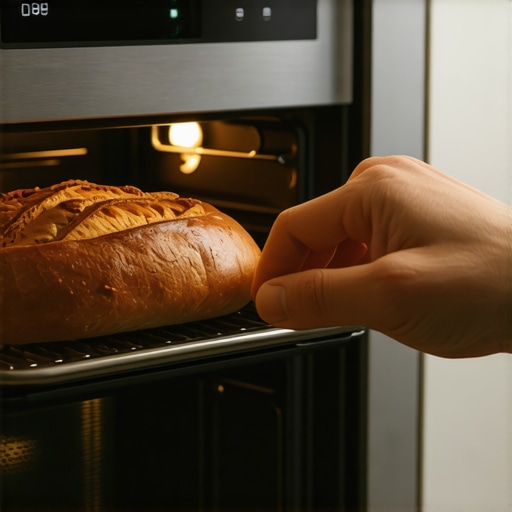
The smell of scorched sugar and disappointment hit me the second I opened the kitchen door. I had spent two hours prepping a delicate lemon tart for a dinner party, and my high-tech smart oven—the one I had bragged about to all my neighbors—had turned it into a blackened, smoking frisbee. It wasn’t the first time either. For weeks, I had been chasing my tail, lowering temperatures by twenty degrees and cutting bake times in half, but everything kept coming out charred on the outside while remaining suspiciously raw in the middle. I felt totally betrayed by my own kitchen. We invest in smart home appliances for a modern living experience, yet there I was, failing at the basics because my thermostat was acting like a rogue agent. It turns out, I made the classic amateur mistake of trusting the digital display more than my own gut.
Stop Letting Your Oven Ruin Your Best Meals
If your cookies are coming out like hockey pucks despite following the recipe to a T, you aren’t losing your mind. Your oven’s brain is likely just a little confused. I spent way too many nights scouring forums and dusty manual PDFs to realize that even the most expensive top smart appliances can lose their calibration over time. Today, we are going to fix that. I’ll show you how to take back control so you can stop hovering by the oven window with a fire extinguisher in hand. We have all been there, questioning why your smart oven takes significantly longer to preheat or why it seems to have a mind of its own once the door is shut. The good news is that recalibration is usually just a simple software tweak or a hidden menu setting away, rather than a costly hardware replacement.
Is This Technical Stuff Actually Worth the Hassle?
You might be thinking that you should just call a repairman or accept the ‘burnt toast’ lifestyle as your new reality. I get it; I was terrified of making it worse. Early on, I actually tried to ‘manually’ adjust a sensor with a pair of pliers—a massive mistake that led to a $200 service call for a broken mounting bracket. Don’t be like me. Use the software tools built into the machine. According to research from Consumer Reports, even brand-new, high-end ovens can be off by as much as 25 degrees straight from the factory floor. If you have noticed that your temperature feels wrong, it almost certainly is. This isn’t just about saving your dessert; it is about energy efficiency and peace of mind. Have you ever felt like your oven was gaslighting you about how hot it really was? Let me know in the comments if you have had a similar ‘charcoal’ disaster in your kitchen! Now, let’s dive into the exact steps to sync your oven’s reality with its digital promises.Before you start poking around in the software, you need hard data. You can’t just guess that it feels too hot based on a charred crust. I once tried to recalibrate my oven based on how fast a batch of brownies looked done, and I ended up over-correcting so much that the next night’s chicken remained dangerously undercooked. You need a dedicated oven thermometer to act as your source of truth. Set it in the center of the middle rack and preheat to exactly 350°F. Wait at least 20 minutes after the chime sounds before checking the dial. If your thermometer says 325°F but the screen insists it is 350°F, you have a 25-degree deficit. This is a common issue even with top smart appliances that have been bumped during shipping or used heavily for years.
Fix the Heat Gap Once and For All
To bridge the gap between the display and reality, you must find the calibration offset setting. Unlike traditional ovens that might require a screwdriver to adjust a physical thermostat knob, smart models use digital offsets. If you have already integrated your devices, check how to set up a central kitchen hub to see if your manufacturer allows temperature adjustments directly through a mobile app. It is often much faster and more intuitive than scrolling through a tiny, unresponsive LCD screen on the appliance itself.
Get an Accurate Temperature Baseline
I learned the hard way that one single reading isn’t enough to make a permanent change. When I first tried to recalibrate your smart oven when the temperature feels wrong, I took a reading immediately after the preheat beep. That was a big mistake. Most ovens cycle their heating elements on and off to maintain a range. To get a true average, let the oven sit at the target temperature for thirty minutes. Check the thermometer through the glass door every five minutes and write down the numbers. Average those five readings out. This prevents you from adjusting the logic based on a temporary peak or valley in the heating cycle.
Access Your Oven’s Hidden Offset Menu
Every brand hides this calibration feature in a slightly different spot. On many Samsung or LG models, you might need to hold down the Settings or Options button for three seconds to unlock the deeper technician level settings. On others, you have to navigate through a Maintenance sub-menu. Once you are in, you will typically see a 0 or an Offset value. If your oven was running 15 degrees too cold, you would change this value to +15. This tells the oven’s brain to add that extra heat to whatever temperature you select in the future. It is a simple software fix that creates the modern living experience you actually paid for.
Map Out the Oven Floor Reality
Do not assume the heat is even across the entire cavity. I once had a smart oven that was perfect in the back left corner but nearly 30 degrees cooler near the door glass. This physical discrepancy often explains why your smart oven takes significantly longer to preheat—it is struggling to equalize the air volume. You can test this yourself using the bread test: cover a rack with slices of cheap white bread and bake at 350°F for five minutes. The slices that brown first identify your hot spots. Knowing these zones allows you to place delicate items where the heat is most stable, ensuring you never face a charcoal disaster again.
Now that we have tackled the oven, let’s talk about the biggest misconception in the laundry room and kitchen alike: the belief that ‘more’ equals ‘cleaner.’ Most people approach their top smart appliances with an old-school mentality, dumping in extra detergent or choosing the most intense settings for every load. In reality, modern engineering works against this logic. If you are noticing why your high-efficiency washer leaves white streaks on dark clothes, it is likely because you are using too much soap, not too little. High-efficiency machines are designed to use minimal water; when you over-sudse, the machine cannot rinse the residue away, leading to a ‘scum barrier’ that actually traps bacteria against the fabric.
Stop Using So Much Soap in Your HE Washer
I used to think my clothes smelled ‘fresh’ because of the detergent scent, but I was actually just smelling unrinsed chemicals. Expert research from the American Cleaning Institute confirms that using more than two tablespoons of HE detergent in a modern machine can lead to ‘biofilm’ buildup, which eventually causes that dreaded swampy odor. This is why your high-efficiency washer uses barely any water—it relies on the friction of clothes rubbing against each other, and too many bubbles act as a cushion that prevents actual cleaning. Learning the secret to using less detergent in your high efficiency washer is the fastest way to extend the life of your appliance and your wardrobe.
Should You Actually Install Every Firmware Update Immediately?
For the advanced user, the ‘Firmware Trap’ is a real concern. We are conditioned to hit ‘update’ on our phones, but why your smart appliance app keeps asking for a firmware update might be a different story. While some updates fix critical security flaws, others can subtly alter energy-saving algorithms, sometimes making your dishwasher or washer take even longer to complete a cycle. Before updating, I always check the patch notes to see if it affects the heating elements or water usage, especially if I have already spent time perfecting my custom settings. Have you ever fallen into this trap where an update made your machine harder to use? Let me know in the comments!
Why Your Dishwasher’s Heavy Cycle Is a Secret Money Pit
Another common mistake is the daily use of the ‘Heavy’ or ‘Pro-Wash’ cycle. Many homeowners believe this ensures a better clean, but there is a hidden cost of running your dishwasher on the heavy cycle daily that goes beyond your utility bill. The sustained high heat can lead to ‘etching,’ a permanent cloudy look on your glasses. If you see this, you have likely made the dishwasher detergent mistake that is etching your favorite glassware. Instead of blasting the heat, focus on the hidden sensor in your dishwasher that needs a manual scrub. If that tiny sensor is covered in grease, no amount of ‘Heavy Cycle’ heat will make your dishes truly clean because the machine’s brain thinks the water is already clear.
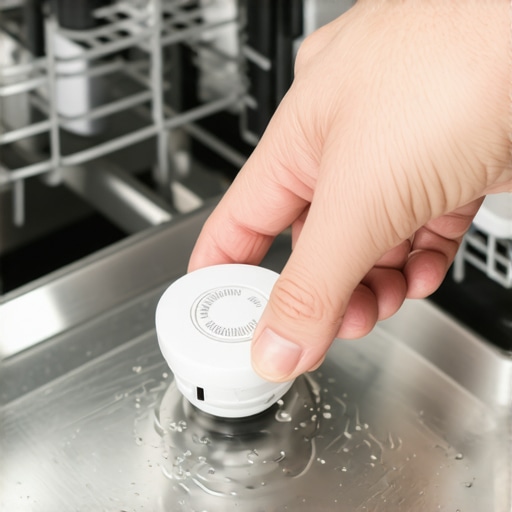
Ultimately, the ultimate guide to smart home appliances for a modern living isn’t about letting the machine do all the thinking—it’s about understanding the physics of how they work. Whether it is cleaning a filter or adjusting an offset, a little bit of manual oversight goes a long way in a digital world.
The Three Tools That Saved Me Thousands
I stopped relying on luck the day my three-year-old refrigerator decided to stop cooling while I was on vacation. When I returned to a puddle of melted organic chicken and a $400 repair estimate for a ‘faulty control board,’ I decided to finally learn the language of my machines. Now, my kitchen junk drawer doesn’t just hold batteries and twist ties; it holds a Klein Tools MM300 multimeter. Most people assume that if a smart appliance fails, it’s a total loss, but I have found that testing for continuity is the only way to beat the system. Whether you are investigating the refrigerator noise that means your fan motor is dying or checking a dishwasher’s heating element, a multimeter is your best friend. For instance, according to the technical bulletins from the Appliance Service Training Institute (ASTI), over 40% of circuit board ‘failures’ are actually just loose connections or moisture-induced corrosion that a simple spray of electronic contact cleaner could fix. I personally use a can of DeoxIT once a year on my main kitchen hub connections just to prevent the oxidative creep that kills sensitive electronics.
How do I keep these complex machines alive for the long haul?
Consistency beats intensity every single time when it comes to maintenance. I used to ignore my washer until it smelled like a damp basement, but now I have a monthly ‘maintenance Sunday.’ This includes knowing how to clean the debris filter on your front load washer effectively. If you haven’t checked that little trap door at the bottom of your machine lately, prepare yourself for a horror show of gray sludge and loose change. This buildup is the primary reason for drainage errors and pump burnout. While you are at it, don’t forget the kitchen; learning how to keep your refrigerator coils clean in a pet-friendly home is arguably the single most important task for energy efficiency. I use a specialized thin-nozzle vacuum attachment to get deep into the compressor bay. If those coils are matted with pet hair, your compressor has to work twice as hard, leading to a premature death and a massive electricity bill.
Stop Guessing and Start Measuring
Beyond the physical tools, I have started using my home’s energy monitoring app to ‘listen’ to my appliances. If I see a spike in kilowatt-hours on a Tuesday afternoon when the dishwasher is running, I know something is wrong before the machine even throws an error code. This proactive approach is exactly what I discuss in the ultimate guide to smart home appliances for a modern living. It’s about shifting from a ‘fix it when it breaks’ mentality to a ‘monitor while it works’ philosophy. I also make sure to check the rubber seals. Knowing how to clean a moldy dishwasher door gasket the right way prevents leaks that can rot your subfloor—a repair that costs way more than the appliance itself. Looking toward the future of home appliances trends to watch in 2025, I expect we will see more machines with built-in sensors that actually predict part failure before it happens, but until then, we have to be the brains of the operation. My best advice? Go check your refrigerator coils right now; if they are dusty, you are literally burning money every second the compressor runs.
Three Hard Lessons My Burnt Toast and Soggy Laundry Taught Me
Reflecting on my journey from a frustrated homeowner to a savvy DIY tech, I realized that the biggest hurdle wasn’t the technology—it was my own expectations. First, the digital screen is often an optimist, not a truth-teller. Whether it’s an oven or a fridge, readouts are just estimations based on sensors that can drift over time. Second, I learned that ‘Smart’ doesn’t mean ‘Maintenance-Free.’ These machines are more like high-performance sports cars than old-school tractors; they need precision care to stay efficient. Lastly, trust your senses over the software. If the washer smells funny or the fridge sounds like it’s clicking, don’t wait for a push notification to tell you something is wrong. Technology is there to assist your intuition, not replace it.
My Personal Troubleshooting Kit for Modern Kitchens
You don’t need a degree in electrical engineering to maintain a high-tech home, but you do need the right gear. I never go a month without my Klein Tools MM300 multimeter; it’s the only way to know if a heating element is actually dead or just playing hard to get. I also swear by DeoxIT D-Series contact cleaner for any sensor connections that seem finicky after a steam-heavy cooking session. For anyone looking to dive deeper into the technical side, I highly recommend reading bulletins from the Appliance Service Training Institute (ASTI). They provide the kind of raw data that helps you decide is a smart fridge really worth the extra money based on long-term repairability rather than just flashy features and sleek touchscreens.
#IMAGE_PLACEHOLDER_E#
Take Back the Reins of Your High-Tech Home
You’ve already taken the first step by learning how to recalibrate, clean, and monitor your devices manually. Remember, you are the brain of the operation, not the circuit board. By applying what you’ve learned here, you’re not just fixing a machine; you’re reclaiming your time and peace of mind. As we look toward the future of home appliances trends to watch in 2025, staying proactive will be your greatest asset. Don’t be afraid to poke around in those settings menus or pull out the vacuum for those dusty coils. You’ve got this, and your wallet will thank you for it. This is the heart of the ultimate guide to smart home appliances for a modern living—staying curious and staying in control of the tech you bring into your sanctuary.
Have you ever had a smart appliance completely ignore your settings? Let me know in the comments below!