
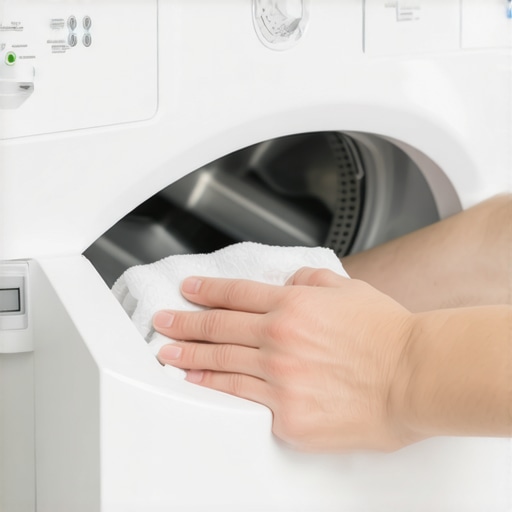
I remember the day vividly. I was pulling a “fresh” load of whites out of my front-loader, expecting that breezy linen scent, but instead, I got a whiff of something swampy. I checked the rubber seal. I checked the drum. Everything looked fine. Then, on a whim, I pulled the detergent drawer all the way out. I actually gasped. Behind that sleek plastic faceplate was a literal ecosystem of black mold and gelatinous blue sludge. It is the ultimate irony, isn’t it? The very place where the soap lives is often the filthiest part of the whole machine. I felt like a total failure as a homeowner. I had been wondering why your washing machine smells like damp towels even after a wash, and the answer was staring me in the face, dripping with mildew.
Stop Ignoring That Sludge in Your Soap Tray
We often treat our front-load washers like magical boxes that just work, but they are more like temperamental roommates. If you do not give them a little TLC, they start to protest. My big mistake early on was thinking the detergent drawer was self-cleaning. I mean, it is full of soap, right? Wrong. Every time the machine flushes water through those compartments, it leaves a tiny bit of residue behind. Over months, that residue builds up into a thick crust that traps moisture. This is especially true if you are not using the secret to using less detergent in your high-efficiency washer. Most of us use way too much, and all that extra goop just sits there, rotting. According to researchers at the University of Arizona, the damp, dark crevices of a washer’s dispenser are prime real estate for mold colonies that can survive even hot water cycles. If you have been noticing weird spots on your clothes, you might also want to look into how to prevent mold growth in your washing machines door seal, because if the drawer is bad, the seal is usually next.
Does a Dirty Drawer Actually Ruin Your Laundry?
You might be thinking, “It is just a little soap scum, does it really matter?” Yes, it absolutely does. That gunk is not just old soap; it is a breeding ground for bacteria that hitches a ride on your clothes during the rinse cycle. If you are shopping for the best front-load washers for preventing mold and mildew buildup, you will notice they often have antimicrobial surfaces, but even those can’t fight a half-inch of petrified fabric softener. Have you ever pulled your drawer out and been horrified by what you found? Tell me I am not the only one who has neglected this chore for way too long! Today, I am going to show you exactly how to strip that drawer down and get it back to factory-clean so your clothes actually come out smelling like flowers instead of a basement. It is easier than you think, but there are a few hidden release tabs you need to know about before you start yanking on the plastic.
Find the Secret Release Tab Without Breaking the Plastic
Most people try to pull the detergent drawer until the plastic groans, thinking it is just stuck. In reality, almost every front-loader has a hidden release mechanism. Look for a colored tab—usually blue or gray—right in the middle of the fabric softener compartment. When you press this down, the drawer should slide out as smoothly as a high-end kitchen drawer. If you are using washing machines that save water expert advice for 2025 indicates that these dispensers are engineered with tighter tolerances to prevent leaks, so never force it. Once that drawer is out, you will likely see a thick, marshmallow-like layer of gunk on the bottom. This is a cocktail of undissolved soap and hard water minerals that acts as a buffet for mold colonies.
Strip the Drawer Down to its Components
You cannot just rinse the drawer and call it a day. If you look closely at the softener and bleach sections, you will see small plastic inserts or siphon caps that can be popped off. These are the lungs of the dispenser; they allow the water to create a vacuum and pull the liquid out at the right time. I once ignored these for a year, and when I finally pried them off, the smell was enough to clear the room. This buildup is often the reason your washing machine is leaving white streaks on dark clothes, as the siphon fails and dumps concentrated softener onto your clothes during the wrong part of the cycle. Soak these small parts in a bowl of warm water and white vinegar for at least twenty minutes while you tackle the machine itself.
#IMAGE_PLACE_PLACEHOLDER_B#
Scrub the Ceiling of the Tray Housing
While the drawer parts are soaking, look into the hole where the drawer used to be. Most homeowners forget the ceiling of this cavity. This is where the water jets live. If these jets get covered in splashback or mold, they will misfire, causing your detergent to stay in the tray or leak down the front of the machine. I learned this the hard way when I decided to spray a heavy-duty cleaner into the housing and immediately scrubbed upward with an old toothbrush. Within seconds, a slurry of black mold and acidic cleaner dripped right into my eyes because I was leaning in too close. Now, I always wear cleaning glasses and use a damp microfiber cloth to wipe the top first. While how smart washing machines can simplify laundry day by tracking cycles, they still require this manual intervention to prevent biofilm from taking over the internal plumbing. Once the ceiling is clean, ensure you also know how to clean the debris filter on your front load washer effectively to ensure all the loosened gunk actually leaves the machine instead of getting trapped in the pump.
Dry Everything Before Reassembly
The biggest mistake is sliding a wet drawer back into a wet machine. That just recreates the humid environment mold loves. Use a dry towel to get every drop of moisture out of the cavity and the drawer itself. This simple habit is more effective than any self-clean button on your dashboard. If you want a machine that stays fresh longer, looking into the best front load washers for preventing mold and mildew buildup is a great step, but manual maintenance remains the gold standard for appliance longevity. Make sure the siphon caps click back into place firmly, or you will find your softener compartment full of water after the next load.
You have probably heard the advice a thousand times: just dump some white vinegar in there and call it a day. While I love a good natural hack, this is where many “expert” blogs steer you wrong. In my experience, relying solely on vinegar is a recipe for a service call two years down the line. Vinegar is an acid, and while it is great for descaling, it can be brutal on the rubber gaskets and internal hoses of a modern high-efficiency machine. If you are curious about the nuance, the truth about using white vinegar in your high-efficiency dishwasher or washer is that it must be used sparingly. Overdoing it leads to brittle seals and, eventually, that dreaded puddle on the floor. I have seen countless machines with rotted out pump seals because the owner thought they were being “green.”
Stop Treating Vinegar Like a Universal Savior
The contrarian truth? Sometimes, you actually need the “chemicals” manufacturers recommend. Modern smart washers use sophisticated sensors to detect soil levels, and the chemistry of specifically formulated cleaners is designed to protect the machine’s internals while stripping away biofilm. A study by the American Cleaning Institute suggests that biofilm—that slimy layer of bacteria—often requires specific surfactants to fully break down, which vinegar alone cannot always manage. If you have noticed why your energy efficient washer leaves your clothes feeling crunchy, it is often because of a mineral buildup that vinegar just isn’t touching. You need to balance “green” cleaning with actual appliance health to ensure your machine lasts more than five years.
Can Too Much Maintenance Actually Break Your Smart Washer?
Believe it or not, there is such a thing as over-cleaning. I once met a homeowner who was so obsessed with hygiene that she ran a “Sanitize” cycle every other day. She thought she was being proactive, but she was actually cooking her machine’s control board and wearing out the heating element prematurely. This is the “Oops” factor most people miss: appliances have a finite number of high-heat cycles in their lifespan. High-efficiency machines are precision instruments, not cast-iron tubs. Instead of brute-forcing the heat, you should learn the best energy saving settings for your smart washing machine that balance cleanliness with longevity. Pushing your machine to its thermal limits every day is a shortcut to the scrap yard, and it might even be the reason your washing machine is leaving white streaks on dark clothes because the excessive heat can bake detergent residue onto the fibers before they can rinse away.
The Trap of the Eco Mode Setting
We all want to save the planet, but the truth about the eco mode on your new dishwasher and washing machine is that it often uses lower water temperatures. While this saves electricity, it is the primary reason for that swampy smell we discussed earlier. Lower temps do not dissolve fats and oils as effectively, leading to a “fatberg” of sorts inside your outer drum. According to experts at the Association of Home Appliance Manufacturers (AHAM), modern HE washers rely on a delicate balance of water volume and temperature; shifting that balance too far toward “eco” can lead to performance degradation. I recommend running one “Maintenance Wash” at the highest possible temperature once a month. This is not just about smell; it is about recalibrating the internal sensors. Have you ever fallen into this trap of over-cleaning or relying too much on the ‘Eco’ button? Let me know in the comments. If you are struggling with other appliances, you might also want to check out how to save money on your electric bill by tweaking your fridge settings to optimize your whole kitchen without sacrificing performance.
After years of tinkering with every brand under the sun, I have realized that the difference between a washer that lasts five years and one that lasts fifteen isn’t the price tag—it is the toolkit. I have a dedicated ‘appliance bag’ in my garage that most people think is overkill, but it has saved me thousands. My secret weapon? A set of long-reach, stiff-bristled radiator brushes. I do not just use them for radiators; I use the 12-inch flexible versions to snake into the dark cavity behind the detergent drawer housing. You would be shocked at the amount of ‘bio-slime’ that collects where your eyes can’t see. If you are struggling with a machine that seems confused, you might need to learn how to fix a washing machine that is stuck on the sensing cycle because that slime can eventually interfere with internal pressure sensors.
How do I keep my complex appliances running smoothly for a decade?
The answer is consistent, small-scale recalibration. Just like a guitar needs tuning, your smart home needs a digital and physical reset. For my refrigerator, I do not just trust the digital display. Once a year, I use a high-accuracy probe thermometer to check the actual air temp vs. what the screen says. If they are off by more than two degrees, your compressor is working harder than it needs to. I highly recommend learning how to recalibrate your refrigerators internal thermometer for better cooling to prevent premature motor burnout. Steve Sheinkopf from Yale Appliance often points out that ice makers and cooling sensors are the most frequent points of failure in modern units, so staying ahead of these small drifts in accuracy is the only way to avoid a mid-summer breakdown.
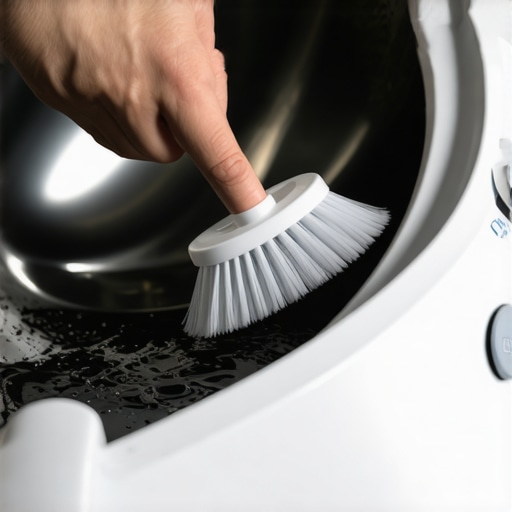
Beyond the fridge, your dishwasher is likely crying out for help. Most people think ‘cleaning’ it means running an empty cycle. I take it a step further: I remove the spray arms and use a toothpick to clear every single tiny jet hole. Even one or two blocked holes can change the water pressure balance, which is the hidden sensor that stops your dishwasher from drying properly. When the water doesn’t hit the dishes at the right angle, the evaporation phase fails. While you are at it, checking the bottom of the tub for debris is essential. If you have been ignoring the drainage, you really need to see how to clean the debris filter on your front load washer effectively because the same logic applies to your dishwasher—if the water can’t leave fast, the gunk just resettles on your ‘clean’ plates.
Why AI Diagnostics Will Change Your Weekend Routine
Looking ahead to 2025 and beyond, we are moving away from manual ‘scrubbing sessions.’ The industry is shifting toward predictive maintenance where your machine tells you exactly what part of the detergent drawer is clogged before the mold even starts to grow. We are already seeing innovative dishwashers with AI technology you must know about that can sense the turbidity of the water and adjust the cycle on the fly. Eventually, these machines won’t just tell you there is a problem; they will guide you through the fix on your smartphone screen. It is part of the smart appliances revolution how to choose the best dishwasher that prioritizes long-term health over just short-term convenience.
Fix the Humidity Before the Mold Finds You
My final ‘pro’ tip for today: buy a small wireless hygrometer and stick it in your laundry room. If the humidity in that room stays above 60% after you run a load, you are essentially inviting mold to live in your machine’s door seal. I have found that simply running a dehumidifier for an hour after the final spin cycle does more for my washer’s health than any chemical cleaner ever could. If you have already noticed black spots on the rubber, you need to know how to replace the door seal on a front load washing machine before it starts to leak. Don’t wait for the puddle—try recalibrating your fridge thermometer tonight as a first step toward total appliance mastery.
I remember the day vividly. I was pulling a “fresh” load of whites out of my front-loader, expecting that breezy linen scent, but instead, I got a whiff of something swampy. I checked the rubber seal. I checked the drum. Everything looked fine. Then, on a whim, I pulled the detergent drawer all the way out. I actually gasped. Behind that sleek plastic faceplate was a literal ecosystem of black mold and gelatinous blue sludge. It is the ultimate irony, isn’t it? The very place where the soap lives is often the filthiest part of the whole machine. I felt like a total failure as a homeowner. I had been wondering why your washing machine smells like damp towels even after a wash, and the answer was staring me in the face, dripping with mildew.
Stop Ignoring That Sludge in Your Soap Tray
We often treat our front-load washers like magical boxes that just work, but they are more like temperamental roommates. If you do not give them a little TLC, they start to protest. My big mistake early on was thinking the detergent drawer was self-cleaning. I mean, it is full of soap, right? Wrong. Every time the machine flushes water through those compartments, it leaves a tiny bit of residue behind. Over months, that residue builds up into a thick crust that traps moisture. This is especially true if you are not using the secret to using less detergent in your high-efficiency washer. Most of us use way too much, and all that extra goop just sits there, rotting. According to researchers at the University of Arizona, the damp, dark crevices of a washer’s dispenser are prime real estate for mold colonies that can survive even hot water cycles. If you have been noticing weird spots on your clothes, you might also want to look into how to prevent mold growth in your washing machines door seal, because if the drawer is bad, the seal is usually next.
Does a Dirty Drawer Actually Ruin Your Laundry?
You might be thinking, “It is just a little soap scum, does it really matter?” Yes, it absolutely does. That gunk is not just old soap; it is a breeding ground for bacteria that hitches a ride on your clothes during the rinse cycle. If you are shopping for the best front-load washers for preventing mold and mildew buildup, you will notice they often have antimicrobial surfaces, but even those can’t fight a half-inch of petrified fabric softener. Have you ever pulled your drawer out and been horrified by what you found? Tell me I am not the only one who has neglected this chore for way too long! Today, I am going to show you exactly how to strip that drawer down and get it back to factory-clean so your clothes actually come out smelling like flowers instead of a basement. It is easier than you think, but there are a few hidden release tabs you need to know about before you start yanking on the plastic.
Find the Secret Release Tab Without Breaking the Plastic
Most people try to pull the detergent drawer until the plastic groans, thinking it is just stuck. In reality, almost every front-loader has a hidden release mechanism. Look for a colored tab—usually blue or gray—right in the middle of the fabric softener compartment. When you press this down, the drawer should slide out as smoothly as a high-end kitchen drawer. If you are using washing machines that save water expert advice for 2025 indicates that these dispensers are engineered with tighter tolerances to prevent leaks, so never force it. Once that drawer is out, you will likely see a thick, marshmallow-like layer of gunk on the bottom. This is a cocktail of undissolved soap and hard water minerals that acts as a buffet for mold colonies.
Strip the Drawer Down to its Components
You cannot just rinse the drawer and call it a day. If you look closely at the softener and bleach sections, you will see small plastic inserts or siphon caps that can be popped off. These are the lungs of the dispenser; they allow the water to create a vacuum and pull the liquid out at the right time. I once ignored these for a year, and when I finally pried them off, the smell was enough to clear the room. This buildup is often the reason your washing machine is leaving white streaks on dark clothes, as the siphon fails and dumps concentrated softener onto your clothes during the wrong part of the cycle. Soak these small parts in a bowl of warm water and white vinegar for at least twenty minutes while you tackle the machine itself.
#IMAGE_PLACE_PLACEHOLDER_B#
Scrub the Ceiling of the Tray Housing
While the drawer parts are soaking, look into the hole where the drawer used to be. Most homeowners forget the ceiling of this cavity. This is where the water jets live. If these jets get covered in splashback or mold, they will misfire, causing your detergent to stay in the tray or leak down the front of the machine. I learned this the hard way when I decided to spray a heavy-duty cleaner into the housing and immediately scrubbed upward with an old toothbrush. Within seconds, a slurry of black mold and acidic cleaner dripped right into my eyes because I was leaning in too close. Now, I always wear cleaning glasses and use a damp microfiber cloth to wipe the top first. While how smart washing machines can simplify laundry day by tracking cycles, they still require this manual intervention to prevent biofilm from taking over the internal plumbing. Once the ceiling is clean, ensure you also know how to clean the debris filter on your front load washer effectively to ensure all the loosened gunk actually leaves the machine instead of getting trapped in the pump.
Dry Everything Before Reassembly
The biggest mistake is sliding a wet drawer back into a wet machine. That just recreates the humid environment mold loves. Use a dry towel to get every drop of moisture out of the cavity and the drawer itself. This simple habit is more effective than any self-clean button on your dashboard. If you want a machine that stays fresh longer, looking into the best front load washers for preventing mold and mildew buildup is a great step, but manual maintenance remains the gold standard for appliance longevity. Make sure the siphon caps click back into place firmly, or you will find your softener compartment full of water after the next load.
You have probably heard the advice a thousand times: just dump some white vinegar in there and call it a day. While I love a good natural hack, this is where many “expert” blogs steer you wrong. In my experience, relying solely on vinegar is a recipe for a service call two years down the line. Vinegar is an acid, and while it is great for descaling, it can be brutal on the rubber gaskets and internal hoses of a modern high-efficiency machine. If you are curious about the nuance, the truth about using white vinegar in your high-efficiency dishwasher or washer is that it must be used sparingly. Overdoing it leads to brittle seals and, eventually, that dreaded puddle on the floor. I have seen countless machines with rotted out pump seals because the owner thought they were being “green.”
Stop Treating Vinegar Like a Universal Savior
The contrarian truth? Sometimes, you actually need the “chemicals” manufacturers recommend. Modern smart washers use sophisticated sensors to detect soil levels, and the chemistry of specifically formulated cleaners is designed to protect the machine’s internals while stripping away biofilm. A study by the American Cleaning Institute suggests that biofilm—that slimy layer of bacteria—often requires specific surfactants to fully break down, which vinegar alone cannot always manage. If you have noticed why your energy efficient washer leaves your clothes feeling crunchy, it is often because of a mineral buildup that vinegar just isn’t touching. You need to balance “green” cleaning with actual appliance health to ensure your machine lasts more than five years.
Can Too Much Maintenance Actually Break Your Smart Washer?
Believe it or not, there is such a thing as over-cleaning. I once met a homeowner who was so obsessed with hygiene that she ran a “Sanitize” cycle every other day. She thought she was being proactive, but she was actually cooking her machine’s control board and wearing out the heating element prematurely. This is the “Oops” factor most people miss: appliances have a finite number of high-heat cycles in their lifespan. High-efficiency machines are precision instruments, not cast-iron tubs. Instead of brute-forcing the heat, you should learn the best energy saving settings for your smart washing machine that balance cleanliness with longevity. Pushing your machine to its thermal limits every day is a shortcut to the scrap yard, and it might even be the reason your washing machine is leaving white streaks on dark clothes because the excessive heat can bake detergent residue onto the fibers before they can rinse away.
The Trap of the Eco Mode Setting
We all want to save the planet, but the truth about the eco mode on your new dishwasher and washing machine is that it often uses lower water temperatures. While this saves electricity, it is the primary reason for that swampy smell we discussed earlier. Lower temps do not dissolve fats and oils as effectively, leading to a “fatberg” of sorts inside your outer drum. According to experts at the Association of Home Appliance Manufacturers (AHAM), modern HE washers rely on a delicate balance of water volume and temperature; shifting that balance too far toward “eco” can lead to performance degradation. I recommend running one “Maintenance Wash” at the highest possible temperature once a month. This is not just about smell; it is about recalibrating the internal sensors. Have you ever fallen into this trap of over-cleaning or relying too much on the ‘Eco’ button? Let me know in the comments. If you are struggling with other appliances, you might also want to check out how to save money on your electric bill by tweaking your fridge settings to optimize your whole kitchen without sacrificing performance.
After years of tinkering with every brand under the sun, I have realized that the difference between a washer that lasts five years and one that lasts fifteen isn’t the price tag—it is the toolkit. I have a dedicated ‘appliance bag’ in my garage that most people think is overkill, but it has saved me thousands. My secret weapon? A set of long-reach, stiff-bristled radiator brushes. I do not just use them for radiators; I use the 12-inch flexible versions to snake into the dark cavity behind the detergent drawer housing. You would be shocked at the amount of ‘bio-slime’ that collects where your eyes can’t see. If you are struggling with a machine that seems confused, you might need to learn how to fix a washing machine that is stuck on the sensing cycle because that slime can eventually interfere with internal pressure sensors.
How do I keep my complex appliances running smoothly for a decade?
The answer is consistent, small-scale recalibration. Just like a guitar needs tuning, your smart home needs a digital and physical reset. For my refrigerator, I do not just trust the digital display. Once a year, I use a high-accuracy probe thermometer to check the actual air temp vs. what the screen says. If they are off by more than two degrees, your compressor is working harder than it needs to. I highly recommend learning how to recalibrate your refrigerators internal thermometer for better cooling to prevent premature motor burnout. Steve Sheinkopf from Yale Appliance often points out that ice makers and cooling sensors are the most frequent points of failure in modern units, so staying ahead of these small drifts in accuracy is the only way to avoid a mid-summer breakdown.
Beyond the fridge, your dishwasher is likely crying out for help. Most people think ‘cleaning’ it means running an empty cycle. I take it a step further: I remove the spray arms and use a toothpick to clear every single tiny jet hole. Even one or two blocked holes can change the water pressure balance, which is the hidden sensor that stops your dishwasher from drying properly. When the water doesn’t hit the dishes at the right angle, the evaporation phase fails. While you are at it, checking the bottom of the tub for debris is essential. If you have been ignoring the drainage, you really need to see how to clean the debris filter on your front load washer effectively because the same logic applies to your dishwasher—if the water can’t leave fast, the gunk just resettles on your ‘clean’ plates.
Why AI Diagnostics Will Change Your Weekend Routine
Looking ahead to 2025 and beyond, we are moving away from manual ‘scrubbing sessions.’ The industry is shifting toward predictive maintenance where your machine tells you exactly what part of the detergent drawer is clogged before the mold even starts to grow. We are already seeing innovative dishwashers with AI technology you must know about that can sense the turbidity of the water and adjust the cycle on the fly. Eventually, these machines won’t just tell you there is a problem; they will guide you through the fix on your smartphone screen. It is part of the smart appliances revolution how to choose the best dishwasher that prioritizes long-term health over just short-term convenience.
Fix the Humidity Before the Mold Finds You
My final ‘pro’ tip for today: buy a small wireless hygrometer and stick it in your laundry room. If the humidity in that room stays above 60% after you run a load, you are essentially inviting mold to live in your machine’s door seal. I have found that simply running a dehumidifier for an hour after the final spin cycle does more for my washer’s health than any chemical cleaner ever could. If you have already noticed black spots on your rubber, you need to know how to replace the door seal on a front load washing machine before it starts to leak. Don’t wait for the puddle—try recalibrating your fridge thermometer tonight as a first step toward total appliance mastery.
The Brutal Lessons I Learned Keeping These Machines Alive
After years of thinking I was a domestic pro, I realized my biggest mistake was trusting the machines to handle themselves. Here is the insider wisdom I wish I had known years ago:
- The Self-Clean Cycle is Not Magic: It cleans the drum, not the dispenser. If you rely solely on the button, you are leaving the most vulnerable parts to rot.
- Less is Always More: Most detergent caps are three times larger than they need to be. Use the secret to using less detergent in your high-efficiency washer and you will cut your maintenance time in half.
- Sensors Can Drift: Over time, mineral buildup can trick your machine. This is why your cycles might start acting erratic. Consistent cleaning keeps those sensors honest.
Tools That Make Maintenance Less of a Chore
You do not need a massive toolbox to keep your kitchen and laundry room in peak condition. These are the items I personally use to keep my smart home humming. First, get a set of flexible radiator brushes. These allow you to reach the back of the washer cavity where slime hides. Second, a wireless hygrometer is essential for monitoring humidity to prevent mold. Third, I always keep a probe thermometer on hand to recalibrate your refrigerators internal thermometer for better cooling when the digital display starts to drift. Finally, follow the ultimate guide to smart home appliances for a modern living to stay updated on the latest diagnostic tools that help you avoid a repairman.
Take Charge of Your High Tech Home Today
Maintenance might feel like a chore, but it is actually the key to getting the most out of your investment. When you take ten minutes to scrub a drawer or check a seal, you are extending the life of your machine by years. As we look toward the future of home appliances trends to watch in 2025, manual care will still be the backbone of a high-performing home. Don’t let the technology intimidate you—you are the one in control. Have you ever discovered a hidden gunk zone in your washer that totally surprised you? Let me know in the comments below!