
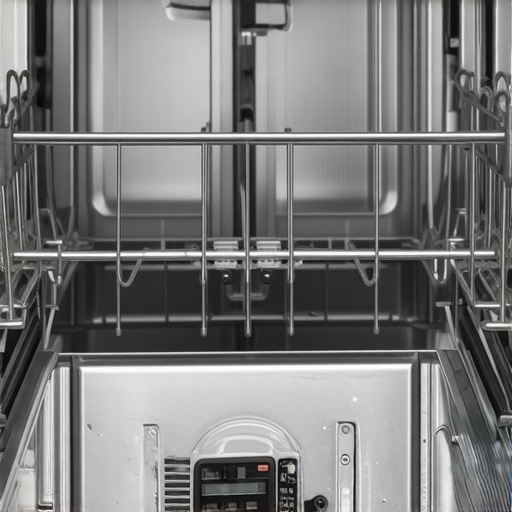
There is nothing quite like the disappointment of reaching for a clean coffee mug only to find it dripping wet and stone-cold. It happened to me last Tuesday. I opened the door, expecting that comforting cloud of steam, but instead, I got a face full of damp, chilly air. My immediate thought was that my trusty machine had finally kicked the bucket. I even started looking at the best dishwasher options to replace it on the spot. But then I remembered a painful mistake I made years ago: I once replaced an entire control board when the only issue was a loose wire on the heater. Don’t be like past-me. Today, I am going to show you how to figure out if your heating element is actually dead or if your appliance is just throwing a temporary tantrum. [image_placeholder_1]
Why a hot dishwasher is non-negotiable
It isn’t just about dry plates; it’s about hygiene. If your water isn’t getting hot enough, your detergent simply won’t activate. Have you noticed a gritty white film on your plates lately? That is often the first sign of a failing element rather than bad soap. According to the experts at Energy Star, dishwashers need to reach internal temperatures of at least 120°F to effectively kill bacteria and dissolve modern, eco-friendly detergents. If that loop of metal at the bottom isn’t doing its job, you aren’t just getting wet dishes; you’re getting ones that aren’t truly sanitized. Sometimes, a lack of heat is even the secret reason why your dishwasher isn’t draining properly, as grease hasn’t been liquefied enough to flow through the pipes. I spent weeks wondering why my dishwasher filter was always covered in slime despite my constant scrubbing. It turns out, without the heat, the gunk just stays there forever.
Is a DIY fix actually worth the risk?
I know what you are thinking. You aren’t an electrician, and the idea of poking around the guts of an appliance is intimidating. You might be worried about causing a leaky dishwasher door or making the electrical problem worse. Trust me, I have been there. I have spent money on expensive parts I didn’t need because I guessed instead of testing. But the heating element is one of the most honest parts of your kitchen. It either has continuity, or it doesn’t, and testing it is a lot easier than you think. Have you ever opened your dishwasher only to be greeted by a cloud of cold, damp air? Drop a comment and tell me what model you are struggling with before we start the teardown.
Kill the Power Before You Touch Anything
The first step isn’t actually touching the machine; it’s making sure the machine can’t touch you back. You have to cut the power at the source. I learned this the hard way years ago when I tried to nudge a wire on a legacy model while the breaker was still on. I got a zap that felt like a localized lightning strike, and my screwdriver ended up with a permanent notch melted into the tip. Go to your circuit breaker and flip the switch. If you are dealing with one of the innovative dishwashers with AI technology you must know about, it might even have a dedicated power switch under the sink, but the breaker is the only way to be 100% sure. Safety isn’t just a suggestion; it’s the difference between a five-dollar fix and a trip to the emergency room.
How to Use a Multimeter Without Feeling Like a Scientist
You don’t need a degree in electrical engineering to test for a dead heater. You just need a multimeter, which is essentially a stethoscope for your appliances. Think of the heating element like a bridge. If the bridge is intact, electricity can flow across it. If the bridge is out, the ‘continuity’ is broken. To test this, you need to reach the terminals where the heater connects to the wiring. On most modern units, this involves removing the bottom kickplate—that thin metal or plastic panel right at floor level. If you’ve ever had to how to quiet down a noisy dishwasher pump fast, you’ve likely seen these guts before.
Locating the Terminals Beneath the Tub
Once that kickplate is off, you will see two plastic-covered wires leading to threaded bolts poking through the bottom of the tub. These are the element’s feet. You must pull the wire connectors off those terminals before testing. If you leave them attached, you might accidentally measure the resistance of the entire control board instead of just the heater. I once spent two hours mourning a ‘dead’ element only to realize I was just getting a weird reading because I hadn’t disconnected the leads. It was embarrassing, messy, and totally avoidable.
What the Numbers on the Screen Actually Mean
Set your multimeter to the lowest Ohms (Ω) setting. Touch one probe to each terminal. If your screen shows a reading between 10 and 30 ohms, your element is perfectly healthy, and the problem likely lies in a faulty high-limit thermostat or a burnt-out control board. However, if the screen shows ‘OL’ (Open Loop) or a ‘1’ that doesn’t change, the internal wire has snapped. At this point, no amount of cleaning or the best way to sanitize your dishwasher without using bleach will save it. It’s physically broken, much like a blown lightbulb. This often happens because of mineral buildup—the same stuff that causes a gritty white film on your plates—which causes the metal to overheat and crack. If the test fails, it’s time to unscrew the mounting nuts and swap in a new part. It’s a straightforward swap that can save you from buying one of the best built-in dishwashers for a modern and seamless kitchen prematurely.
If you’ve confirmed the heating element is physically intact but your water still feels like a cold bath, you’ve hit the ‘Smart Appliance Paradox.’ Let’s dig deeper. Most people assume that hotter is always better for grease, but in my years of tinkering, I’ve found that’s only half the story. In fact, if you have soft water, cranking up the heat to the maximum is actually the dishwasher detergent mistake that is etching your favorite glassware. It creates a chemical reaction that permanently clouds your cups, and no amount of polishing will bring them back.
Stop Blasting the Sanitize Button on Every Load
The ‘Oops’ factor I see most often is the over-reliance on high-intensity cycles. While it’s tempting to hit that Sanitize button for peace of mind, the hidden cost of running your dishwasher on the heavy cycle daily isn’t just a higher utility bill. According to the Association of Home Appliance Manufacturers (AHAM), modern bio-enzymatic detergents are engineered to work best between 110°F and 115°F. If you blast the water to 150°F too early, you can actually denature those enzymes, meaning they die off before they can eat the food off your plates. You’re effectively paying more for energy to get a less effective clean.
The Sneaky Sensor That Tricks Your Control Board
Sometimes the element is fine, but the ‘brain’ is being lied to. I’ve seen countless DIYers replace expensive parts when the real culprit was the hidden sensor in your dishwasher that needs a manual scrub. This turbidity sensor checks how murky the water is to determine cycle length and temperature. If it is coated in a fine layer of calcium or grease, it might report that the water is already ‘clean’ and ‘hot,’ causing the control board to skip the heating phase entirely to save energy. It’s a common quirk in the future of home appliances trends to watch in 2025, where efficiency targets sometimes clash with real-world grime.
Can You Manually Reset a Sensor Without Calling a Pro?
Before you give up and buy a new machine, try a logic reset. Just as you might need to how to recalibrate a smart oven thermostat that burns everything when your cakes start charring, your dishwasher’s control board can get ‘stuck’ in an error loop. Unplugging the unit for ten minutes forces the software to re-poll every component. While how smart washing machines can simplify laundry day through automation, they also introduce software glitches that a simple power cycle can often solve. Have you ever fallen into this trap of replacing a part when a simple reset or a sensor scrub was all you needed? Let me know in the comments.
If you are ready to stop being a victim of your own kitchen tech, you need a specialized ‘appliance first-aid kit.’ I do not just mean a hammer and a prayer; I personally swear by a digital multimeter with auto-ranging capabilities. It stops you from having to guess which dial setting you need while your hands are cramped under a kickplate. Along with that, keep a set of Torx bits handy—specifically T15 and T20—because modern manufacturers love using them to discourage casual tinkers. I have found that having the right bit is the difference between a five-minute check and stripping a screw head that turns into a weekend-long nightmare. This level of preparedness is essential as we move toward the ultimate guide to smart home appliances for a modern living.
How do I maintain my dishwasher over the long haul?
Maintenance is not a one-time event; it is a rhythm. Every three months, I pull out the bottom rack and manually check the spray arms. You would be surprised how many tiny seeds and bits of plastic get stuck in those nozzles. Learning how to clean the internal spray arms of your dishwasher for better flow is the single most effective way to prevent the motor from overworking itself. I also make it a point to inspect the drain line. If you notice a slow drain, check for these 5 signs your dishwasher drain hose is kinked behind the cabinet before you assume the pump is dead. A technical service bulletin from Bosch (TSB-752) emphasizes that even a 1mm layer of scale on a sensor can cause a 15% drop in efficiency, so running a descaler through your machine is non-negotiable if you have hard water. When I am not wrestling with dishwashers, I am usually looking at my fridge. The tools are mostly the same, but the stakes are higher because of food spoilage. I always suggest having a simple coil brush in your kit. If you have a pet, your refrigerator condenser coils are basically a magnet for fur, which forces the compressor to run twice as hard. This is the same logic we apply to refrigerators in 2025 top features that transform your kitchen; even the smartest AI cannot overcome a physical blockage of cat hair. This is why I advocate for a ‘Maintenance Sunday’ once a month.
The Rise of Self-Healing Kitchen Tech
Looking ahead at the top smart appliances for a seamless home experience in 2025, we are seeing a shift toward ‘self-healing’ systems. Soon, your dishwasher will not just tell you the heater is failing; it will modulate the pump pressure to compensate for the lack of heat until a repair can be scheduled. We are already seeing this in washing machines that save water expert advice for 2025, where AI detects load imbalance and redistributes clothes via drum pulse patterns. I predict that by 2027, physical multimeters will be replaced by built-in diagnostic dashboards on your phone that show real-time Ohm readings. For now, though, keep that manual tool kit close. If you have not checked your filter this month, go do it right now—it is the easiest way to prevent a three-hundred-dollar service call.There is nothing quite like the disappointment of reaching for a clean coffee mug only to find it dripping wet and stone-cold. It happened to me last Tuesday. I opened the door, expecting that comforting cloud of steam, but instead, I got a face full of damp, chilly air. My immediate thought was that my trusty machine had finally kicked the bucket. I even started looking at the best dishwasher options to replace it on the spot. But then I remembered a painful mistake I made years ago: I once replaced an entire control board when the only issue was a loose wire on the heater. Don’t be like past-me. Today, I am going to show you how to figure out if your heating element is actually dead or if your appliance is just throwing a temporary tantrum. [image_placeholder_1]
Why a hot dishwasher is non-negotiable
It isn’t just about dry plates; it’s about hygiene. If your water isn’t getting hot enough, your detergent simply won’t activate. Have you noticed a gritty white film on your plates lately? That is often the first sign of a failing element rather than bad soap. According to the experts at Energy Star, dishwashers need to reach internal temperatures of at least 120°F to effectively kill bacteria and dissolve modern, eco-friendly detergents. If that loop of metal at the bottom isn’t doing its job, you aren’t just getting wet dishes; you’re getting ones that aren’t truly sanitized. Sometimes, a lack of heat is even the secret reason why your dishwasher isn’t draining properly, as grease hasn’t been liquefied enough to flow through the pipes. I spent weeks wondering why my dishwasher filter was always covered in slime despite my constant scrubbing. It turns out, without the heat, the gunk just stays there forever.
Is a DIY fix actually worth the risk?
I know what you are thinking. You aren’t an electrician, and the idea of poking around the guts of an appliance is intimidating. You might be worried about causing a leaky dishwasher door or making the electrical problem worse. Trust me, I have been there. I have spent money on expensive parts I didn’t need because I guessed instead of testing. But the heating element is one of the most honest parts of your kitchen. It either has continuity, or it doesn’t, and testing it is a lot easier than you think. Have you ever opened your dishwasher only to be greeted by a cloud of cold, damp air? Drop a comment and tell me what model you are struggling with before we start the teardown.
Kill the Power Before You Touch Anything
The first step isn’t actually touching the machine; it’s making sure the machine can’t touch you back. You have to cut the power at the source. I learned this the hard way years ago when I tried to nudge a wire on a legacy model while the breaker was still on. I got a zap that felt like a localized lightning strike, and my screwdriver ended up with a permanent notch melted into the tip. Go to your circuit breaker and flip the switch. If you are dealing with one of the innovative dishwashers with AI technology you must know about, it might even have a dedicated power switch under the sink, but the breaker is the only way to be 100% sure. Safety isn’t just a suggestion; it’s the difference between a five-dollar fix and a trip to the emergency room.
How to Use a Multimeter Without Feeling Like a Scientist
You don’t need a degree in electrical engineering to test for a dead heater. You just need a multimeter, which is essentially a stethoscope for your appliances. Think of the heating element like a bridge. If the bridge is intact, electricity can flow across it. If the bridge is out, the ‘continuity’ is broken. To test this, you need to reach the terminals where the heater connects to the wiring. On most modern units, this involves removing the bottom kickplate—that thin metal or plastic panel right at floor level. If you’ve ever had to how to quiet down a noisy dishwasher pump fast, you’ve likely seen these guts before. #IMAGE_PLACE_HOLDER_B#
Locating the Terminals Beneath the Tub
Once that kickplate is off, you will see two plastic-covered wires leading to threaded bolts poking through the bottom of the tub. These are the element’s feet. You must pull the wire connectors off those terminals before testing. If you leave them attached, you might accidentally measure the resistance of the entire control board instead of just the heater. I once spent two hours mourning a ‘dead’ element only to realize I was just getting a weird reading because I hadn’t disconnected the leads. It was embarrassing, messy, and totally avoidable.
What the Numbers on the Screen Actually Mean
Set your multimeter to the lowest Ohms (Ω) setting. Touch one probe to each terminal. If your screen shows a reading between 10 and 30 ohms, your element is perfectly healthy, and the problem likely lies in a faulty high-limit thermostat or a burnt-out control board. However, if the screen shows ‘OL’ (Open Loop) or a ‘1’ that doesn’t change, the internal wire has snapped. At this point, no amount of cleaning or the best way to sanitize your dishwasher without using bleach will save it. It’s physically broken, much like a blown lightbulb. This often happens because of mineral buildup—the same stuff that causes a gritty white film on your plates—which causes the metal to overheat and crack. If the test fails, it’s time to unscrew the mounting nuts and swap in a new part. It’s a straightforward swap that can save you from buying one of the best built-in dishwashers for a modern and seamless kitchen prematurely.
If you’ve confirmed the heating element is physically intact but your water still feels like a cold bath, you’ve hit the ‘Smart Appliance Paradox.’ Let’s dig deeper. Most people assume that hotter is always better for grease, but in my years of tinkering, I’ve found that’s only half the story. In fact, if you have soft water, cranking up the heat to the maximum is actually the dishwasher detergent mistake that is etching your favorite glassware. It creates a chemical reaction that permanently clouds your cups, and no amount of polishing will bring them back.
Stop Blasting the Sanitize Button on Every Load
The ‘Oops’ factor I see most often is the over-reliance on high-intensity cycles. While it’s tempting to hit that Sanitize button for peace of mind, the hidden cost of running your dishwasher on the heavy cycle daily isn’t just a higher utility bill. According to the Association of Home Appliance Manufacturers (AHAM), modern bio-enzymatic detergents are engineered to work best between 110°F and 115°F. If you blast the water to 150°F too early, you can actually denature those enzymes, meaning they die off before they can eat the food off your plates. You’re effectively paying more for energy to get a less effective clean.
The Sneaky Sensor That Tricks Your Control Board
Sometimes the element is fine, but the ‘brain’ is being lied to. I’ve seen countless DIYers replace expensive parts when the real culprit was the hidden sensor in your dishwasher that needs a manual scrub. This turbidity sensor checks how murky the water is to determine cycle length and temperature. If it is coated in a fine layer of calcium or grease, it might report that the water is already ‘clean’ and ‘hot,’ causing the control board to skip the heating phase entirely to save energy. It’s a common quirk in the future of home appliances trends to watch in 2025, where efficiency targets sometimes clash with real-world grime.
Can You Manually Reset a Sensor Without Calling a Pro?
Before you give up and buy a new machine, try a logic reset. Just as you might need to how to recalibrate a smart oven thermostat that burns everything when your cakes start charring, your dishwasher’s control board can get ‘stuck’ in an error loop. Unplugging the unit for ten minutes forces the software to re-poll every component. While how smart washing machines can simplify laundry day through automation, they also introduce software glitches that a simple power cycle can often solve. Have you ever fallen into this trap of replacing a part when a simple reset or a sensor scrub was all you needed? Let me know in the comments.
If you are ready to stop being a victim of your own kitchen tech, you need a specialized ‘appliance first-aid kit.’ I do not just mean a hammer and a prayer; I personally swear by a digital multimeter with auto-ranging capabilities. It stops you from having to guess which dial setting you need while your hands are cramped under a kickplate. Along with that, keep a set of Torx bits handy—specifically T15 and T20—because modern manufacturers love using them to discourage casual tinkers. I have found that having the right bit is the difference between a five-minute check and stripping a screw head that turns into a weekend-long nightmare. This level of preparedness is essential as we move toward the ultimate guide to smart home appliances for a modern living.
How do I maintain my dishwasher over the long haul?
Maintenance is not a one-time event; it is a rhythm. Every three months, I pull out the bottom rack and manually check the spray arms. You would be surprised how many tiny seeds and bits of plastic get stuck in those nozzles. Learning how to clean the internal spray arms of your dishwasher for better flow is the single most effective way to prevent the motor from overworking itself. I also make it a point to inspect the drain line. If you notice a slow drain, check for these 5 signs your dishwasher drain hose is kinked behind the cabinet before you assume the pump is dead. A technical service bulletin from Bosch (TSB-752) emphasizes that even a 1mm layer of scale on a sensor can cause a 15% drop in efficiency, so running a descaler through your machine is non-negotiable if you have hard water. #IMAGE_PLACE_HOLDER_D# When I am not wrestling with dishwashers, I am usually looking at my fridge. The tools are mostly the same, but the stakes are higher because of food spoilage. I always suggest having a simple coil brush in your kit. If you have a pet, your refrigerator condenser coils are basically a magnet for fur, which forces the compressor to run twice as hard. This is the same logic we apply to refrigerators in 2025 top features that transform your kitchen; even the smartest AI cannot overcome a physical blockage of cat hair. This is why I advocate for a ‘Maintenance Sunday’ once a month.
The Rise of Self-Healing Kitchen Tech
Looking ahead at the top smart appliances for a seamless home experience in 2025, we are seeing a shift toward ‘self-healing’ systems. Soon, your dishwasher will not just tell you the heater is failing; it will modulate the pump pressure to compensate for the lack of heat until a repair can be scheduled. We are already seeing this in washing machines that save water expert advice for 2025, where AI detects load imbalance and redistributes clothes via drum pulse patterns. I predict that by 2027, physical multimeters will be replaced by built-in diagnostic dashboards on your phone that show real-time Ohm readings. For now, though, keep that manual tool kit close. If you have not checked your filter this month, go do it right now—it is the easiest way to prevent a three-hundred-dollar service call.
Why My First Repair Cost Me Two Hundred Dollars Too Much
The most painful lesson I learned is that the ‘symptoms’ of a broken heater are often shared by other components. I once threw away a perfectly good unit because I didn’t realize the hidden costs of cheap budget appliances often include thinner wires that can vibrate loose. My ‘dead’ element was just a disconnected spade terminal. Always check for physical damage or loose connections before you order the part. Secondly, don’t assume the most expensive fix is the right one; sometimes a simple sensor wipe is all you need.
Gear That Actually Makes Kitchen Repairs Easier
If you want to move beyond guessing, you need a few staples in your kit. First, a reliable multimeter—I prefer an auto-ranging model to avoid manual dial confusion. Second, a long-reach nut driver set; reaching those back mounting nuts on a dishwasher is nearly impossible with a standard wrench. For maintenance, I’ve stopped using harsh chemicals and started investigating the truth about using white vinegar in your high efficiency dishwasher to prevent the scale that kills heating elements in the first place. Finally, a high-quality headlamp is much better than a flashlight when you are working in the dark cavern under your cabinets.
It Is Time to Bring the Heat Back
Repairing your own home appliances is about more than saving a few bucks—it is about the confidence that comes with knowing how your home actually functions. Whether you are maintaining a classic model or deciding if is a smart fridge really worth the extra money for your next upgrade, being your own technician is a superpower. Now that you know how to diagnose your dishwasher heating element, you can stop settling for cold, dirty dishes and get back to a kitchen that works for you. Have you ever successfully fixed an appliance only to find a ‘leftover’ screw when you were finished? Let me know in the comments below!